Avoid These 10 Common Photoshop Mistakes lays out crucial tips for achieving professional-looking images. Mastering these fundamental techniques will significantly improve your image quality and workflow, transforming your photos from ordinary to extraordinary.
This guide will walk you through ten common pitfalls in Photoshop, from exposure and color correction to layer management and image quality. Understanding these errors and their impact will empower you to produce stunning visuals with precision and confidence.
Introduction to Photoshop Mistakes

Mastering Photoshop is a rewarding journey, but even seasoned users can fall prey to common pitfalls. These errors can lead to frustrating rework, wasted time, and ultimately, subpar image quality. Understanding these mistakes is crucial for anyone looking to improve their Photoshop workflow and produce professional-quality results efficiently.Knowing the potential negative consequences of these mistakes empowers users to proactively avoid them.
By understanding the “why” behind each error, users can develop better strategies for creating high-quality images with minimal fuss. Ultimately, this knowledge translates into significant improvements in both image quality and the overall efficiency of the image editing process.
Common Photoshop Errors and Their Impact
Many common Photoshop errors stem from a lack of understanding of basic principles or neglecting crucial steps in the editing process. These errors can range from simple oversights to more complex issues, affecting the overall quality and aesthetic appeal of the final image. Misunderstanding these issues can lead to considerable problems in the long run, so proactively addressing them is key to effective image editing.
Selection and Masking Mistakes
Inaccurate selections can ruin an image, leading to undesirable results. Improperly used masking tools can create unwanted artifacts and distort the intended edits. A precise selection is essential for accurate editing, while careless masking can produce uneven or distorted results. For example, an incorrectly masked subject could appear to have an unnatural or distorted edge.
Layer Management and Organization
Mishandling layers can quickly lead to a complex and confusing workflow, making subsequent edits difficult and time-consuming. Poor layer organization can cause issues with merging, blending, and even simple adjustments. This can result in a significant loss of productivity and a final image that doesn’t reflect the original intent. Consider a situation where a critical adjustment layer is accidentally deleted or obscured within a complex layered document; recovering from such a situation can take significant time and effort.
File Handling and Exporting Issues
Saving files with the wrong format or using inappropriate settings during export can result in images that are either too large or too small, or have poor quality. Improper export settings can also lead to a loss of resolution, which is crucial for high-quality print or web use. A poor export choice could lead to the image not displaying properly online or printing poorly.
It’s essential to choose the appropriate format and settings to ensure the best possible image quality and compatibility with various platforms.
Incorrect Color Adjustments
Unintentional color shifts or distortions can occur when adjusting color balance, levels, or curves. These adjustments, if not carefully managed, can result in images that appear unnatural or aesthetically unappealing. An incorrect color adjustment can create an image that appears overly saturated, desaturated, or has an inaccurate color temperature.
Misuse of Filters and Effects
Filters and effects, while powerful tools, can quickly overwhelm an image if not used judiciously. Overuse of filters can lead to a loss of image detail, clarity, and overall quality. An example would be an image that’s been subjected to excessive blurring or sharpening filters, leading to an undesirable “noisy” or “pixelated” appearance. A well-considered approach is needed to ensure these tools enhance, rather than detract from, the image.
Understanding and Applying Perspective and Composition
Poorly considered perspective or composition can make an image appear distorted or unbalanced. This can detract from the image’s overall appeal. For example, an image with a severely distorted perspective might appear unnatural or jarring. Understanding basic principles of perspective and composition can dramatically improve the visual impact of an image.
Image Resolution and Scaling Issues
Unintentional resizing or scaling can result in a loss of resolution and image quality, especially when working with smaller images. Working with low-resolution images can introduce pixelation and artifacts that can be very difficult to remove. This can significantly reduce the overall quality of the image, making it unsuitable for print or other high-resolution applications.
Incorrect Use of Blending Modes
Misunderstanding or misapplying blending modes can create unexpected or undesirable effects on an image. Improper use of blending modes can lead to merging layers in ways that detract from the desired effect. For instance, applying the wrong blending mode could lead to an image that appears incorrectly blended, opaque, or transparent in undesirable ways.
Problems with Adjustments and Enhancements
Unintentional or excessive adjustments can create an image that is over-processed or lacking in natural detail. Over-adjustment to specific areas can introduce unnatural artifacts, making the image look unnatural or artificial. For example, an overly saturated image or one with an extreme contrast adjustment will have lost the subtle details of the original image.
Overexposure and Underexposure
Overexposure and underexposure are common pitfalls in digital photography, often leading to images that lack detail or vibrancy. Understanding these issues and how to correct them is crucial for producing high-quality photographs. These errors can significantly impact the visual appeal and overall quality of an image.Overexposure occurs when too much light hits the sensor, resulting in a washed-out image with blown-out highlights.
Conversely, underexposure happens when insufficient light reaches the sensor, producing a dark, murky image with lost detail in shadows. Both conditions can severely compromise the image’s artistic merit and informational value.
Effects of Overexposure and Underexposure
Overexposure results in a loss of detail in highlights, as the brightest parts of the image become pure white, devoid of any tonal gradation. Underexposure, conversely, causes a loss of detail in the shadows, leading to a dark, flat image. In both cases, the dynamic range of the image is reduced, which is the range of tones from darkest shadow to brightest highlight.
Avoiding common Photoshop blunders is key, but exploring creative photo manipulation techniques, like those found in Photoshop Photo Manipulation Ideas to Try Today , can significantly elevate your skills. Understanding these foundational errors is crucial before diving into more advanced projects. Ultimately, mastering the fundamentals of Photoshop is the best approach for avoiding pitfalls and achieving polished results.
Identifying Overexposure and Underexposure
A crucial step in correcting these errors is accurate identification. Inspecting the histogram is a reliable method. A histogram displays the distribution of tones in an image. A histogram with a significant concentration of pixels at the right-hand side suggests overexposure, while a histogram concentrated on the left indicates underexposure. Examining the image itself also provides clues.
Overexposed areas appear excessively bright, lacking texture and detail. Underexposed areas, on the other hand, appear dark and murky.
Correcting Overexposure and Underexposure
Several techniques exist for correcting overexposure and underexposure in Photoshop. For overexposure, techniques like reducing brightness or using the Levels adjustment can help recover some lost detail. For underexposure, increasing brightness or using the Curves adjustment can bring back detail in shadowed areas. However, recovery is not always possible. Excessive overexposure or underexposure can result in irreversible loss of detail.
Understanding the limitations of these corrections is crucial.
Relationship Between Exposure and Contrast
Exposure and contrast are interconnected. Correct exposure ensures a balanced distribution of tones, allowing for a greater range of contrast. Overexposure and underexposure can flatten the contrast, making the image appear dull. Conversely, appropriate exposure allows for a greater contrast range, making the image more visually appealing.
Impact on Different Image Types
The impact of overexposure and underexposure varies depending on the type of image. In portraits, overexposure can wash out the subject’s skin tones, while underexposure can make the subject appear dark and unflattering. In landscapes, overexposure can make the sky appear featureless, while underexposure can cause shadows to appear too dark, potentially obscuring details in the scene. Understanding these nuances is crucial for effective image editing.
Incorrect Color Correction
Color correction is a crucial aspect of image editing, significantly impacting the overall aesthetic and emotional impact of a photograph. Incorrect color correction can result in images that appear unnatural, jarring, or simply unappealing. Understanding common errors and their effects is essential for achieving desired results.
Common Color Correction Errors
Several errors frequently occur during color correction. These range from subtle inaccuracies to dramatic misinterpretations of color balance. A lack of understanding of the image’s inherent color palette and the intended mood can lead to unintended consequences.
Impact on Aesthetic
Incorrect color correction can significantly alter the aesthetic appeal of an image. For instance, overly saturated colors can make an image look garish and detract from the subject’s natural beauty. Conversely, desaturated colors can make the image appear dull and lifeless, losing vibrancy and impact.
Impact on Mood and Atmosphere
Color correction directly influences the mood and atmosphere of an image. Warm tones often evoke feelings of comfort, nostalgia, or warmth, while cool tones can create a sense of calmness, serenity, or even melancholy. Applying incorrect color adjustments can completely alter the intended mood, leading to an image that feels out of place or inconsistent with its subject matter.
Examples of Mistakes in Different Image Types
Color correction errors manifest differently across various image types. For example, in a portrait photograph, an inaccurate white balance can cause the subject’s skin tones to appear overly orange or blue, creating an unflattering effect. In a landscape photograph, a mismatched color temperature between the sky and foreground can make the image feel disjointed and unrealistic. In a product photograph, an incorrect color correction can distort the product’s actual color, potentially leading to inaccurate representation and customer dissatisfaction.
Specific Examples of Color Correction Mistakes, Avoid These 10 Common Photoshop Mistakes
- Incorrect White Balance: A common error is failing to adjust the white balance to match the light source. This can result in images with inaccurate color temperatures, causing skin tones to appear unnatural or objects to appear overly warm or cool. For example, a portrait taken indoors under fluorescent lights could have an unnatural green tint, whereas a landscape shot in the shade might appear overly blue.
- Over-Saturation: Excessively saturating colors can create a garish or artificial look. This can make an image appear overly vibrant and detract from the subject matter. For instance, a photograph of a flower might look exaggerated and unnatural if the colors are oversaturated.
- Incorrect Contrast Adjustments: Incorrect adjustments to contrast levels can lead to an image that appears too dark or too bright. This can make subtle details in the image disappear or overly emphasize highlights, resulting in a loss of visual appeal.
Poor Cropping Techniques
Poor cropping can significantly detract from an image’s impact, diminishing its visual appeal and potentially misrepresenting the subject. Effective cropping is crucial for maintaining a balanced composition and conveying the intended message. Understanding common pitfalls and best practices can elevate the quality of your images.
Common Cropping Errors
Incorrect cropping techniques can lead to a loss of visual interest and impact. Common mistakes include cropping too tightly around the subject, leading to a feeling of claustrophobia, or cropping too loosely, resulting in a lack of focus. Failing to consider the overall composition and the relationship between the subject and its surroundings can negatively affect the image’s impact.
Impact of Improper Cropping
Improper cropping can significantly alter the visual narrative of an image. For example, cropping out essential elements of a scene can change the overall meaning or context. An image of a person in a landscape, cropped too tightly around the individual, may diminish the sense of scale and place. Conversely, cropping too loosely around the subject can diminish the impact and importance of the individual.
The composition and visual weight of the elements within the frame are vital in conveying a desired message.
Maintaining Subject Focus and Composition
Effective cropping hinges on maintaining the subject’s focus within the frame. This involves careful consideration of the subject’s position, size, and relationship to other elements within the scene. Cropping techniques should enhance the visual narrative and create a sense of balance and harmony. For instance, a portrait should focus on the subject’s expression and pose, while a landscape image should emphasize the scene’s grandeur and scale.
Effective Cropping Techniques for Different Image Types
The best cropping technique varies depending on the image type. A portrait, for instance, necessitates a tighter crop to emphasize the subject’s facial features and expression. The goal is to highlight the key elements of the image. Conversely, a landscape image benefits from a broader crop to showcase the vastness of the scene. The choice of crop dictates the emotional response of the viewer.
Similarly, a product shot demands a crop that clearly displays the product’s features and details.
Examples of Poor Cropping
A portrait cropped too tightly around the subject might obscure the subject’s expression and body language. A landscape image cropped too closely to the foreground might remove critical context and visual interest. A product shot cropped with a distracting background might draw attention away from the product itself. These examples illustrate how the cropping choice can dramatically alter the viewer’s perception.
Techniques for Effective Cropping
Several techniques can help create impactful and well-composed images. Consider the rule of thirds, where the subject is placed along imaginary lines dividing the frame into nine equal sections. This technique can create a visually balanced and engaging image. Symmetry and leading lines can also be employed to draw the viewer’s eye to the subject. Finally, negative space, the area around the subject, plays a significant role in emphasizing the subject’s presence.
Unnecessary Filters and Effects

Overusing filters and effects in Photoshop can diminish the impact of a photograph. Applying excessive layers of effects can create a jarring, unnatural look, detracting from the subject’s natural appeal. This often results in an image that appears overly processed and lacks authenticity.Applying too many filters and effects can also lead to a loss of detail in the image.
This can be especially problematic when working with images that already have limited detail or resolution. The result is a visually unappealing image, which fails to capture the essence of the original.
Identifying Unnecessary Filters
A critical step in avoiding unnecessary filters is understanding how they impact the overall image. Look for instances where the filter overwhelms the image’s core elements. Excessive use of filters often creates a distracting visual effect, rather than enhancing the subject. A good rule of thumb is to ask yourself whether the filter genuinely adds value or if it simply makes the image look artificial.
Removing Unnecessary Filters
Removing unnecessary filters is a straightforward process. Begin by carefully analyzing each filter layer. Identify any filters that appear to distort the image or detract from its natural appeal. Start by removing the most prominent filters first, gradually adjusting the image until the desired look is achieved without relying on excessive filter application.
Common Misused Filters and Effects
Overuse of certain filters is a common pitfall for many Photoshop users. Here are some examples of filters often applied excessively:
- Noise Reduction: While noise reduction is beneficial for removing imperfections, excessive use can lead to a flattened, unnatural look, making the image appear dull and lifeless. Images should only be filtered to remove noticeable noise.
- Sharpening: Sharpening is essential for enhancing details, but oversharpening creates an unnatural “digital” appearance, emphasizing artifacts and imperfections. The ideal level of sharpening is one that highlights details without creating unwanted artifacts.
- Color Adjustments: While color correction is crucial, applying a plethora of color adjustments can result in an image with unnatural tones, lacking a natural balance. Color adjustments should be subtle and well-considered to maintain the natural tones of the image.
- Artistic Effects: Filters like “Oil Paint,” “Pencil Sketch,” and “Watercolor” can dramatically alter the image’s appearance. These should be used sparingly, as excessive use can diminish the image’s original intent and artistic value.
Role of Filters in Image Manipulation
Filters play a vital role in image manipulation, enabling adjustments to enhance the overall image. Filters can be used to correct imperfections, enhance visual elements, or add unique artistic effects. However, it is essential to employ filters judiciously, ensuring they augment the image rather than overpowering it. Filters should never be used to cover up image deficiencies or conceal a lack of composition or lighting.
Layer Management Issues: Avoid These 10 Common Photoshop Mistakes
Effective layer management is crucial for smooth and efficient image editing in Photoshop. Poorly organized layers can lead to a tangled mess, making it difficult to modify or refine specific elements. This section will detail common layer management problems, their impact, and strategies to effectively organize and manage layers.Layer organization in Photoshop directly impacts the workflow and final image quality.
A well-structured layer stack allows for non-destructive editing, easy adjustments, and efficient revisiting of edits. Conversely, a poorly managed layer system can lead to frustration, lost edits, and ultimately, a compromised final product.
Common Layer Management Problems
Improper layer organization is a frequent source of trouble for image editors. This includes neglecting to name layers, not utilizing layer groups, and failing to create smart objects. These practices can quickly create an unmanageable layer stack.
Impact on Image Editing
Unorganized layers impede the editing process. Identifying and adjusting specific elements becomes time-consuming and error-prone. The risk of accidentally altering unintended layers during adjustments increases dramatically. Additionally, the overall editing experience becomes frustrating and inefficient.
Strategies for Organizing and Managing Layers Effectively
Effective layer management is crucial to maintain a productive workflow. This includes consistent naming conventions for layers and layer groups, utilization of layer groups for logical grouping of related elements, and converting elements to smart objects to preserve non-destructive editing.
- Consistent Naming Conventions: Using descriptive and consistent names for layers and groups aids in quick identification. This practice is particularly helpful in complex projects where multiple individuals might contribute to the edits. For instance, naming a layer “sky_blue_gradient” instead of simply “layer1” provides immediate clarity.
- Layer Groups: Layer groups organize related elements logically, simplifying navigation and providing structure. For example, grouping all the elements related to the foreground of an image into a “Foreground” layer group will greatly improve your workflow.
- Smart Objects: Smart objects maintain the original file’s resolution and enable non-destructive editing. This approach prevents issues like pixelation or loss of quality during adjustments.
Practical Examples of Avoiding Issues
Implementing these strategies prevents common issues. A clear naming convention for layers and groups, such as “Background_Clouds,” “Foreground_Objects,” and “Text_Layer,” streamlines navigation and allows easy identification of specific elements. Utilizing layer groups, like “Lighting_Effects” or “Special_Effects,” improves organizational structure. Using smart objects to edit textures, shapes, or patterns prevents image quality loss from repeated adjustments. This allows for revisions without degrading the resolution.
Incorrect Use of Adjustments Layers
Adjustment layers in Photoshop are powerful tools for non-destructive image editing. They allow you to modify aspects of your image without permanently altering the original pixels. However, misuse of these layers can lead to unexpected results and hinder your creative process. Understanding the common pitfalls and how to avoid them is crucial for effective image manipulation.Incorrect use of adjustment layers often results in unwanted artifacts, inconsistencies, or a loss of image detail.
For instance, applying multiple adjustment layers with overlapping effects can create a muddled or over-processed look. Similarly, incorrect placement or inappropriate settings within a layer can affect the intended outcome. Mastering the correct application of adjustment layers leads to a clean and controlled workflow.
Common Mistakes with Adjustment Layers
Incorrect adjustment layer placement can lead to inconsistencies across the image. For instance, a Brightness/Contrast adjustment layer applied globally might over-expose bright areas and under-expose dark areas. Likewise, a Curves adjustment layer applied to the entire image might distort the tonal range of specific elements. It’s crucial to use masking to isolate the adjustment’s effect.
Correct Application of Adjustment Layers
Using masks effectively with adjustment layers is essential for precision. A mask allows you to control the exact area where the adjustment takes effect. This targeted application ensures that the adjustment only affects the intended portions of the image, preserving the integrity of other areas. Creating a selective mask for the adjustment layer ensures precise application.
Benefits of Using Adjustment Layers
Adjustment layers offer significant advantages over direct pixel manipulation. The non-destructive nature of adjustment layers allows for easy experimentation and revision. If you’re unsatisfied with a change, you can easily adjust, delete, or modify the layer without damaging the original image. This iterative approach is significantly beneficial when working on complex projects. Furthermore, layers can be easily organized and combined, making complex edits manageable.
Practical Steps for Correct Use
- Create a new adjustment layer (e.g., Brightness/Contrast, Curves, Levels) and apply the desired settings.
- Create a mask for the adjustment layer. This can be done by selecting the mask icon and using a brush or other masking tools to paint the area where the adjustment should apply. A white brush paints in the adjustment, black removes it.
- Adjust the mask opacity if necessary to fine-tune the adjustment’s strength and coverage.
- Repeat steps 1-3 for additional adjustments, ensuring each adjustment layer is masked appropriately.
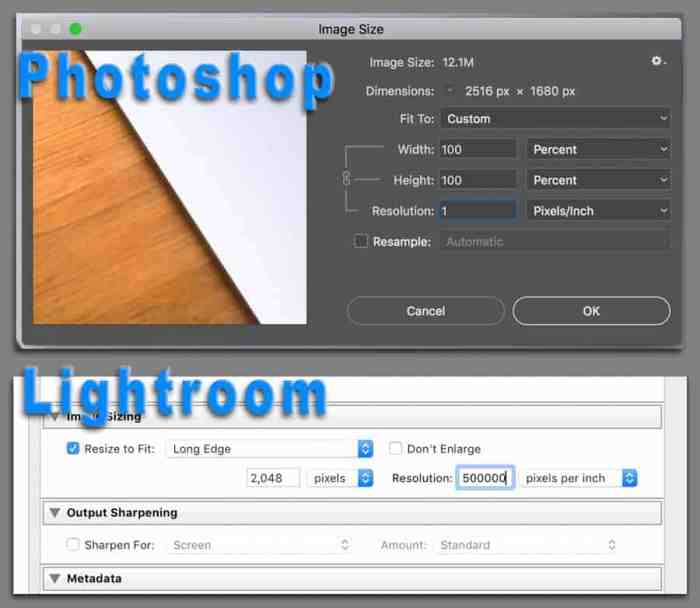
Image Resolution and Quality
Understanding image resolution and quality is crucial for achieving professional-looking results in Photoshop. A poorly resolved image can lead to blurry prints, pixelated displays, and overall unsatisfactory output. This section will delve into common issues, the importance of resolution for different applications, and how to maintain optimal quality throughout the editing process.
Common Issues with Image Resolution
Image resolution issues often stem from a lack of understanding about the relationship between image size, resolution, and intended use. Images intended for web use may not require the same resolution as those destined for print. A common mistake is using low-resolution images for print projects, resulting in a grainy, unattractive final product. Another frequent error involves resizing images without considering the impact on resolution.
This can introduce undesirable artifacts and quality degradation.
Importance of Appropriate Resolution for Different Applications
The ideal resolution for an image depends heavily on its intended application. For example, images destined for social media or websites often require lower resolutions to optimize loading times. Print projects, particularly those involving large-format outputs, necessitate significantly higher resolutions to maintain clarity and sharpness. Photographs intended for publication in magazines or books will also require high resolution.
Impact of Poor Image Resolution on Print and Digital Output
Poor image resolution manifests differently in print and digital outputs. In print, poor resolution results in a noticeably grainy or pixelated image. This is particularly evident in enlarged reproductions or close-up views. Digitally, poor resolution leads to a blurry or pixelated appearance, reducing overall image quality and clarity. For example, a low-resolution image used for a large billboard will look unacceptable.
Conversely, a high-resolution image will maintain its sharpness and clarity across various sizes and output mediums.
Ensuring Optimal Image Quality Throughout the Editing Process
Maintaining optimal image quality throughout the editing process requires careful attention to several key aspects. Firstly, selecting images with sufficient resolution from the start is essential. Secondly, avoid unnecessary resizing or resampling. If resizing is necessary, use high-quality interpolation methods. Thirdly, be mindful of the intended output and adjust resolution accordingly.
Finally, using the correct image format (e.g., TIFF for high-resolution editing) is also critical to maintaining quality during the editing stages.
Misuse of Tools and Shortcuts
Incorrect use of Photoshop tools and shortcuts can lead to frustrating editing sessions and potentially irreversible damage to your images. Understanding the proper application of these tools is crucial for efficient and high-quality editing. Ignoring these nuances can result in unexpected alterations and diminish the overall visual appeal of your work.Often, users familiarize themselves with the basic functionalities of tools, but overlook the subtle yet significant differences in their application.
These nuances often determine the precision and quality of the edits. Ignoring the specific requirements of each tool can lead to undesirable results, requiring more time and effort to correct. Mastering proper tool usage is key to achieving polished and professional-looking images.
Commonly Abused Tools and Shortcuts
Incorrect tool usage is a common pitfall for many Photoshop users. Knowing how to employ tools correctly is essential for effective editing. Common tools that are frequently mishandled include the selection tools, the adjustment layers, and various drawing tools. These tools are versatile but require specific techniques for optimal results.
Avoiding common Photoshop blunders is key, especially when tackling complex edits like removing backgrounds. Mastering techniques like those detailed in How to Remove Backgrounds in Photoshop Like a Pro can significantly improve your workflow. Ultimately, understanding these pitfalls is crucial for avoiding frustration and achieving professional-quality results in your Photoshop projects.
Incorrect Use of Selection Tools
Users often struggle with the accuracy and precision of selection tools. Incorrect use can lead to jagged edges, incomplete selections, or selections that include unwanted elements. Using the incorrect selection tool for the task at hand can drastically affect the accuracy of the selection. For example, a quick selection tool may not provide the necessary precision for a complex shape, leading to undesirable artifacts.
The lasso tool may prove insufficient for a complex image area. Incorrect use of selection tools can result in inaccurate results.
Proper Usage of Selection Tools
- Understand the strengths and weaknesses of each selection tool. The polygonal lasso is ideal for precise selections of shapes, while the magic wand is suitable for selecting similar colors or tones. Understanding the tool’s capabilities will lead to efficient use.
- Employ the “feathering” option judiciously. This softens the edges of a selection, preventing harsh lines in the final image. Using the feathering feature appropriately avoids unwanted visual artifacts.
- Utilize the “add to selection” and “subtract from selection” options for complex selections. These options enable you to refine your selection, eliminating or including elements as needed. This is crucial for complex image selections.
Incorrect Use of Adjustment Layers
Using adjustment layers inappropriately can significantly affect the overall image quality. Adjustments applied directly to an image layer can lead to a loss of image data. Adjustment layers allow for non-destructive editing, meaning changes can be easily reversed or adjusted. Employing adjustment layers in the right manner is a cornerstone of non-destructive editing.
Proper Usage of Adjustment Layers
- Employ adjustment layers to modify colors, brightness, contrast, and other aspects of the image. Applying these changes to a separate layer prevents any loss of data and allows for easy adjustments later. Applying these changes to an adjustment layer ensures that the edits are easily reversible.
- Utilize the opacity slider to fine-tune the effect of the adjustment layer. This allows for subtle or significant changes to the effect. Adjusting the opacity of the adjustment layer is essential for precise control.
- Use the mask of an adjustment layer to apply the effect to specific parts of the image. This allows you to make localized adjustments to parts of the image without affecting the entire image. Employing masks with adjustment layers allows for selective application of changes.
Incorrect and Correct Use Comparison Table
| Tool | Incorrect Use | Correct Use |
|---|---|---|
| Selection Tool (Magic Wand) | Selecting dissimilar areas with the magic wand. | Selecting similar areas with the magic wand; utilizing the tolerance slider for precision. |
| Adjustment Layer (Brightness/Contrast) | Applying brightness/contrast directly to the image layer. | Creating a Brightness/Contrast adjustment layer and adjusting its opacity for localized impact. |
| Brush Tool | Using a hard brush with large size for details. | Using a soft brush with a smaller size for details; utilizing opacity and flow to control brush intensity. |
Summary
In conclusion, avoiding these ten common Photoshop mistakes will dramatically enhance your image editing skills. By mastering these techniques, you’ll save time, reduce frustration, and ultimately produce high-quality images that meet your creative vision. This knowledge is essential for anyone seeking to elevate their digital photography and graphic design.
Query Resolution
What are some common mistakes people make when using adjustment layers?
Overusing adjustment layers, applying them to the wrong layers, and failing to properly mask adjustments are frequent mistakes. Also, not understanding the hierarchy of adjustment layers can lead to unexpected results.
How can I prevent overexposure or underexposure in my photos?
Careful monitoring of exposure during capture is crucial. In Photoshop, use the histogram to assess exposure and use tools like levels or curves to fine-tune brightness and contrast. Experimenting with different techniques like exposure blending can help as well.
What’s the best way to organize layers in Photoshop?
Use folders to group related layers, rename layers descriptively, and utilize layer masks to control the visibility of layers. Consistent naming conventions and a logical stacking order are key.
What tools are frequently misused in Photoshop?
The Healing Brush, Patch Tool, and Clone Stamp are often misused. Understanding the proper use of each tool, including the importance of sample size and brush size, is critical.


