Exposure adjustment is the cornerstone of photography, enabling photographers to control the light entering the camera and ultimately shaping the mood and impact of their images. Understanding the interplay between aperture, shutter speed, and ISO is crucial to mastering this fundamental technique. This guide dives deep into the various facets of exposure adjustment, from basic concepts to advanced techniques, offering practical insights and real-world examples.
This comprehensive guide explores the different methods for adjusting exposure, from manual controls to automatic settings. We’ll examine techniques for various photographic genres, like landscape, portrait, and macro photography, demonstrating how exposure adjustments can transform a scene and convey a specific story. Furthermore, we’ll explore the relationship between exposure and different light conditions, including soft light, harsh light, and various weather conditions.
Defining Exposure Adjustment
Exposure adjustment in photography is the process of manipulating the amount of light that reaches the camera’s sensor to create the desired image. This control is crucial for achieving accurate and aesthetically pleasing results. Understanding the interplay of aperture, shutter speed, and ISO is fundamental to mastering this process.Exposure adjustment is achieved by modifying the parameters that determine how light interacts with the camera’s sensor.
This includes precisely controlling the aperture, shutter speed, and ISO to optimize the image’s brightness, contrast, and overall look.
Fundamental Concepts of Exposure Adjustment
The core principle behind exposure adjustment is the balance between the amount of light entering the camera and the duration it’s exposed. This balance is governed by three key variables: aperture, shutter speed, and ISO. Proper adjustment ensures the correct amount of light strikes the sensor, preventing underexposure (too dark) or overexposure (too bright).
Relationship Between Aperture, Shutter Speed, and ISO
Aperture, shutter speed, and ISO work together to control exposure. Aperture refers to the size of the opening in the lens through which light passes. Shutter speed dictates the duration the sensor is exposed to light. ISO measures the sensor’s sensitivity to light. A wider aperture allows more light, a faster shutter speed reduces exposure time, and a higher ISO increases sensitivity.
Adjusting any one of these elements affects the others, requiring a balanced adjustment to maintain the correct exposure. For example, a wider aperture might require a faster shutter speed or lower ISO to maintain proper exposure.
Methods for Manual Exposure Adjustment
Manual exposure adjustment allows photographers to precisely control the exposure by altering the aperture, shutter speed, and ISO settings. There are several methods to achieve this. One common method is to use a light meter to determine the correct exposure based on the scene’s lighting conditions. Using the camera’s light meter allows for a measured and consistent exposure, enabling precise control.Another method is to use the camera’s exposure compensation feature.
This allows the photographer to make small adjustments to the automatic exposure settings to compensate for specific lighting situations. Exposure compensation can be used to brighten or darken the image based on the specific needs of the scene.
Comparison of Automatic and Manual Exposure Adjustment
| Feature | Automatic Exposure | Manual Exposure |
|---|---|---|
| Control | Camera automatically adjusts aperture, shutter speed, and ISO. | Photographer manually adjusts aperture, shutter speed, and ISO. |
| Flexibility | Limited flexibility; may not always produce the desired results. | High degree of flexibility; allows for creative control over the image. |
| Learning Curve | Easy to use; requires minimal learning. | Steeper learning curve; requires understanding of exposure triangle. |
| Complexity | Simple; suitable for beginners. | More complex; suitable for advanced photographers. |
| Light Conditions | Adequately handles consistent light conditions. | Allows for precise control in varied light conditions. |
Manual exposure adjustment offers the most control over the final image. It requires understanding the exposure triangle, but provides the greatest creative flexibility. Automatic exposure is suitable for beginners and works well in consistent light conditions, but may not always produce the desired aesthetic.
Exposure Adjustment Techniques
Exposure adjustment is a critical aspect of photography, allowing photographers to fine-tune the brightness of an image. Mastering these techniques enables capturing images with optimal exposure, regardless of the lighting conditions. It’s a versatile tool, applicable from capturing breathtaking landscapes to capturing dynamic action shots.Exposure adjustment encompasses various techniques for achieving the desired image brightness, from subtle changes to significant alterations.
It is crucial for adapting to different lighting conditions and achieving the desired artistic effect.
Exposure Adjustment Techniques for Different Scenarios
Various scenarios necessitate specific exposure adjustments. Understanding these differences is vital for achieving the best possible outcome. For instance, a brightly lit scene might require a decrease in exposure, while a dimly lit area may demand an increase. Careful consideration of the scene’s characteristics is paramount.
- Low-Light Conditions: Adjusting exposure in low-light situations often requires increased sensitivity to light, typically represented by a higher ISO setting. This allows the camera sensor to capture more light. However, increasing ISO can introduce noise (graininess) into the image, so a balance must be struck between increased exposure and image quality. For example, shooting indoor events or night landscapes often necessitates a higher ISO and slower shutter speed.
- High-Contrast Scenes: Scenes with significant differences in light and dark areas often benefit from exposure bracketing, a technique where multiple images are taken at different exposures. This allows for combining the best elements of each shot. For example, landscapes with bright skies and dark shadows can be improved with this method.
Bracketing Exposures
Exposure bracketing is a crucial technique for capturing scenes with a wide dynamic range. It involves taking a series of images with varying exposure settings. This ensures that at least one image within the series captures the desired level of detail in both highlights and shadows. This is particularly useful in high-contrast scenes.By taking multiple exposures, the photographer can choose the best-exposed image after the shoot, potentially combining elements from several exposures to create a final image with more comprehensive detail.
Exposure Compensation Values
A comprehensive understanding of exposure compensation values is crucial for precise control over image brightness. These values allow photographers to adjust the camera’s automatic exposure settings to achieve the desired effect. The values are typically expressed in increments of 1/3 or 1/2 stop.
- Common Values: Typical exposure compensation values range from -3 stops to +3 stops. A value of -1 represents a decrease in exposure by one stop, while +1 represents an increase by one stop. Using a negative value darkens the image, and a positive value lightens it.
Comparison of Exposure Adjustment Tools
Different cameras and photo editing software offer various tools for exposure adjustment. Understanding these tools and their functionalities is essential for effective use.
- In-Camera Controls: Most cameras offer exposure compensation controls directly on the camera body. These controls allow adjustments during shooting, providing immediate feedback on the effect of the changes. They are often intuitive and efficient for on-the-spot adjustments.
- Editing Software: Post-processing software like Adobe Lightroom or Capture One offers powerful tools for adjusting exposure. These tools allow precise control over highlights, shadows, and mid-tones, enabling more sophisticated corrections than in-camera adjustments. These tools allow for detailed control and manipulation of the image’s exposure after the fact.
Exposure Adjustment in Landscape Photography
Landscape photography often demands careful exposure adjustment to capture the details of both the bright sky and the darker foreground elements. Bracketing exposures is a common technique for achieving this, capturing various levels of detail. This allows the photographer to combine the best elements of each image in post-processing, resulting in a final image with greater depth and detail.
Exposure Adjustment Settings for Various Subjects
The optimal exposure settings vary based on the subject being photographed. This table provides a general guideline for different subjects.
| Subject | Shutter Speed | Aperture | ISO |
|---|---|---|---|
| Portraits | Fast (e.g., 1/125 sec) | Medium (e.g., f/5.6) | Low (e.g., 100) |
| Sports | Fast (e.g., 1/500 sec or faster) | Wide (e.g., f/2.8 or wider) | Medium to High (e.g., 400-800) |
| Landscapes | Slow (e.g., 1/30 sec) | Narrow (e.g., f/16) | Low (e.g., 100) |
Software Tools for Exposure Adjustment
Post-processing is a crucial step in photography, allowing photographers to refine their images and achieve the desired aesthetic. Exposure adjustment is a significant part of this process, enabling manipulation of brightness and contrast to enhance visual impact. A variety of software tools offer sophisticated features for exposure adjustments, each with its own strengths and weaknesses.Various software applications provide robust tools for exposure adjustments, catering to different skill levels and needs.
The choice of software depends on factors like budget, specific needs, and personal preference. This section delves into popular choices, examining their capabilities and limitations.
Popular Photo Editing Software for Exposure Adjustments
A multitude of software packages are available for adjusting image exposure, each with unique features and strengths. These applications offer diverse options for achieving optimal results, from basic adjustments to advanced techniques.
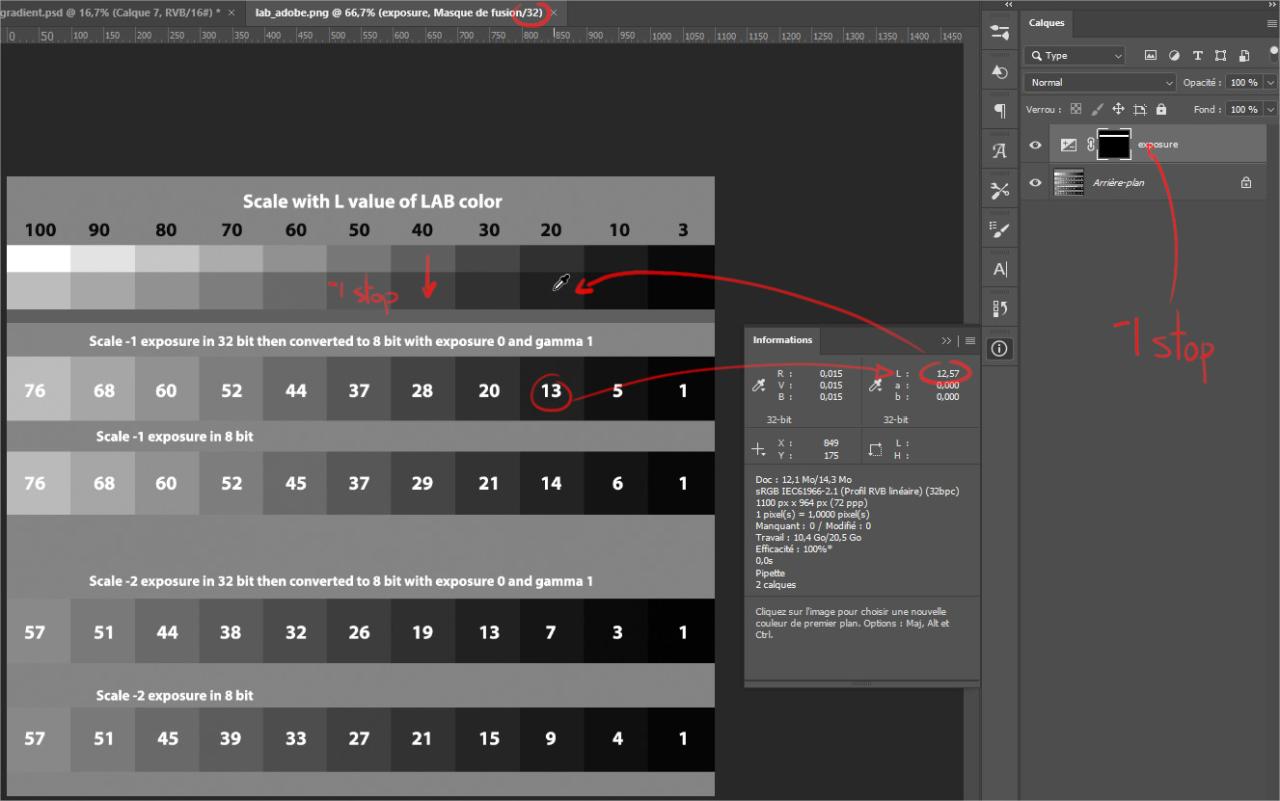
- Adobe Photoshop: Known for its extensive feature set, Photoshop provides a comprehensive array of tools for adjusting exposure. Its non-destructive editing capabilities, such as adjustment layers, allow for easy modifications without permanently altering the original image data. This feature is crucial for preserving the integrity of the original image. The extensive brush tools for local adjustments also contribute to the software’s flexibility.
- Adobe Lightroom: A popular choice for photographers, Lightroom offers a streamlined interface and powerful tools for exposure adjustments. It’s renowned for its intuitive workflow and its emphasis on non-destructive editing, similar to Photoshop’s adjustment layers. Lightroom’s targeted adjustments, such as those for specific color ranges or areas of an image, allow for a fine-tuned approach to exposure manipulation.
- GIMP (GNU Image Manipulation Program): A free and open-source alternative to Photoshop, GIMP provides a comparable set of tools for exposure adjustment. While it might not offer the same level of sophistication as Adobe’s software, it provides ample functionality for most users and is a valuable option for those seeking a cost-effective solution.
- Capture One: Known for its speed and efficiency, Capture One is a popular choice among professional photographers. Its powerful tools and user-friendly interface streamline the process of adjusting exposure, allowing for quick and accurate results. Its focus on high-end image editing makes it an attractive choice for those working with high-resolution images.
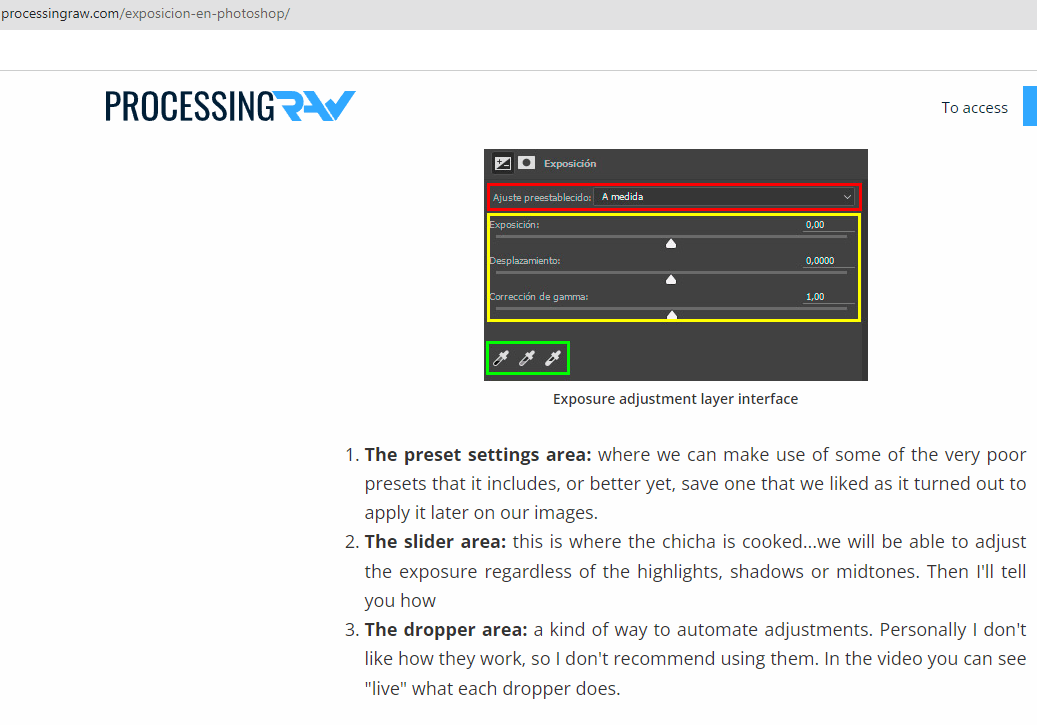
Adjustment Layers for Exposure Changes
Adjustment layers offer a flexible and non-destructive approach to modifying exposure. They allow users to apply adjustments to specific areas of an image without affecting other parts of the image. This method enables the preservation of the original image data and offers a reversible approach to editing.
- Using adjustment layers allows for the application of exposure adjustments without altering the original image. This enables photographers to experiment with different adjustments and easily revert to the original state if needed. The layers can be easily combined, allowing for a more complex and targeted approach to exposure manipulation.
- Adjustment layers are applied as separate layers on top of the image. These layers act as filters, altering the image in a non-destructive manner. This approach allows for easy modifications, making the adjustment process more manageable. This method is crucial for preserving the integrity of the original image, allowing for flexibility and multiple editing iterations without losing the original image’s data.
Software Tool Comparison
A comparative analysis of various software tools is presented below, highlighting their strengths and weaknesses. This table aids in selecting the most suitable software for specific needs and skill levels.
| Software | Strengths | Weaknesses |
|---|---|---|
| Adobe Photoshop | Comprehensive feature set, non-destructive editing, advanced adjustment tools | Steep learning curve, resource-intensive |
| Adobe Lightroom | Intuitive interface, streamlined workflow, excellent for RAW image editing | Limited advanced editing options compared to Photoshop |
| GIMP | Free and open-source, comparable functionality to Photoshop | Interface may be less intuitive for some users, potentially less powerful for high-end editing |
| Capture One | Speed and efficiency, powerful tools, user-friendly interface | Higher cost compared to other options, potentially steeper learning curve for some users |
Exposure Adjustment in Different Genres
Exposure adjustment is a critical aspect of achieving optimal results in photography, transcending mere technicalities to become an artistic tool. Understanding how to adjust exposure in different genres allows photographers to capture the desired mood and essence of a scene. By manipulating exposure, photographers can emphasize specific elements and convey a particular narrative.
Architectural Photography
Architectural photography demands precise exposure control to capture the intricate details of structures. Overexposure can wash out subtle textures and shadows, while underexposure can obscure details in heavily shaded areas. Careful bracketing, a technique of taking multiple shots with varying exposure settings, is often employed to ensure sufficient data for post-processing. Exposure adjustments are crucial for showcasing the architectural features, from the fine lines of a facade to the grandeur of a vast interior space.
A common technique is using a tripod for precise control and exposure blending in post-processing. This allows photographers to combine multiple exposures to obtain a final image with a wide dynamic range.
Street Photography
Street photography, often characterized by candid moments and fleeting scenes, benefits greatly from understanding exposure adjustment. The rapid-fire nature of street photography necessitates a quick response and the ability to adapt to varying lighting conditions. A photographer needs to be comfortable adjusting exposure in real-time to capture the desired atmosphere, whether it’s the bustling energy of a city square or the quiet solitude of a street corner.
The ability to quickly adjust exposure settings allows the photographer to emphasize the light and shadow interplay, highlighting the mood and feeling of the scene.
Macro Photography
Macro photography, focusing on minute details, requires precise control over exposure. The shallow depth of field often necessitates careful exposure settings to avoid overexposing bright areas or underexposing darker ones. Utilizing spot metering, which measures the light from a specific point, is helpful in macro photography. Exposure adjustments are paramount for capturing intricate details and textures in subjects like insects or flowers.
Careful exposure adjustment allows photographers to bring out the exquisite beauty of tiny objects.
Wildlife Photography
Wildlife photography, often challenging due to the unpredictable nature of subjects, relies heavily on exposure adjustments. Understanding how light interacts with the environment is essential to capture the natural beauty of animals in their habitat. Fast shutter speeds are often necessary to freeze motion, while proper exposure settings help to convey the natural environment and the animals within.
The ability to adjust exposure quickly is critical for capturing spontaneous actions and expressions. A tripod can help maintain consistent exposure and focus in wildlife photography.
Sports Photography
Sports photography demands a keen eye for fast-paced action and precise exposure adjustment. Capturing decisive moments requires anticipating the action and adjusting exposure to freeze the moment. The ability to quickly adjust settings like shutter speed and aperture is crucial. Understanding the interplay between shutter speed, aperture, and ISO allows photographers to freeze motion and capture the dynamic energy of a game or event.
Exposure adjustments help to emphasize the speed and excitement of the scene.
Comparison of Exposure Settings for Different Genres, Exposure adjustment
| Genre | Shutter Speed | Aperture | ISO |
|---|---|---|---|
| Architectural | Slow (e.g., 1/60s or slower) | Narrow (e.g., f/8 or f/11) | Low (e.g., ISO 100 or 200) |
| Street | Fast (e.g., 1/250s or faster) | Moderate (e.g., f/5.6 or f/8) | Variable (depending on light) |
| Macro | Variable (depending on subject movement) | Narrow (e.g., f/16 or f/22) | Variable (depending on light) |
| Wildlife | Fast (e.g., 1/1000s or faster) | Variable (depending on subject distance) | Variable (depending on light) |
| Sports | Fast (e.g., 1/1000s or faster) | Variable (depending on depth of field needs) | High (e.g., ISO 800 or 1600) |
Exposure Adjustment and Image Quality
Proper exposure adjustment is critical for achieving high-quality images. It directly impacts the visual appeal, detail, and overall mood of a photograph. Understanding the interplay between exposure and image quality allows photographers to make informed decisions during the capture and post-processing stages. A well-exposed image retains detail in both highlights and shadows, while an improperly exposed image suffers from either washed-out highlights or muddy shadows, reducing the overall quality and impact.Exposure adjustment significantly influences the image’s dynamic range, which is the ratio between the brightest and darkest parts of the scene.
Maintaining a balanced exposure ensures that the image captures a wide spectrum of tones, preventing the loss of important details. Furthermore, proper exposure adjustment can greatly affect the overall mood and feel of the image, creating a dramatic or serene atmosphere.
Relationship Between Exposure and Image Quality
Exposure directly affects the image’s quality by influencing the amount of light recorded by the camera sensor. Correct exposure ensures that the highlights are not clipped (blown out) and the shadows are not blocked (crushed), preserving the detail in both extremes. Incorrect exposure, either overexposure or underexposure, results in a loss of detail and a compromised image.
Effects of Overexposure and Underexposure
Overexposure occurs when too much light hits the camera sensor, resulting in highlights that are completely white and lack detail. This often results in a loss of texture and tonal gradation. Underexposure, conversely, happens when insufficient light reaches the sensor, causing shadows to appear dark and lacking detail. Both conditions negatively impact the image’s quality, diminishing its overall impact.
Overexposed images are often flat and lifeless, while underexposed images appear muddy and lack contrast.
Importance of Achieving Proper Exposure
Achieving proper exposure is fundamental to capturing images with a wide dynamic range and optimal detail. Proper exposure allows for a greater tonal range in the final image, meaning the photographer can reproduce a broader spectrum of tones present in the scene. This nuanced portrayal of the scene results in more accurate and realistic representations. Furthermore, a well-exposed image generally offers more flexibility during post-processing, allowing for adjustments without significantly affecting the image’s integrity.
Exposure Adjustment and Mood/Feel
Exposure adjustments significantly influence the mood and feel of an image. For example, a brightly exposed landscape can evoke a sense of joy and openness, while a dimly exposed portrait might suggest mystery or intimacy. The choice of exposure directly influences the overall emotional response of the viewer.
Avoiding Common Mistakes During Exposure Adjustment
To avoid common mistakes during exposure adjustment, photographers should:
- Thoroughly evaluate the scene: Consider the overall lighting conditions and the dynamic range of the scene. This involves understanding how light falls on the subject, and how it interacts with different surfaces. Taking into account the available light is paramount in capturing a good image.
- Utilize the histogram: The histogram is a valuable tool to assess the tonal distribution in an image. It visually represents the tonal values, helping photographers identify potential overexposure or underexposure problems before they permanently affect the image.
- Employ exposure compensation: Exposure compensation allows for adjustments to the camera’s automatic exposure settings. Adjusting the exposure based on the specific conditions of the scene is crucial to obtaining accurate exposure and preventing loss of detail.
- Review and refine: Thoroughly examine the image on a calibrated monitor. After making adjustments, review the image to ensure that the exposure and overall quality meet expectations.
Exposure Adjustment and Light
Exposure adjustment is intricately linked to the quality and quantity of light. Understanding how different light types and conditions affect exposure is crucial for achieving optimal results in photography. This section delves into the nuanced relationship between exposure and light, providing practical guidance for photographers.
Relationship Between Exposure and Different Light Types
Soft light, characterized by diffused illumination, casts minimal shadows and produces gentle highlights. This type of light is often ideal for portraits, as it minimizes harshness and emphasizes details. Conversely, harsh light, with its strong directionality, creates deep shadows and strong contrasts. Harsh light can be effective for dramatic or stylized images, but careful exposure adjustment is needed to prevent blown highlights or lost detail in shadows.
The quality of light significantly impacts the way a scene is perceived, and exposure adjustment is key to capturing this impact accurately.
Exposure Adjustment Based on Time of Day
Different times of day bring unique light conditions. Sunrise and sunset, often referred to as the golden hour, are characterized by warm, soft light that creates beautiful, ambient tones. This soft light is perfect for landscape photography, where the subtle color variations are often enhanced. Midday sun, on the other hand, tends to be harsh and direct, requiring careful exposure adjustment to avoid overexposure.
Adjusting exposure based on the time of day is vital for capturing the distinct characteristics of each light source.
Evaluating Light Conditions for Proper Exposure Adjustment
Evaluating light conditions involves assessing the intensity, direction, and color temperature of the light. Analyzing the interplay of light and shadow is crucial for determining the appropriate exposure. The intensity of light affects the amount of light hitting the sensor, influencing the exposure value (EV). Directionality influences the shape and contrast of shadows, impacting the overall image mood.
Color temperature, measured in Kelvin, dictates the warmth or coolness of the light. All these elements must be considered to make accurate exposure adjustments.
Adjusting Exposure for Different Lighting Conditions
Adjusting exposure for different lighting conditions involves a combination of techniques. For soft light, a lower ISO and a smaller aperture can be used to maintain a correct exposure. In harsh light, a higher ISO and a larger aperture may be necessary. The goal is to balance the light intensity with the camera settings to achieve the desired exposure.
Adjusting Exposure in Different Weather Conditions
Weather conditions influence light. Cloudy days often produce diffused light, requiring a lower ISO and a slower shutter speed for correct exposure. Overcast conditions often require a slightly different exposure than sunny conditions. Rainy days can produce unique and atmospheric images, and adjusting exposure for the light conditions is essential to capture these nuances.
Manipulating Light with Exposure Adjustments
Exposure adjustments can be used to manipulate light in several ways. For instance, underexposing a scene can create a dramatic mood, while overexposing can brighten the scene and draw attention to specific details. Careful adjustment of exposure can enhance the overall mood and impact of the image.
Table: Light Conditions and Exposure Settings
| Light Condition | Description | Appropriate Exposure Settings (Example) |
|---|---|---|
| Golden Hour (Sunrise/Sunset) | Warm, soft light | Low ISO, small aperture, slow shutter speed |
| Midday Sun | Harsh, direct light | Higher ISO, larger aperture, faster shutter speed |
| Cloudy Day | Diffused light | Lower ISO, slower shutter speed, small aperture |
| Overcast Day | Consistent diffused light | Lower ISO, slower shutter speed, small aperture |
| Rainy Day | Diffused light with possible atmospheric haze | Lower ISO, slower shutter speed, potentially higher sensitivity to ambient light |
Common Mistakes in Exposure Adjustment
Exposure adjustment, while crucial for achieving compelling images, can be prone to certain pitfalls. Understanding these common errors and their consequences is vital for refining your image editing process and ultimately producing more satisfying results. This section delves into the frequent mistakes photographers make during exposure adjustments, providing actionable strategies to avoid them and troubleshoot potential issues.
Overexposure and Underexposure
Overexposure and underexposure are fundamental errors in exposure adjustment. Overexposure results in a loss of detail in highlights, rendering them as pure white. Underexposure, conversely, diminishes detail in shadows, making them appear as dark blacks. Both issues lead to a reduction in the dynamic range of the image, impacting its overall quality and visual appeal.
- Overexposure: Occurs when too much light reaches the sensor, resulting in blown-out highlights. This often happens when the exposure compensation is set too high or when the scene itself has exceptionally bright areas (e.g., a sunny sky). The consequences include the loss of detail in highlights and a flattened tonal range. To avoid this, use a lower exposure compensation setting, consider bracketing exposures (taking multiple shots with different exposure values), or selectively adjust highlights in post-processing software.
For example, in a landscape photo with a bright sky, shooting in raw format and using the camera’s exposure bracketing function can help prevent overexposure of the sky while maintaining detail in the foreground. Careful monitoring of the histogram during shooting can also prevent overexposure.
- Underexposure: Arises when insufficient light reaches the sensor, resulting in dark shadows with a lack of detail. This commonly occurs with scenes featuring significant shadow areas or when the exposure compensation is set too low. The consequences include the loss of detail in shadows and a diminished tonal range. To avoid this, use a higher exposure compensation setting, adjust the ISO to increase light sensitivity, or use fill-in flash to illuminate shadowed areas.
For instance, in a portrait shot taken in a dimly lit area, increasing the ISO or using a flash can prevent underexposure, ensuring that facial features remain visible.
Incorrect White Balance Adjustment
Improper white balance adjustments can significantly alter the color rendition of an image. This is crucial for maintaining the natural tones of the scene and can lead to an undesirable or inaccurate color palette.
- Inaccurate White Balance: Adjusting white balance incorrectly can lead to images with unnatural color casts, such as images with a yellowish or bluish tint. This occurs when the white balance setting in the camera is not appropriately calibrated to the light source or when it is incorrectly adjusted in post-processing. This mistake affects the overall mood and authenticity of the image.
To avoid this, use the camera’s auto white balance feature or manually select a white balance preset that best matches the light source (e.g., daylight, tungsten). Using a gray card or a neutral object as a reference can also ensure accurate white balance. Examples include using a grey card under tungsten lighting and then adjusting the white balance in post-processing accordingly.
Similarly, choosing the right white balance preset (e.g., cloudy) for a cloudy day will help avoid color casts.
Incorrect Contrast Adjustment
Incorrect contrast adjustment can result in images that are either too flat or too harsh, impacting the overall visual appeal and emotional impact.
- Excessive Contrast: Increasing contrast too much can lead to a loss of detail in mid-tones, creating a high-contrast image that is not visually appealing. This occurs when adjusting the contrast slider in post-processing software to extreme values. This can create an image that is overly harsh and lacks subtlety. To avoid this, adjust contrast gradually and ensure the image retains its natural tonal range.
For example, gradually increasing contrast can enhance the image’s depth, but an extreme increase can lead to a loss of details and a hard look.
- Insufficient Contrast: Conversely, insufficient contrast can result in flat, lifeless images with limited visual impact. This can be due to a lack of contrast in the original scene or inappropriate adjustments in post-processing. To avoid this, subtly increase contrast to enhance the visual interest and tonal range of the image. For instance, in a landscape photo with subtle variations in light and shadow, a slight increase in contrast can create a sense of depth and drama.
Troubleshooting Exposure Issues
Troubleshooting exposure issues requires a systematic approach. Analyzing the histogram, checking the image’s highlights and shadows, and adjusting settings accordingly can aid in identifying and resolving exposure problems.
- Histogram Analysis: The histogram is a valuable tool for understanding the distribution of tones in an image. By examining the histogram, you can identify areas of overexposure (highlighted by peaks on the right side) and underexposure (highlighted by peaks on the left side). Adjusting exposure settings based on this analysis can significantly improve image quality. For instance, in a landscape photo with a bright sky, a histogram showing a peak in the right side suggests the sky might be overexposed.
Exposure adjustment is a crucial step in photo editing, and GIMP, a powerful open-source image editor ( GIMP ), offers a wide array of tools to fine-tune this aspect. From brightness and contrast controls to specific adjustments for highlights and shadows, GIMP provides the flexibility needed to master exposure in your images. Ultimately, precise exposure adjustment is key for creating visually appealing and professional-quality photos.
Adjusting exposure in post-processing or during shooting can correct this.
- Reviewing Highlights and Shadows: Carefully review the highlights and shadows in the image to determine if there are areas with excessive brightness or significant darkness. Identifying these areas helps in targeted adjustments to achieve a balanced tonal range. For example, if a photo of a person has significant shadow in the face, adjusting exposure or using fill-in flash during shooting or post-processing can correct this.
Advanced Exposure Adjustment Techniques
Exposure adjustment extends beyond basic techniques to encompass more sophisticated methods for achieving desired results in complex photographic scenarios. Advanced techniques leverage blending, HDR, special effects, and specialized applications like astrophotography to manipulate light and create compelling images. These techniques allow photographers to capture scenes with high dynamic ranges, intricate details, and unique artistic interpretations.
Exposure Blending for Complex Scenes
Exposure blending is a powerful technique for capturing scenes with significant tonal variations, such as landscapes with bright skies and dark shadows, or interiors with strong light sources. By combining multiple exposures with different exposures, photographers can capture the full tonal range of the scene. This process requires careful consideration of the scene’s characteristics, and precise alignment of the images in post-processing.
HDR Photography
High Dynamic Range (HDR) photography is a specific application of exposure blending that captures a wider range of light values than a single exposure can record. This allows for a more realistic representation of scenes with extreme contrasts. HDR images often require specialized software to blend the exposures.
Creating HDR Images
Creating an HDR image involves capturing multiple bracketed exposures, typically at varying intervals (e.g., -2, -1, 0, +1, +2 EV). Each exposure captures a different aspect of the light range. The software then blends these exposures, combining the highlights of one image with the shadows of another, to produce an HDR image that contains a more comprehensive tonal range.
The precise exposure values for bracketing depend on the scene.
Exposure Adjustment for Special Effects
Exposure adjustment can be used to create various special effects. Adjustments to the exposure values, such as increasing or decreasing the exposure compensation, can produce dramatic or surreal effects. For instance, a dramatic increase in exposure can emphasize light sources, while a decrease can draw attention to shadowed areas. These adjustments can be used in conjunction with other editing tools to create unique visual styles.
Exposure Adjustment in Astrophotography
In astrophotography, exposure adjustment is crucial for capturing faint celestial objects. Long exposures are often necessary to gather enough light from dim stars and nebulae. Adjusting exposure time and ISO sensitivity is crucial to achieve optimal results. Careful consideration of light pollution and atmospheric conditions is vital to ensure sharp and clear images. Astrophotography often involves meticulous post-processing techniques to enhance the details and colors of the captured objects.
Exposure Adjustment and Camera Settings
Mastering exposure adjustment goes beyond just snapping a photo; it’s about understanding how your camera’s settings interact to create the desired image. This section delves into the crucial relationship between camera settings and achieving optimal exposure. From aperture to shutter speed, and ISO, this guide provides practical insights for fine-tuning your images.
Understanding Camera Exposure Modes
Different exposure modes on your camera give you varying levels of control over the exposure triangle. Knowing how to use these modes empowers you to adapt to different shooting scenarios, from capturing fast-moving subjects to capturing stunning landscapes.
- Aperture Priority Mode (Av or A): This mode allows you to select the desired aperture while the camera automatically adjusts the shutter speed to maintain proper exposure. A wider aperture (smaller f-number, like f/2.8) allows more light to reach the sensor, ideal for low-light situations or creating shallow depth of field. A smaller aperture (larger f-number, like f/16) restricts light and is suitable for landscapes needing a deep depth of field.
- Shutter Priority Mode (Tv or S): This mode lets you select the shutter speed while the camera automatically sets the aperture for proper exposure. A faster shutter speed (e.g., 1/500s) freezes motion, perfect for sports photography or action shots. A slower shutter speed (e.g., 1/30s) blurs motion, useful for creating artistic effects like light trails.
- Manual Mode (M): This mode grants complete control over both aperture and shutter speed, enabling you to precisely fine-tune every aspect of the exposure triangle. This is often the most versatile mode, especially for advanced photographers or when you need complete creative freedom.
Interpreting Camera Metering Systems
Your camera’s metering system analyzes the light in the scene and suggests an appropriate exposure. Understanding these systems allows you to adjust the exposure based on the meter’s reading and your creative vision.
- Evaluative (Matrix) Metering: This system measures light across the entire scene and calculates an average exposure, often suitable for a wide range of subjects. However, it may struggle with highly contrasting scenes.
- Center-Weighted Averaging Metering: This metering system gives more weight to the center of the frame, making it useful for subjects centered in the scene or for situations where the subject in the center requires more focus.
- Spot Metering: This method measures light from a small area, typically around 2-5%, within the frame. It’s invaluable for focusing on a specific portion of the scene with high contrast, like the highlights of a snow-capped mountain.
Adjusting Camera Settings for Specific Situations
Camera settings should be adjusted based on the lighting conditions and the desired effect.
Exposure adjustment is crucial in photography, and tools like ON1 Photo RAW ON1 Photo RAW make it super easy. These programs offer a wide array of options for fine-tuning your images’ exposure, ensuring accurate brightness and contrast. Ultimately, precise exposure adjustment leads to more impactful and professional-looking photos.
- Bright Sunlight: Use a small aperture (high f-number) and a fast shutter speed to prevent overexposure. Adjust ISO to the lowest possible value for optimal image quality.
- Cloudy Conditions: You can use a wider aperture (lower f-number) and a moderate shutter speed to capture more light. ISO can often remain at a low value.
- Low-Light Conditions: Use a wider aperture (lower f-number) and a slower shutter speed to maximize light. Increase the ISO to compensate for the reduced light, but be aware of potential noise in the image.
Comparing Camera Settings and Exposure Impact
This table illustrates how different camera settings affect exposure.
| Setting | Impact on Exposure | Example Use Case |
|---|---|---|
| Aperture (f-number) | Controls depth of field and light intake. | Shallow depth of field for portraits, large depth of field for landscapes. |
| Shutter Speed | Controls motion blur and light duration. | Freezing action for sports, creating motion blur for artistic effects. |
| ISO | Controls sensor sensitivity to light. | High ISO in low light to prevent motion blur, low ISO for bright conditions to maintain image quality. |
Summary
In conclusion, mastering exposure adjustment empowers photographers to sculpt images with precision and creativity. From basic settings to advanced techniques, this guide provides a thorough understanding of this crucial aspect of photography. By grasping the nuances of exposure, photographers can elevate their skills, capturing stunning images that convey emotion and story.
Popular Questions
What is the difference between aperture priority and shutter priority modes?
Aperture priority mode lets you choose the aperture, and the camera automatically selects the appropriate shutter speed. Shutter priority mode allows you to select the shutter speed, and the camera chooses the aperture. Each mode offers different creative control.
How can I avoid overexposure or underexposure?
Overexposure occurs when too much light hits the sensor, resulting in a washed-out image. Underexposure occurs when insufficient light hits the sensor, causing a dark image. Understanding your camera’s metering system, using a light meter, and practicing exposure bracketing can help avoid these issues.
What are some common mistakes photographers make when adjusting exposure?
Common mistakes include not considering the ambient light conditions, not using a light meter, and not understanding the relationship between ISO, aperture, and shutter speed. Also, failing to pre-visualize the final image or rushing the process can lead to poor results.
What software tools are available for post-processing exposure adjustments?
Popular photo editing software like Adobe Photoshop, Lightroom, and Capture One offer powerful tools for adjusting exposure, contrast, highlights, and shadows. These tools provide precise control over image adjustments.


