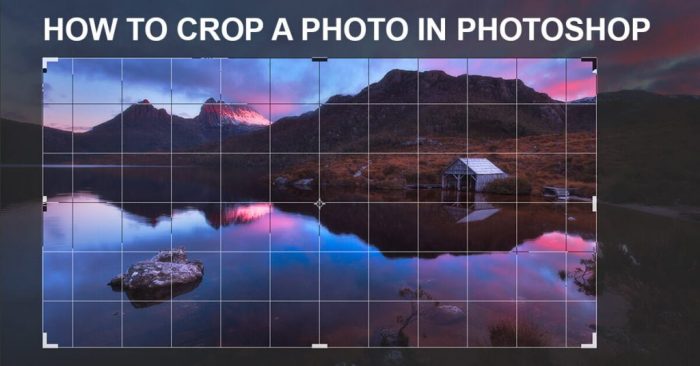
How to crop in Photoshop unlocks a world of image enhancement. This guide delves into the art of image cropping, from basic techniques to advanced strategies, ensuring your photos are visually compelling and perfectly tailored for any purpose.
Learning how to crop in Photoshop goes beyond simply cutting off excess parts of an image. It’s about understanding the interplay of composition, aspect ratios, and visual appeal to create impactful images. This comprehensive guide walks you through the various cropping tools and techniques, enabling you to refine your images with precision and creativity.
Introduction to Cropping in Photoshop
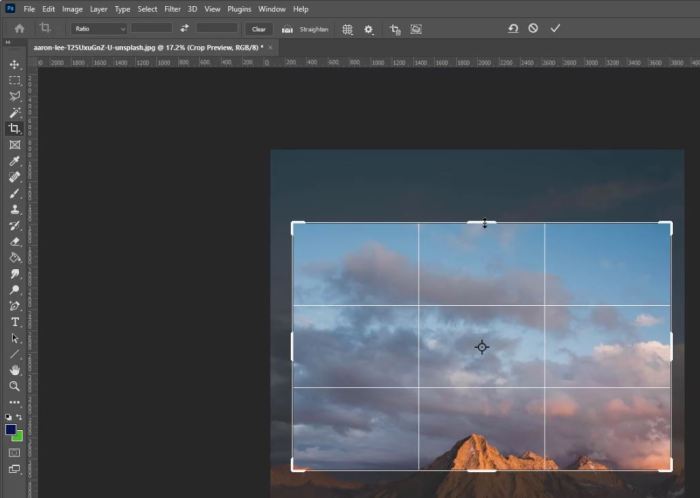
Image cropping is a fundamental image editing technique used to precisely select and retain a specific portion of an image, discarding the rest. It’s a powerful tool for refining compositions, removing unwanted elements, and adjusting the overall visual impact of a photograph. Cropping can dramatically change the emphasis and mood of an image, and is a crucial step in many image editing workflows.Cropping serves a variety of purposes in Photoshop, from simple aesthetic adjustments to more complex creative transformations.
It’s not just about removing excess; it’s about focusing the viewer’s attention on the most impactful elements of the image, thus improving its overall effectiveness.
Use Cases for Cropping
Cropping is a versatile technique with numerous applications in image editing. It’s used to remove distracting background elements, to change the perspective of a scene, or to alter the overall composition. The flexibility of cropping makes it a valuable tool in various scenarios.
- Improving Composition: Cropping allows for the precise placement of key elements within the frame, leading to a more balanced and aesthetically pleasing image. This is often achieved by removing elements that detract from the primary subject or by adjusting the framing to enhance the subject’s relationship with the surrounding environment. For example, removing a distracting pole in the background of a portrait can improve the focus on the subject.
- Resizing and Aspect Ratio Adjustments: Cropping is frequently used to resize an image to a specific aspect ratio, which is crucial for web design, print media, and other applications where specific dimensions are required. This is common in social media posting, where images need to adhere to a particular aspect ratio.
- Removing Unwanted Elements: Cropping can be used to eliminate elements that are unnecessary or distracting in an image. This could include unwanted objects in the foreground, background clutter, or even blemishes on the subject.
- Changing Perspective: Cropping can be used to alter the perspective of an image, giving it a different visual character. For instance, cropping an image of a landscape can shift the focus from a wide view to a tighter perspective on a specific portion of the scene.
Types of Cropping
Photoshop offers various cropping options to cater to different needs. The choice of cropping method depends on the desired effect and the specific elements within the image.
- Rectangular Cropping: This is the most common type of crop, where a rectangular selection is made. It’s simple and straightforward, suitable for most general image editing tasks. A rectangular crop is useful for adjusting the overall proportions of an image while maintaining a consistent perspective.
- Elliptical Cropping: This type of crop uses an elliptical or oval shape to isolate the subject within the image. It’s useful for creating a more dynamic or artistic effect, especially when the subject is naturally circular or oval-shaped, like a flower or a person’s face. It can draw attention to a particular point in an image.
- Custom Shape Cropping: Photoshop allows users to create crops with custom shapes. This feature provides great flexibility and control, allowing users to create unique and artistic crops for diverse needs. For example, you could use a custom shape to crop a picture into a heart shape, or a more abstract form.
Importance in Image Composition
Cropping plays a critical role in image composition, impacting how viewers perceive the image. Effective cropping can guide the viewer’s eye, emphasizing important elements and creating a more engaging visual experience.
- Visual Appeal: By carefully selecting the portion of the image to keep, the photographer can emphasize the subject and draw the viewer’s eye to the most important parts of the scene. This results in a more aesthetically pleasing and engaging image.
- Emphasis and Focal Point: The right crop can direct the viewer’s attention to the main subject of the image, ensuring it remains the central focus of the composition.
- Balance and Harmony: Effective cropping techniques can achieve a balance and harmony within the image, preventing any visual imbalance or imbalance of weight.
Aspect Ratios and Cropping
Aspect ratio is a crucial consideration in cropping, defining the proportional relationship between the width and height of an image. Understanding aspect ratios is essential for ensuring images are compatible with different media and platforms.
- Defining Aspect Ratios: Aspect ratios are expressed as a numerical ratio, such as 16:9 (widescreen) or 4:3 (standard). Different platforms and applications have specific aspect ratio requirements, which must be taken into account when cropping images for those uses.
- Relevance to Cropping: By understanding the aspect ratio requirements of a particular application, the photographer can ensure that the cropped image will be properly displayed. For example, a 16:9 aspect ratio is common for widescreen monitors and televisions, and images cropped to this ratio will look their best on these devices.
Basic Cropping Techniques
Mastering cropping in Photoshop is crucial for refining images and achieving the desired aesthetic. Knowing the various tools and their applications allows for precise adjustments and creative control over the composition. This section delves into the fundamental methods for cropping, ranging from straightforward rectangular selections to more complex selections using advanced tools.
Rectangular Marquee Tool
The Rectangular Marquee Tool is the simplest method for cropping. It creates a rectangular selection that defines the area to be kept. Select the tool, then drag a rectangle around the portion of the image you wish to retain. Photoshop automatically removes the unwanted parts. This method is efficient for basic cropping tasks, like removing excess white space or trimming a portrait to fit a specific frame.
It’s a straightforward process, ideal for quickly adjusting image proportions.
Lasso Tool and Polygonal Lasso Tool
These tools provide more flexibility than the Rectangular Marquee Tool for selecting irregular shapes. The Lasso Tool allows freehand selections, while the Polygonal Lasso Tool creates selections using straight line segments. These are valuable when cropping around complex shapes or intricate details. Precise selection is critical for preserving important elements of the image, such as the subject’s face in a portrait.
The Polygonal Lasso Tool, with its straight lines, is often preferable for shapes with well-defined edges, whereas the Lasso Tool allows for more organic, freeform selections.
Quick Selection Tool
The Quick Selection Tool excels at complex selections. It allows for selections based on color and edge detection. By intelligently recognizing subtle differences in tones and colors, it enables accurate cropping in situations with intricate or nuanced details, particularly useful for portraits with backgrounds or when cutting out objects from their surroundings. Click and drag the tool over the area you want to select; the tool will automatically select similar colors or edges.
Fine-tuning can be accomplished through adjustments in the options bar.
Comparison of Cropping Tools
| Tool | Strengths | Weaknesses | Applications |
|---|---|---|---|
| Rectangular Marquee Tool | Speed, simplicity, suitable for basic cropping | Limited to rectangular shapes, less precision for complex areas | Removing excess whitespace, adjusting aspect ratios |
| Lasso Tool | Freehand selections, precise control for irregular shapes | Can be time-consuming for complex shapes, susceptible to user error | Cropping around intricate details, objects with organic edges |
| Polygonal Lasso Tool | Straight-line selections, good precision for well-defined shapes | Limited to straight lines, may not be ideal for highly organic forms | Cropping around objects with clear lines and corners |
| Quick Selection Tool | Efficient for complex selections, automatically selects similar colors or edges | May require fine-tuning, can be less precise than lasso tools for very intricate shapes | Removing backgrounds, cutting out objects, portraits with detailed backgrounds |
Advanced Cropping Techniques
Mastering advanced cropping techniques in Photoshop elevates your image editing from basic adjustments to sophisticated compositions. These techniques allow for precise control over the final image, optimizing it for specific purposes and achieving desired aesthetic effects. Understanding these methods empowers you to craft compelling images for various applications.
Perspective Cropping Tool
The Perspective Crop tool in Photoshop enables you to adjust the image’s perspective, correcting distortions and creating more natural-looking compositions. This is particularly useful for images with strong vanishing points, like architectural shots or photos taken from unusual angles. Using the Perspective Crop tool, you can manipulate the image’s corners to straighten lines and create a more accurate representation of the scene.
Cropping Based on Specific Image Dimensions
Frequently, specific image dimensions are required for various purposes. These dimensions can be pre-defined by clients, templates, or the nature of the application. By defining the width and height, you ensure the image aligns with the intended format, whether for print, web, or social media.
Cropping in Photoshop is straightforward. Select the Crop tool, define your desired area, and hit Enter. Knowing the differences between the various Photoshop versions, like Adobe Photoshop CC and Photoshop Elements, Adobe Photoshop CC vs Photoshop Elements: Key Differences can be helpful for understanding the features available. Ultimately, the core cropping process remains consistent regardless of the version.
Cropping to Specific Aspect Ratios
Aspect ratio refers to the proportional relationship between the width and height of an image. Maintaining a consistent aspect ratio is crucial for maintaining visual harmony and preventing distortion. Photoshop provides tools to crop images to specific aspect ratios, ensuring compatibility with different platforms and formats. Common aspect ratios include 16:9 (widescreen), 4:3 (standard), and 1:1 (square). This ensures your images fit seamlessly into the designated space, whether it’s a website banner, a social media post, or a print advertisement.
Cropping Images for Social Media Posts
Social media platforms have specific image dimensions and aspect ratios for optimal display. Cropping images to these dimensions ensures your content looks its best on the chosen platform. Understanding the dimensions for various social media sites, such as Instagram, Facebook, and Twitter, allows for the creation of visually engaging posts. Knowing the correct dimensions ensures that your images will appear correctly and not be distorted on different social media platforms.
Cropping Images to Fit a Specific Canvas Size
Sometimes, you need to resize an image to fit a particular canvas size. This is commonly used when preparing images for print or when designing with specific templates. Photoshop offers tools for cropping images to match the exact canvas size, ensuring your image aligns precisely with the template or design guidelines. You can utilize the cropping tool to achieve the desired size and maintain the overall image’s integrity.
This is vital for professional print design and for maintaining the quality of the final product.
Cropping with Layers
Cropping within Photoshop often involves more than just a single image. Frequently, you’ll be working with multiple layers, each containing distinct elements or parts of the overall composition. Understanding how cropping interacts with layers is crucial for precise editing and maintaining the integrity of your layered artwork. This section delves into the nuances of cropping within the layered environment of Photoshop, exploring techniques for precise editing and non-destructive manipulation.Layer-based cropping offers significant advantages over direct image cropping.
It allows you to selectively adjust portions of your design without impacting other elements. Layer masks provide an extra level of control, enabling nuanced adjustments. This approach is particularly valuable when dealing with complex images or projects requiring adjustments to specific sections without affecting the rest of the design.
Cropping a Layer Without Affecting Others
Cropping a layer doesn’t inherently change other layers. Photoshop’s layer system isolates each element. When you crop a layer, only the contents within that specific layer are affected. Other layers remain untouched, maintaining their original dimensions and content. This non-destructive nature is crucial for revisiting edits and adjustments later.
You can modify a layer’s crop without altering other layers in your project.
Layer Masks and Cropping
Layer masks offer an additional layer of control when cropping. They allow you to selectively apply a mask to a layer, hiding or revealing parts of the layer’s content. This approach is particularly helpful when dealing with complex images or precise cropping requirements. By using a layer mask, you can refine your crop without directly editing the layer’s content.
For example, you can create a mask around a subject to crop the background without altering the subject itself.
Using Layer Styles to Enhance Cropped Images
Layer styles in Photoshop provide a powerful toolkit for enhancing cropped images. They offer a variety of effects like bevels, gradients, and inner shadows that can significantly improve the visual appeal of your cropped elements. By applying these styles to cropped layers, you can add depth, dimension, and contrast to your images. For example, applying a drop shadow to a cropped image of a product can help it stand out on a webpage.
Grouping Layers for Easier Cropping and Manipulation
Grouping layers in Photoshop simplifies the process of cropping and manipulating multiple elements simultaneously. Grouping allows you to treat a collection of layers as a single unit. This can be especially helpful for complex designs, where several layers need to be cropped or manipulated as a cohesive whole. By grouping related layers, you gain the ability to apply cropping or other transformations to all members of the group simultaneously.
For instance, if you have multiple layers depicting a character, you could group them for easier cropping and manipulation.
Cropping for Specific Purposes
Beyond the fundamentals of cropping, understanding how to tailor the technique to specific needs significantly enhances the impact of your images. Mastering cropping for various purposes allows you to convey a specific message or feeling, drawing the viewer’s attention to the most important elements within the frame. Different applications demand distinct approaches to achieve the desired effect.Effective cropping is more than just resizing; it’s a strategic process that requires an understanding of the intended use of the image.
Whether it’s highlighting a subject in a portrait, showcasing a product’s features, or creating engaging website graphics, a thoughtful approach to cropping can elevate the visual appeal and effectiveness of the image.
Cropping for Portraits
A well-cropped portrait isolates the subject and draws attention to their expression and features. Cropping strategies for portraits often center around removing distracting elements from the background and focusing on the subject’s pose and facial expression. A tight crop can emphasize intimacy, while a wider crop can convey a broader context.
- Background Removal: Carefully cropping away unnecessary elements in the background ensures the subject is the focal point. Consider the lighting and composition to maintain visual harmony. For example, a cluttered or distracting background can be eliminated by cropping in a way that isolates the subject.
- Framing the Subject: The frame of the crop can be strategically used to emphasize the subject’s body language and expressions. Cropping techniques such as a close-up on the face or a full-body shot can be used to highlight different aspects of the subject.
- Focus on Expression: By cropping closely around the subject’s face, you can highlight their facial expression. This method often works best when the subject has a compelling or intriguing expression.
Cropping Landscape Photographs
Effective landscape cropping focuses on creating a compelling composition that emphasizes the scene’s key elements. The goal is to guide the viewer’s eye through the image and highlight the most impactful aspects of the landscape.
- Leading Lines: Cropping can be used to emphasize leading lines within the landscape, such as a winding road or a meandering river, drawing the viewer’s eye through the scene. This often enhances the sense of depth and scale.
- Rule of Thirds: Applying the rule of thirds during cropping helps to create a balanced and visually appealing composition. Placing important elements along these lines or at their intersections can significantly enhance the image’s aesthetic.
- Sky and Horizon: The relationship between the sky and the horizon line is critical in landscape photography. Cropping strategically can highlight dramatic skies or emphasize the foreground elements.
Cropping for Product Images
Cropping product images focuses on showcasing the product’s key features and benefits. This often involves removing distractions and highlighting the product’s form, color, and functionality.
- Highlighting Key Features: Cropping should isolate the most important features of the product. This could involve zooming in on specific details or creating a composition that showcases the product’s function.
- Removing Distractions: Background elements that are irrelevant to the product should be removed. This creates a cleaner image that focuses solely on the product.
- Color and Texture: Strategic cropping can be used to highlight the product’s color and texture. By isolating the product against a plain background, you can showcase its visual attributes more effectively.
Cropping for Website Graphics
Cropping for website graphics prioritizes clarity, visual appeal, and efficiency. The goal is to create graphics that are easy to load and display on various screen sizes while maintaining a high level of visual quality.
- Optimizing File Size: Cropping images to the specific dimensions needed for the website will help reduce file size, resulting in faster loading times. This is particularly important for web graphics to improve user experience.
- Visual Hierarchy: Cropping for website graphics is crucial for creating a clear visual hierarchy. This involves strategically placing elements to guide the user’s eye and convey the intended message.
- Resolution and Format: Consider the resolution and file format when cropping website graphics. Choose formats that balance image quality and file size, considering the web’s display standards.
Cropping for Print Media
Cropping for print media focuses on creating images suitable for various print applications, such as magazines, brochures, and posters. The goal is to ensure the image fits the print space and maintains its visual impact.
- Resolution and DPI: Ensure the image resolution is appropriate for the intended print size. Higher DPI values are generally necessary for larger prints.
- Bleed Area: Consider the bleed area when cropping images for print. This extra space allows for printing without white edges.
- Margins: Crop images to maintain appropriate margins, which are critical for proper placement within the final print product.
Using Guides and Grids
Guides and grids are indispensable tools in Photoshop for precise cropping. They provide visual aids that enhance accuracy and consistency, especially when dealing with complex compositions or specific aspect ratios. These tools streamline the cropping process, making it more efficient and less prone to errors.Using guides and grids allows for more accurate cropping, especially in situations where maintaining precise proportions is crucial.
Whether you’re working with a photograph, a graphic design element, or a complex image manipulation, guides and grids provide a solid foundation for accurate cropping.
Guide Usage for Accurate Cropping
Guides in Photoshop are helpful for creating straight lines, accurately positioning elements, and maintaining consistent layouts within an image. They act as visual references, allowing you to align elements or create precise cropping boundaries. To add a guide, use the ‘Rulers’ tool, and click and drag to create a horizontal or vertical guide. Guides can be moved, resized, and deleted as needed.
These adjustable lines provide a visual framework for accurate cropping.
Grid Usage for Enhanced Cropping, How to crop in Photoshop
Photoshop grids are beneficial for achieving specific aspect ratios or creating a more structured layout for cropping. They are particularly helpful for creating consistent patterns or grid-based designs. The grid displays a series of intersecting lines, enabling the user to achieve specific proportions for cropping. To add a grid, navigate to the ‘View’ menu and select ‘New Guide.’ Photoshop provides options to customize grid size, spacing, and color.
This helps achieve consistency and clarity in the cropping process.
Customizing Guide and Grid Settings
Precise cropping hinges on tailored guide and grid settings. Photoshop allows for extensive customization to align with your specific needs. The ‘View’ menu offers options to modify the grid’s color, size, and spacing. Adjusting the grid’s parameters ensures alignment with specific proportions or design needs. Guides can be moved, deleted, or added.
This flexibility empowers you to tailor the environment for precise cropping.
Table of Guide and Grid Options
| Option | Description |
|---|---|
| Grid Size | Determines the number of columns and rows in the grid. |
| Grid Color | Sets the color of the grid lines. |
| Grid Spacing | Adjusts the distance between grid lines. |
| Guide Position | Allows precise placement of guides on the canvas. |
| Guide Color | Specifies the color of the guide lines. |
Benefits for Complex Cropping Tasks
Guides and grids prove invaluable in handling complex cropping tasks. When working with multiple elements or maintaining precise proportions, guides offer a robust visual reference. For example, when cropping a photograph to fit a specific aspect ratio, grids can aid in ensuring the proportions are correct. They simplify the cropping process by providing visual cues, reducing the chance of error, and increasing efficiency.
This aids in maintaining consistent ratios, creating balanced layouts, and achieving desired compositions when dealing with intricate cropping requirements.
Understanding Image Resolution and Cropping
Image resolution plays a crucial role in digital image manipulation, particularly when cropping. Understanding the relationship between resolution and cropping is essential for maintaining image quality and achieving desired results. Cropping, while seemingly simple, can significantly impact the final product if not handled with awareness of these factors.Image resolution is fundamentally defined by the number of pixels per unit area (typically inches or centimeters).
A higher resolution image contains more pixels, resulting in finer details and potentially better quality when enlarged or manipulated. This higher density of pixels allows for greater flexibility in cropping without significant loss of image quality. Conversely, lower resolution images may exhibit pixelation or loss of detail when cropped.
Relationship Between Image Resolution and Cropping
Cropping an image essentially removes portions of the existing pixels. If the original image has a high pixel density, cropping a significant portion of the image will still leave enough pixels to maintain detail and quality. However, cropping a large section of a low-resolution image may lead to visible pixelation and loss of detail. A high-resolution image can afford more cropping without a noticeable impact on quality, unlike a low-resolution image, where even small crops can affect quality.
Impact of Cropping on Image Quality and Pixel Density
Cropping directly affects pixel density. When you crop, you reduce the effective size of the image. The density of pixels in the remaining area remains the same; however, the overall pixel count decreases. If the initial pixel density is high, the impact of cropping on pixel density is negligible. However, if the initial pixel density is low, cropping can significantly impact the overall quality by reducing the number of available pixels to represent the remaining image content.
Resampling and Its Effect on Cropping
Resampling, in the context of image editing, is a process that alters the resolution of an image by adding or removing pixels. When cropping, resampling can be necessary if the aspect ratio or size of the cropped image needs to be changed to accommodate a new format or to compensate for the cropped portion. If resampling is performed during or after cropping, the process can affect the final quality.
Incorrect resampling methods may lead to blurring, artifacts, or a loss of sharpness, especially in low-resolution images. High-resolution images can tolerate more aggressive resampling after cropping without significant quality loss.
Cropping High-Resolution Images Without Significant Quality Loss
High-resolution images offer substantial flexibility during cropping. Carefully cropping high-resolution images, such as those captured with professional cameras or scanned from high-quality sources, typically results in little to no noticeable loss of quality. Cropping large sections of such images will not noticeably affect pixel density or detail.
Maintaining Image Quality While Cropping
To maintain the highest possible image quality during cropping, it is essential to consider the original resolution of the image. Start with high-resolution images whenever possible. Also, avoid excessive cropping, particularly when dealing with low-resolution images. Consider resampling only when necessary to achieve the desired dimensions or aspect ratio, and employ appropriate resampling techniques to minimize artifacts and loss of sharpness.
Using appropriate software tools that support high-quality resampling can greatly aid in preserving image quality during cropping.
Undoing and Redoing Cropping Actions
Mastering the undo and redo functions in Photoshop is crucial for navigating cropping adjustments effectively. It allows for easy recovery from accidental mistakes, experimentation with different cropping options, and ultimately, greater control over image editing.The undo and redo commands are essential tools for maintaining a workflow that balances efficiency with the ability to correct errors or explore various cropping possibilities.
These actions, along with the history panel, provide a comprehensive system for managing cropping operations and ensuring a smoother editing experience.
Undoing Cropping Actions
Photoshop’s undo feature allows you to reverse the most recent cropping action. This is a fundamental step in the editing process, allowing for immediate correction of errors. Clicking the “Undo” button (often represented by a curved arrow) will restore the image to its previous state, effectively eliminating the last cropping operation. The number of undo steps available depends on your settings, which can be adjusted in Photoshop preferences.
Redoing Cropping Actions
The redo command is the precise counterpart to undo. It reinstates the cropping action that was previously undone. It’s useful for reapplying a cropping step if you realize the previous undo was unintended. The redo command is represented visually by a curved arrow that points in the opposite direction of the undo arrow. It functions in a similar way to the undo feature, sequentially reapplying the steps that were previously reversed.
The History Panel
The History panel in Photoshop provides a visual record of all actions performed on an image, including cropping. It displays a chronological sequence of edits, represented as thumbnails. This panel acts as a time machine for your image, allowing you to step back through various stages of editing. By clicking on a specific thumbnail, you can instantly revert to that precise point in the image’s history, potentially undoing a series of cropping actions at once.
Recovering from Accidental Cropping Mistakes
Accidental cropping mistakes are common, but they are easily corrected. To recover from an accidental crop, utilize the undo feature to reverse the unwanted change. If the undo function doesn’t resolve the issue, use the History panel to revert to a previous, error-free state. Careful observation of the history panel and the undo/redo tools allows you to precisely control the editing process, minimizing the chance of irreversible errors.
Saving Multiple Versions of Cropped Images
Maintaining multiple versions of cropped images is essential for archiving and future reference. To ensure you have different cropped versions, duplicate the original image before applying any cropping alterations. You can then save each cropped variation as a separate file, clearly identifying the different cropping adjustments in the file names. Alternatively, you can create copies of layers in Photoshop and experiment with cropping different layers.
This method allows you to retain all original data and easily revert to earlier stages.
Image Adjustments after Cropping
Post-cropping adjustments refine the image’s overall aesthetic, enhancing the visual impact of the cropped area. These adjustments go beyond simply cropping the image and aim to optimize the visual elements that remain after the cropping process. This section details crucial adjustments for color balance, sharpness, contrast, brightness, levels, curves, vibrance, and saturation.
Color Balance Adjustments
Color balance adjustments are essential for achieving a consistent and harmonious color palette within the cropped image. Variations in lighting and exposure can create discrepancies in color tones across the image. By adjusting the color balance, these inconsistencies can be corrected, resulting in a more visually appealing and balanced final product. These adjustments can be made using Photoshop’s color balance tool, allowing for precise control over red, green, and blue channels.
Sharpness Adjustments
Sharpness adjustments are critical for enhancing the detail and clarity of the cropped image. Cropping can sometimes reduce the perceived sharpness of an image, especially if the original image was already on the lower end of the sharpness spectrum. Sharpness adjustments help to restore the details and make the image appear crisper and more visually engaging. Photoshop offers several tools for adjusting sharpness, allowing users to fine-tune the level of sharpness according to their needs.
Contrast and Brightness Adjustments
Contrast and brightness adjustments are crucial for optimizing the visual impact of the cropped image. They control the difference between the darkest and lightest areas in the image, influencing how much detail is visible in highlights and shadows. Adjusting these parameters allows users to emphasize certain features and ensure that details are well-defined, thereby improving the overall quality of the image.
For instance, adjusting contrast can enhance the definition of textures, while adjusting brightness can bring out the details in dark or shadowy areas.
Levels and Curves Adjustments
Levels and curves adjustments offer more advanced control over the tonal range of the image. Levels adjust the distribution of tones across the image, enabling users to modify the highlights, mid-tones, and shadows. Curves adjustments provide a more precise method for manipulating the tonal range. These adjustments can be highly effective in improving the overall quality of the cropped image by refining the tonal variations.
Curves offer a visual representation of the tonal adjustments, making it easier to understand and fine-tune the changes.
Other Image Adjustments (Vibrance and Saturation)
Vibrance and saturation adjustments are crucial for optimizing the colors within the cropped image. Vibrance adjustments specifically target the muted colors within the image, enhancing their intensity without affecting the already saturated colors. Saturation adjustments, on the other hand, affect all colors equally, increasing or decreasing their intensity. These adjustments are vital for creating a more visually appealing and engaging image, particularly when working with images that lack vibrancy or saturation.
For example, a lack of vibrancy can make a landscape appear dull, while insufficient saturation can make portraits look washed out. Applying these adjustments can effectively remedy such issues.
Troubleshooting Common Cropping Issues: How To Crop In Photoshop
Cropping in Photoshop, while a fundamental tool, can sometimes lead to unexpected results. Understanding potential pitfalls and how to address them is crucial for achieving desired outcomes. This section delves into common cropping errors, their causes, and effective solutions.Common cropping errors stem from various factors, including user mistakes, software limitations, and image characteristics. Careful attention to detail and a methodical approach are key to avoiding and correcting these issues.
Identifying Cropping Errors
Often, the first sign of a cropping problem is an aesthetically displeasing or functionally incorrect result. This can manifest in several ways, from noticeable distortions to awkward or unusable compositions. Careful examination of the cropped image is essential.
Correcting Geometric Distortion
Distorted images after cropping can arise from several factors. One common cause is using inappropriate cropping tools for the image’s content. For example, a tool designed for rectangular cropping may not be suitable for objects with complex or non-linear edges. This often occurs when images with perspective issues are cropped without appropriate correction. In cases of significant distortion, the “Transform” command can be utilized to correct minor geometric warping.
Cropping in Photoshop is pretty straightforward. Select the Crop tool, define your desired area, and then hit enter. Knowing when to use Photoshop vs Lightroom: Photoshop vs Lightroom: Which One Should You Use? is crucial, though. Ultimately, Photoshop offers more advanced cropping options, ideal for complex edits.
Activating the “Free Transform” tool allows for precise adjustments to the image’s corners, correcting the perspective or shape distortion. Careful use of the transform handles (the small squares and circles) allows for resizing, rotating, and skewing to counteract these issues.
Handling Perspective Issues
Perspective distortion in cropped images can result from uneven or skewed angles in the original image. This often occurs when photographing objects or scenes from unusual angles or when working with images that already have inherent perspective problems. Photoshop’s tools can help mitigate this problem. Utilizing the “Perspective” tool within the “Edit” menu can help straighten skewed lines and create a more natural, undistorted view.
This feature is particularly helpful for images with strong architectural elements or landscapes with receding lines.
Troubleshooting Irregular Shapes
Irregular shapes, such as those from intricate objects or images with unusual contours, may present cropping challenges. Incorrect cropping can result in parts of the object being cut off, creating a jarring or incomplete look. Using the “Crop” tool with its precise selection capabilities can help to manage irregular shapes. In cases of extreme complexity, the “Magic Wand” tool might be helpful in selecting the area to crop, though it may require some adjustment.
Tips and Tricks for Efficient Cropping

Mastering efficient cropping techniques in Photoshop can significantly boost your workflow and deliver professional-quality results. These tips and tricks cover a range of approaches, from simple keyboard shortcuts to advanced plugin utilization, ensuring consistent and speedy cropping.Effective cropping is more than just trimming excess; it’s about strategically composing your image for optimal impact. Understanding these techniques empowers you to streamline your process and achieve consistent high-quality outputs.
Keyboard Shortcuts for Faster Cropping
Knowing Photoshop’s keyboard shortcuts is crucial for streamlining the cropping process. These shortcuts allow for rapid adjustments and precise control, saving valuable time.
- Ctrl+Alt+X (Windows) / Cmd+Option+X (Mac): This combination instantly crops the image to the selection boundary, eliminating the need for further confirmation steps.
- Alt+drag (Windows) / Option+drag (Mac): This method allows you to drag and resize the crop box by maintaining its proportions. A common use case is for maintaining aspect ratios during cropping.
- Spacebar: The spacebar allows for moving the crop box while maintaining the cropping area.
- Ctrl+Z (Windows) / Cmd+Z (Mac): The standard undo command is essential for correcting mistakes quickly and efficiently.
Batch Cropping Multiple Images
Batch processing is a time-saver when working with numerous images. Utilizing Photoshop’s batch processing features, or external tools, can significantly reduce the time spent on repetitive cropping tasks.
- Photoshop’s Batch Processing Feature: Photoshop allows you to apply actions (including cropping) to a series of images in a folder. This feature is invaluable for tasks involving consistent cropping procedures across a large number of files.
- External Tools: Dedicated image editing software or specialized scripting languages like Python, along with image processing libraries like Pillow, provide powerful tools for batch cropping multiple images with consistent parameters. These methods are useful when you need to apply more complex cropping rules to a set of images.
Advanced Cropping Techniques using Plugins or Scripts
Photoshop plugins and scripts provide advanced tools for specialized cropping tasks that go beyond the standard tools. These tools enhance accuracy and automate intricate processes.
- Plugins for Specific Purposes: Specialized plugins can automate the cropping process based on predefined criteria or parameters, such as aspect ratio, subject detection, or watermark insertion. These are particularly useful when you need to implement intricate rules or apply specific formats to a large number of images.
- Custom Scripts: Custom scripts can automate the entire cropping process, including image pre-processing, selection, cropping, and post-processing, based on complex criteria. This method offers a high level of customization and control over the entire cropping procedure.
Optimizing Workflow for Consistent Cropping Results
Establishing a consistent workflow is critical for achieving repeatable and high-quality results. This includes establishing a set of rules and procedures for all cropping tasks.
- Predefined Cropping Templates: Create predefined cropping templates to ensure consistent image proportions. This is helpful for maintaining brand consistency in various projects or when dealing with repetitive tasks.
- Consistent Cropping Practices: Establish clear rules for cropping based on the specific needs of each project. This might include defining the aspect ratio, the cropping guidelines, and the positioning of elements within the frame.
Epilogue
In conclusion, mastering the art of cropping in Photoshop empowers you to transform ordinary images into extraordinary works of art. From fundamental techniques to sophisticated strategies, this guide has equipped you with the knowledge to crop images for various purposes, from social media to print media. By understanding image resolution, adjustments, and troubleshooting common issues, you’ll be able to achieve professional-level results every time.
Helpful Answers
What are the common errors when cropping images?
Common cropping errors include improper use of tools, inaccurate aspect ratios, and neglecting image resolution. Distorted perspectives and irregular shapes can also result from improper cropping techniques.
How can I crop an image to a specific aspect ratio?
Photoshop offers tools to maintain the desired aspect ratio during cropping. Utilize the guidelines and aspect ratio options available within the cropping tools to achieve precise results.
How do I undo a cropping action?
Photoshop provides an undo feature. Use the “Edit” menu or keyboard shortcuts to reverse recent cropping actions. The history panel also provides options to revisit previous versions of your image.
Can I crop multiple images at once?
Yes, Photoshop allows batch cropping of multiple images. Use the batch processing features or scripting to automate the cropping process for efficiency.


