How to Remove Backgrounds in Photoshop Like a Pro provides a comprehensive guide to mastering background removal techniques in Photoshop. From basic tools to advanced strategies, this guide covers everything you need to quickly and effectively remove backgrounds in various image scenarios. Whether you’re a beginner or an experienced designer, this guide will equip you with the knowledge and skills to handle any background removal task with confidence.
The tutorial will walk you through different Photoshop tools, including the Quick Selection Tool, Magic Wand Tool, Pen Tool, Layer Masks, and Content-Aware Fill. Each tool is explained in detail, accompanied by step-by-step instructions and practical examples to enhance your understanding.
Introduction to Background Removal

Background removal in Photoshop is a crucial technique for isolating subjects from their surroundings. It’s a fundamental skill for various design projects, allowing designers to seamlessly integrate images into different contexts. This process empowers users to create compelling visuals, from product photography to graphic design.The importance of background removal extends far beyond aesthetics. It’s essential for tasks such as creating marketing materials, product catalogs, and website graphics.
The technique also underpins more complex tasks, like creating layered compositions, where objects need to be isolated for further manipulation or integration into different projects.
Different Scenarios Requiring Background Removal
Background removal is vital in numerous design scenarios. Product photography benefits significantly from background removal, allowing for a clean, focused presentation of the product. In marketing materials, removing distracting backgrounds helps highlight the product or service. Website design often uses background removal to create eye-catching visuals. In graphic design, removing backgrounds can prepare images for various applications like posters, flyers, and brochures.
Tools for Background Removal in Photoshop
Photoshop provides a variety of tools for background removal, catering to different needs and complexities. The most common tools include the Pen Tool, which allows for precise selections, and the Magic Wand Tool, for quick selections of similar colors. The Quick Selection Tool facilitates selections based on color and edges. For more complex backgrounds, the Content-Aware Fill Tool can intelligently fill in the removed area.
The Lasso Tool and the Magic Eraser Tool offer additional options, each with their own specific use cases.
Basic Workflow for Removing Backgrounds
A fundamental workflow for removing backgrounds in Photoshop, suitable for beginners, involves these steps:
- Select the subject: Carefully select the subject using the appropriate tool. If the background is relatively simple, the Magic Wand Tool can be effective. For intricate shapes or complex backgrounds, the Pen Tool or Quick Selection Tool provides better control. Ensure the selection is as accurate as possible to avoid unwanted areas being removed or preserved.
- Invert the selection: This crucial step reverses the selection, highlighting the background. This is important for the next step.
- Remove the background: With the background selected, choose the “Delete” key, or use the “Delete” or “Backspace” commands in your keyboard.
- Refine the selection (if necessary): If there are imperfections in the selection, use tools like the Refine Edge to improve the edge sharpness. This step ensures a seamless transition between the subject and the new background.
- Content-Aware Fill (Optional): For complex backgrounds, the Content-Aware Fill Tool can fill in the area left by the removed background, creating a more natural result. This option may be suitable for seamless integration into different backgrounds.
Quick Selection Tool Mastery
The Quick Selection Tool in Photoshop is a powerful yet versatile tool for selecting objects with varying degrees of complexity. Its ability to adapt to diverse image types and intricate shapes makes it a go-to for many professional image editors. Mastering this tool can significantly streamline your workflow when dealing with background removal tasks.
Quick Selection Tool Functionalities
The Quick Selection Tool allows for the selection of areas in an image based on similar colors and edges. It works by automatically identifying and selecting contiguous areas that match the sampled color or edge characteristics. This intuitive approach is especially helpful for selecting objects with defined edges, though it also handles more subtle transitions with appropriate adjustments.
Refining Selections
Various options exist to refine selections made with the Quick Selection Tool. These options allow for more precise control over the selection boundaries. For example, you can adjust the brush size and hardness for greater precision when working with complex edges. Using the “Add to Selection” and “Subtract from Selection” options provides further control, enabling you to incrementally expand or reduce the selected area.
This iterative approach ensures a higher degree of accuracy in your selections.
Using the Quick Selection Tool for Complex Shapes
The Quick Selection Tool is effective for intricate shapes, such as those with multiple curves and irregularities. A key strategy is to start with a rough selection, then refine it iteratively. Using the “Add to Selection” and “Subtract from Selection” tools is crucial in this process, allowing for precise adjustments to the selected area. Repeated application of these options ensures that the selection accurately captures the desired shape.
It’s important to understand that this iterative approach may require multiple rounds of refinement for complex subjects.
Using the Quick Selection Tool with Different Image Types
The Quick Selection Tool excels in a variety of image types. For example, when dealing with images featuring intricate patterns, the tool’s ability to recognize subtle color differences allows for accurate selections, provided the patterns have clear color boundaries. Similarly, with textured surfaces, the tool’s edge detection capability proves helpful, but manual adjustments may be necessary for accurate selections, especially where textures have subtle variations.
Mastering background removal in Photoshop takes practice, but it’s a valuable skill. Knowing when to use Photoshop versus Lightroom is key; for intricate edits like complex background removals, Photoshop’s power is unmatched. Photoshop vs Lightroom: Which One Should You Use? Ultimately, the best approach for removing backgrounds in Photoshop hinges on understanding your specific needs and the complexity of the image.
Learning the various tools and techniques within Photoshop will equip you with the ability to handle any background removal task.
Quick Selection Tool Comparison
| Tool | Strengths | Weaknesses |
|---|---|---|
| Quick Selection Tool | Intuitive, fast initial selection, handles smooth and sharp edges, effective with simple to moderately complex shapes | Can struggle with highly detailed, irregular shapes, requires iterative refinement, might not be the best for extremely complex patterns |
| Lasso Tool | Precise selection for freehand shapes, very good for intricate and complex shapes. | Time-consuming for larger selections, not as fast as Quick Selection for basic selections. |
| Magic Wand Tool | Quick selection of areas with similar colors, simple and straightforward. | Struggles with complex shapes, may select unwanted areas based on color alone. |
| Pen Tool | Highly precise, allows for very complex and intricate shapes, best for very detailed shapes | Requires advanced knowledge, significantly slower for basic selections. |
Magic Wand Tool Techniques
The Magic Wand Tool in Photoshop is a valuable asset for basic background removal. Its simplicity and speed make it a go-to choice for straightforward selections, especially when dealing with uniform backgrounds. Understanding its nuances, particularly adjusting tolerance, allows for more precise selections. Learning to combine it with other tools enhances its capabilities, making it a powerful tool in a photographer’s arsenal.The Magic Wand Tool works by selecting pixels based on their color similarity.
Mastering background removal in Photoshop requires a solid understanding of layers. Knowing how to effectively use layers, as detailed in Understanding Layers in Photoshop: A Simple Explanation , is crucial for achieving professional-level results. This knowledge forms the bedrock of techniques like masking and adjustment layers, ultimately leading to smoother, more polished background removal in your Photoshop projects.
A tolerance value dictates how much variation in color is acceptable within the selection. Mastering this tool allows for quick and effective background removal in various scenarios.
Adjusting Tolerance for Precision
The tolerance setting is crucial for achieving accurate selections. A lower tolerance value will select pixels that are very similar in color, while a higher value will select pixels with more color variation. Experimentation is key to finding the optimal tolerance value for a given image. Finding the right tolerance is an iterative process, often requiring adjustments based on the specific image characteristics.
For instance, a low tolerance might be appropriate for selecting a solid color background, but a higher tolerance might be necessary for backgrounds with subtle gradients. A good practice is to start with a low tolerance and gradually increase it until the desired selection is achieved.
Comparing Magic Wand to Other Tools
The Magic Wand Tool excels at quickly selecting areas of uniform color. However, its limitations become apparent when dealing with complex images. Other tools, like the Quick Selection Tool or the Pen Tool, offer more flexibility and control, particularly when dealing with irregular shapes or gradients. The Magic Wand Tool’s strength lies in its speed and simplicity, making it ideal for basic selections.
The Quick Selection Tool is often preferred for more complex selections, and the Pen Tool is best for precise, intricate selections.
Using Magic Wand with Different Backgrounds
The Magic Wand Tool’s effectiveness varies depending on the background. For solid color backgrounds, a low tolerance often yields accurate results. For backgrounds with subtle gradients or textures, a higher tolerance is often required. Consider a picture of a person in front of a blue sky. A low tolerance setting might select only the exact shade of blue in the sky, but a slightly higher tolerance can include the adjacent shades of blue, ensuring the complete background is selected.
Adjusting the tolerance is a crucial step for achieving the best results.
Combining Magic Wand with Other Tools
The Magic Wand Tool can be effectively used in conjunction with other selection tools. For instance, selecting the initial area with the Magic Wand and then refining the selection with the Quick Selection Tool can produce a more precise outcome. This combination allows for a balance between speed and precision. This technique is especially helpful when dealing with intricate backgrounds.
Begin with the Magic Wand to establish the initial selection; then, refine it with the Quick Selection Tool for greater precision.
Pen Tool Precision
The Pen Tool in Photoshop is a powerful tool for intricate background removal, offering unparalleled precision compared to other selection methods. It allows for the creation of custom paths, enabling you to isolate complex shapes and areas with exceptional control. This precision is invaluable when dealing with images featuring intricate details or complex shapes.The Pen Tool’s flexibility stems from its ability to define paths using anchor points.
Understanding how to manipulate these points and the resulting paths is crucial for mastering this tool. Proper use of anchor points and paths allows for accurate selection of objects against complex backgrounds, even those with subtle gradients or overlapping elements.
Anchor Points and Paths
The Pen Tool works by creating anchor points, which define the shape of the path. These points can be moved and adjusted, allowing for precise control over the path’s curvature. Different types of anchor points influence the shape and flexibility of the path. A corner anchor point defines a sharp angle in the path, while a smooth anchor point creates a smooth curve.
These points are connected by segments, forming the path itself. Understanding the different types of anchor points and their influence on the path’s shape is essential for creating accurate selections. The resulting path, once closed, defines the area to be selected or masked.
Creating Precise Selections
This section details a step-by-step guide for creating precise selections using the Pen Tool:
- Select the Pen Tool: Choose the Pen Tool from the toolbar. It is usually represented by a pen icon.
- Add Anchor Points: Click to create anchor points along the Artikel of the object you want to isolate. These points define the path’s shape.
- Adjust Anchor Points: Use the direct selection tool to manipulate anchor points to fine-tune the path’s shape and ensure it accurately follows the object’s Artikel.
- Convert Anchor Points: Use the Convert Anchor Point Tool to adjust the angle of the path between anchor points for a smooth, continuous path. Smooth curves are created by using smooth anchor points.
- Close the Path: Once the path is complete, click the starting anchor point to close the path. This completes the selection.
- Make Selection: Once the path is closed, select “Make Selection” from the Pen Tool options to convert the path into a selection.
- Refine the Selection (Optional): In cases with complex or irregular Artikels, refining the selection with the Refine Edge option can improve the precision of the selection, handling issues like hair, fur, or fuzzy edges.
Adjusting Precision for Different Details
The Pen Tool’s precision can be adjusted for different image details. For instance, intricate details require more anchor points for accuracy, while simpler shapes need fewer.
- Hair or Fur: For hair or fur, use many anchor points to closely follow the intricate details of the object.
- Complex Shapes: For intricate shapes with complex curves, more anchor points are needed to ensure accuracy.
- Straight Lines: For straight lines, fewer anchor points are required. Using a smooth anchor point can streamline the selection.
Workflow for Intricate Backgrounds
For complex backgrounds, consider the following workflow:
- Divide into Sections: Divide the object into smaller sections for easier handling. This approach allows for greater precision when selecting intricate details.
- Select Each Section: Use the Pen Tool to carefully select each section of the object.
- Combine Selections: Combine the selections of the individual sections into a single selection for the entire object.
- Refine Edge (Optional): Use the Refine Edge option for final adjustments and improvements to the selection’s precision.
Layer Masks for Background Removal
Layer masks offer a powerful, non-destructive approach to background removal in Photoshop. Unlike methods that directly alter the image, layer masks allow you to selectively reveal or hide portions of a layer, providing flexibility and control during the editing process. This technique is particularly useful for complex images where a precise selection might be challenging.Layer masks work by creating a secondary layer that acts as a stencil for the primary layer.
Areas where the mask is white reveal the corresponding pixels of the layer below, while areas that are black hide those pixels. Grayscale values in the mask create a gradual transition, allowing for smooth blending and refined selections.
Understanding Layer Masks
Layer masks are essentially grayscale images that control the visibility of the underlying layer. White reveals 100% of the layer, black hides it completely, and shades of gray create partial visibility. This allows for subtle adjustments and gradual transitions, which is crucial for complex images. This non-destructive approach is a hallmark of Photoshop’s editing philosophy.
Using Layer Masks for Background Removal
To use layer masks for background removal, first create a selection of the subject you want to keep. Next, create a new layer mask for the layer containing your subject. Then, fill the mask with black. This will hide the entire subject layer, effectively isolating the background. Invert the selection (Command/Control + Shift + I) and then use a brush with a low opacity to paint the areas you want to reveal.
Adjust the brush size and opacity for precision.
Refining Selections with Layer Masks
Layer masks excel at refining selections that might be imperfect from other tools. For instance, if you use the Quick Selection Tool and need to remove some unwanted areas, a layer mask lets you paint those parts black. Conversely, you can use a soft brush with a low opacity to refine the selection edges, ensuring smooth transitions between the subject and background.
Creating and Editing Layer Masks
Several ways exist to create layer masks. One method is to create a selection and then use the ‘Layer Mask’ option in the Layer menu. Another is to use a selection tool to create a mask. Additionally, you can paint directly on the mask with a brush to reveal or hide specific areas.
Layer mask editing is iterative. You might need to apply multiple brush strokes to achieve the desired result. Adjusting brush size, hardness, and opacity are key to precision.
Examples of Complex Image Scenarios
Removing a background from a portrait with intricate details like hair requires a meticulous approach. Use a small, soft brush with low opacity to carefully reveal the hair strands. A complex image like a product shot with a cluttered background demands precision. Use a combination of tools like the Pen Tool and the Quick Selection Tool, then refine the selection with a layer mask.
For instance, a complex scene with many elements that need isolation, layer masks allow for gradual reveals, offering a less abrupt approach to background removal compared to other methods.
Content-Aware Fill for Background Removal: How To Remove Backgrounds In Photoshop Like A Pro
Content-Aware Fill, a powerful tool in Photoshop, offers a unique approach to background removal, particularly when intricate details or complex shapes are involved. It leverages the surrounding pixels to intelligently fill in the gap left after an object is removed, making it a valuable asset in scenarios where precision editing is challenging.The Content-Aware Fill tool intelligently analyzes the surrounding pixels and uses that information to generate a replacement for the removed area.
This is achieved by identifying patterns and relationships within the image, and then using those patterns to create a seamless integration. This differs from other methods which may leave noticeable artifacts or distortions.
Function of Content-Aware Fill
Content-Aware Fill is designed to fill in areas where pixels have been deleted or modified, making it ideal for removing backgrounds from images. It does not simply fill the area with a solid color or pattern, but instead, it attempts to understand the image’s content and replace the missing data with a realistic representation of what was likely there.
This is often more sophisticated than other fill tools, especially in situations where the subject’s surroundings contain intricate patterns or textures.
Limitations and Advantages of Content-Aware Fill
Content-Aware Fill is not a perfect solution for every background removal task. While it can produce impressive results in many cases, it may struggle with highly complex or unusual textures. It’s important to understand that the tool relies on the surrounding context, and if the context is not representative or well-defined, the results might be less than ideal.
However, the advantages are considerable. Its ability to blend in seamlessly with existing elements and maintain detail makes it a valuable tool for complex subjects, particularly those with intricate textures or subtle gradations.
Examples of Highly Effective Scenarios
Content-Aware Fill shines in scenarios involving detailed textures, like removing a person from a crowded marketplace or a subject from a complex architectural scene. It can also effectively remove a person from a busy street scene or a product from a cluttered shelf. A key element of its effectiveness lies in the surrounding details. The tool excels when the subject has clear boundaries and when the surrounding elements are well-defined and relatively consistent in texture and pattern.
Using Content-Aware Fill for Different Backgrounds
The effectiveness of Content-Aware Fill is greatly influenced by the complexity of the background. For simple backgrounds, like a plain wall, the tool performs exceptionally well, creating a seamless transition. For more intricate backgrounds, like a dense forest or a busy cityscape, the tool may require some adjustments. Careful selection of the area to be filled is crucial for accurate results.
The tool works best when the surrounding area provides sufficient visual information for the algorithm to interpret and replicate.
Comparison Table: Content-Aware Fill vs. Other Techniques
| Feature | Content-Aware Fill | Quick Selection Tool | Magic Wand Tool | Pen Tool |
|---|---|---|---|---|
| Accuracy | High, especially with detailed backgrounds | Moderate, prone to errors with complex edges | Low, often requires multiple selections | High, requires precise control |
| Complexity | Medium, requires understanding of limitations | Low | Low | High |
| Time | Variable, depending on complexity | Variable | Variable | Variable |
| Suitability for Complex Backgrounds | Good | Poor | Poor | Excellent |
Advanced Techniques for Difficult Backgrounds
Mastering Photoshop background removal extends beyond simple shapes and colors. Complex patterns, textures, subtle gradients, and blends present unique challenges. This section delves into advanced techniques for tackling these intricate scenarios, emphasizing the combined use of tools and strategies for optimal results while preserving image detail.Successfully removing backgrounds with intricate details often requires a multifaceted approach. This section details how to leverage a combination of tools, rather than relying on a single technique.
This allows for precise control and superior results.
Removing Backgrounds with Complex Patterns or Textures
Complex patterns and textures, such as woven fabrics, brickwork, or intricate tile designs, can prove difficult for standard background removal methods. These patterns often contain repeating elements that are challenging for automatic selection tools to distinguish from the subject. A strategic combination of tools provides the most effective solution.
Utilizing Multiple Tools in Combination
Handling complex backgrounds often necessitates a combination of techniques. For instance, the Quick Selection Tool might be used to initially select the subject, followed by the Pen Tool for refining the selection around intricate details, and the Layer Mask for final adjustments. The Magic Wand Tool can also be helpful for selecting similar color areas within the pattern, then refining the selection with other tools.
This layered approach ensures accuracy and precision, particularly for patterns and textures.
Handling Backgrounds with Subtle Gradients or Blends
Subtle gradients or blends in the background, such as smooth transitions between colors or shades, can be challenging for automated tools. The Pen Tool, coupled with a Layer Mask, offers the most control. The Pen Tool enables precise tracing of the gradient’s edge, and the Layer Mask allows for seamless blending corrections. Manual adjustment layers can also be helpful to fine-tune the background.
Examples of Complex Background Removal Scenarios and Solutions, How to Remove Backgrounds in Photoshop Like a Pro
Consider a photograph of a person standing in front of a tapestry with a complex weave. Using the Quick Selection Tool for an initial selection of the person, followed by the Pen Tool for detailed refinements, and finally using a Layer Mask for further adjustments to blend the background seamlessly around the edges. This ensures that the subject is isolated while maintaining the integrity of the tapestry.
Or, when photographing someone in front of a brick wall, use the Quick Selection Tool for the initial selection of the subject, then fine-tune the selection using the Pen Tool to get the exact edge. A Layer Mask is ideal to remove the background, making the edges look natural.
Preserving Image Details During Background Removal
Preserving image detail during background removal is crucial for a professional result. Using non-destructive techniques is paramount. Employing the Layer Mask allows for adjustments without affecting the original image data. Layer Masks allow you to make adjustments to the selection and refine the edges of the subject, preserving important details in the process. This approach minimizes the risk of introducing artifacts or blurring.
The Content-Aware Fill feature can also be effectively used for more complex backgrounds and situations. This feature allows you to fill in the background areas based on the surrounding details, preserving a natural appearance.
Image Preparation and Optimization
Preparing your images effectively before background removal is crucial for achieving optimal results. A well-prepared image translates to a smoother, more accurate removal process, minimizing errors and maximizing efficiency. This section will detail essential considerations for image quality, resolution, and format, ultimately leading to better background removal outcomes.Image preparation isn’t just about using the right tools; it’s about understanding the underlying factors influencing the success of your background removal task.
Proper contrast, lighting, and file format all contribute to the overall quality of the final product.
Image Resolution and Quality
Image resolution directly impacts the detail and precision attainable during background removal. High-resolution images, with more pixels, allow for finer detail retention and more accurate removal of intricate elements. Lower resolution images, conversely, may result in a loss of detail and a more pixelated outcome. The resolution requirements will vary based on the intended use of the final image.
For web use, a lower resolution might suffice, while high-resolution is essential for print applications. Consider the output size and resolution requirements before starting your background removal process.
Image File Formats
Different image file formats affect how the image data is stored and subsequently processed. Formats like JPEG, often used for web images, employ compression techniques that can degrade image quality, potentially impacting the accuracy of background removal. Lossless formats, such as PNG, retain more detail, which is advantageous for complex background removal tasks. Choosing the appropriate file format based on your needs is essential.
Image Contrast and Lighting
Adequate contrast and lighting are critical for successful background removal. Images with strong contrast between the subject and background make the removal process easier. Sufficient lighting illuminates the subject, ensuring clear details and minimizing shadowing that can hinder the removal process. Images with poor contrast and lighting will require more manual effort during the removal process, which may lead to imperfections in the final result.
Image Preparation Techniques
Several techniques can enhance your image before background removal, leading to smoother results. Cropping the image to focus on the subject can simplify the removal process. Adjusting the image’s brightness and contrast using Photoshop tools will improve the visibility of details, aiding in the removal process. Reducing noise in the image through noise reduction filters can further enhance the accuracy of background removal.
These pre-removal techniques contribute significantly to the efficiency and precision of your workflow.
- Cropping: Cropping the image to focus on the subject reduces the area needing background removal, simplifying the process and improving efficiency. This is a vital first step to ensure the background removal process is focused and accurate.
- Brightness and Contrast Adjustments: Adjusting the image’s brightness and contrast levels improves the visibility of details, ensuring clearer edges and minimizing ambiguities during the removal process. This step enhances the image’s overall clarity, making it easier to discern the subject from the background.
- Noise Reduction: Reducing image noise through specialized filters smoothens the image, eliminating distracting elements that can hinder the background removal process. This step helps to produce a cleaner, more refined image, contributing to the accuracy of the background removal.
Practical Exercises and Examples
Mastering background removal in Photoshop requires practice. This section provides practical exercises with sample images, detailed steps, and explanations, allowing you to apply the learned techniques effectively. These examples will progressively increase in complexity, helping you tackle various scenarios.Effective background removal in Photoshop necessitates a structured approach. By working through these practical examples, you can gain confidence and refine your skills, moving from basic applications to more intricate scenarios.
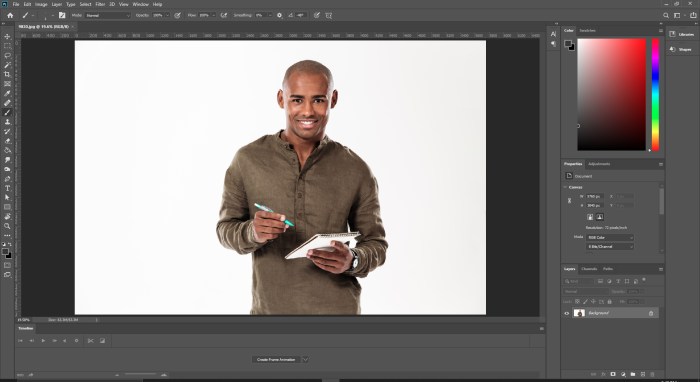
Sample Image 1: Simple Portrait
This image features a person against a plain background. The goal is to isolate the subject using the Quick Selection Tool and refine the selection with the Refine Edge tool.
- Image Description: A professional headshot of a person wearing a casual outfit, set against a solid white backdrop. The lighting is even, and the background is uniformly white. The subject is well-lit, with no significant shadows.
- Required Steps:
- Use the Quick Selection Tool to roughly select the subject.
- Refine the selection using the Refine Edge tool to remove any unwanted areas of the background and maintain sharp edges.
- Copy and paste the selected subject onto a new layer.
- Delete the original layer with the background.
- Tools Used: Quick Selection Tool, Refine Edge Tool.
Sample Image 2: Complex Background
This image presents a person against a more complex background, demanding greater precision. The exercise showcases how to combine the Quick Selection Tool, Magic Wand Tool, and Pen Tool for achieving accurate results.
- Image Description: A person standing in a park, with trees and bushes in the background. The background is complex, and the edges of the person are not sharply defined, requiring precise selection techniques.
- Required Steps:
- Use the Quick Selection Tool to select the main subject.
- Use the Magic Wand Tool to select smaller portions of the background, refine selections, and refine the edges using the Refine Edge tool.
- Use the Pen Tool to create a precise selection of the subject’s edges, especially those near the background elements.
- Combine the selections from various tools.
- Use Layer Masks to further refine the selection.
- Copy and paste the selected subject onto a new layer.
- Delete the original layer with the background.
- Tools Used: Quick Selection Tool, Magic Wand Tool, Pen Tool, Layer Masks.
Sample Image 3: Product Photography
This image presents a product against a background that needs to be removed. It will showcase how to use Content-Aware Fill to seamlessly replace the background.
- Image Description: A product like a smartphone, placed on a patterned background. The pattern is visually distracting, requiring replacement with a plain background.
- Required Steps:
- Select the background using any suitable tool.
- Use Content-Aware Fill to replace the selected background.
- Adjust the result to obtain the desired effect.
- Tools Used: Quick Selection Tool, Content-Aware Fill.
Summary Table
| Sample Image | Tools Used | Description |
|---|---|---|
| Simple Portrait | Quick Selection Tool, Refine Edge Tool | Isolate subject from a plain background. |
| Complex Background | Quick Selection Tool, Magic Wand Tool, Pen Tool, Layer Masks | Isolate subject from a complex background. |
| Product Photography | Quick Selection Tool, Content-Aware Fill | Remove distracting background and replace with a new one. |
Last Point
In conclusion, this comprehensive guide has provided a roadmap to proficient background removal in Photoshop. By mastering these techniques, you can significantly enhance your image editing capabilities and achieve professional-level results. From simple selections to complex scenarios, this guide offers a practical approach, ensuring you are well-equipped to tackle any background removal challenge. Remember to practice the techniques demonstrated to solidify your understanding and develop your own personalized workflow.
Q&A
What is the best tool for removing a simple background with a solid color?
The Magic Wand Tool is often the quickest and easiest choice for simple backgrounds with solid colors. Adjusting the tolerance setting allows for precise selections.
How can I preserve image details during complex background removal?
Using multiple tools in combination, such as the Quick Selection Tool and Layer Masks, can help preserve details. Careful selection and refinement are key to avoiding artifacts and maintaining the original image quality.
What are the limitations of using Content-Aware Fill?
Content-Aware Fill works best with backgrounds that have repeating patterns or textures that the software can understand. It might not be ideal for very unique or complex backgrounds.
What file formats are best for background removal?
High-resolution, lossless formats like TIFF or PSD are generally recommended for optimal background removal. These formats maintain the image quality, crucial for preserving detail.


