Mastering Masking Techniques in Photoshop unlocks a world of image manipulation possibilities. From subtle enhancements to dramatic transformations, mastering these techniques empowers you to achieve professional-quality results. This guide will take you through the fundamentals of masking, exploring various techniques and their applications in different scenarios.
This in-depth exploration will cover everything from basic layer masks to advanced techniques like clipping masks and blending modes. We’ll delve into practical examples and case studies, demonstrating how to apply masking in diverse scenarios, including portrait retouching, product photography, and image compositing. You’ll gain a solid understanding of how masking can elevate your image editing workflow, enabling you to create visually compelling and impactful images.
Introduction to Masking Techniques
Masking in Photoshop is a powerful technique for selectively editing portions of an image without affecting the rest. It allows precise control over which areas of an image are modified, creating a non-destructive workflow. This flexibility makes masking a cornerstone of professional image editing. By understanding the different masking methods and their applications, you can significantly enhance your image manipulation skills.Masking in Photoshop works by defining a mask—a layer or selection that acts as a stencil—that determines which parts of an image are visible or hidden.
This technique is distinct from other image editing methods as it does not directly alter the pixels themselves, preserving the original image data.
Different Masking Methods
Various masking methods exist in Photoshop, each with its own strengths and weaknesses. Understanding their unique characteristics is crucial for choosing the right approach for a given task.
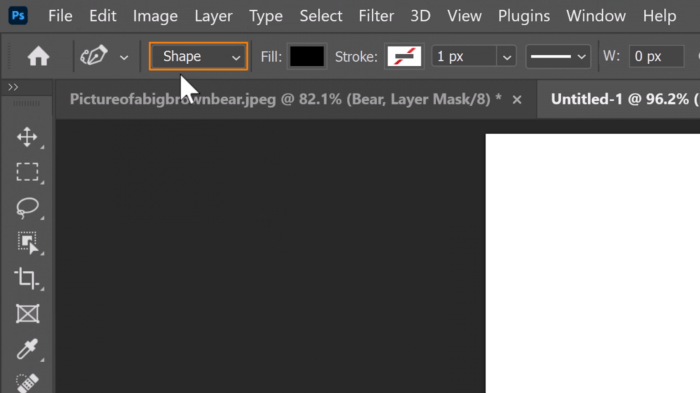
- Layer Masks:
- Layer masks are perhaps the most common type of mask. They operate on layers, allowing for gradual transitions and adjustments. This non-destructive approach is highly versatile, enabling easy changes and revisions without altering the original image data. Using layer masks, you can precisely control opacity and visibility within a layer, enabling seamless blending of different elements. For instance, you can easily mask out a portion of an image, making it transparent or semi-transparent.
- Vector Masks:
- Vector masks, built on vector shapes, offer precision and scalability. They are particularly effective for complex selections and designs, as the vector nature ensures sharpness and detail at different zoom levels. They’re particularly useful for creating precise graphic elements or illustrations within an image.
- Quick Masks:
- Quick masks offer an intuitive way to quickly select areas in an image. They provide a visual representation of the selected area, enabling a rapid masking process. This method is suitable for simpler selections where speed and ease of use are priorities. For example, quickly isolating a subject from a background.
Fundamental Concepts
Understanding the underlying principles of selection, layers, and masks is essential for mastering masking techniques.
- Selection:
- Selection tools in Photoshop allow you to define a specific area within an image. The selected area becomes the focus of subsequent editing operations, including masking. Selection tools are crucial for accurately defining the regions to be masked. A precise selection ensures the mask’s effectiveness and accuracy in isolation.
- Layers:
- Layers are fundamental to Photoshop’s non-destructive editing approach. They allow you to isolate different elements of an image, enabling independent manipulation. Each layer can be edited and masked without affecting other layers, making masking highly efficient. This separation of elements is key to achieving complex editing tasks.
- Masks:
- Masks are the stencils that control the visibility of portions of an image or layer. By applying masks, you can selectively hide or reveal specific areas without modifying the original pixel data. This crucial aspect enables non-destructive editing, allowing for iterative adjustments and revisions.
Examples of Masking Applications
Masking has wide-ranging applications in image editing, from basic corrections to intricate manipulations.
- Image Editing:
- Masking is essential for isolating subjects from backgrounds, enabling easy replacement of backgrounds or creation of unique compositions. For example, isolating a person from a portrait and placing them in a different scene.
- Retouching:
- Masking can be used for precise retouching, such as removing blemishes or adjusting skin tones without affecting the surrounding areas. This technique ensures a natural-looking result, as the surrounding areas remain untouched.
- Graphic Design:
- Masking plays a crucial role in graphic design, allowing for precise placement and manipulation of graphic elements within an image. This enables the creation of complex and aesthetically pleasing compositions.
Comparison of Masking Techniques
The table below provides a comparative overview of the strengths and weaknesses of different masking techniques.
| Masking Technique | Strengths | Weaknesses |
|---|---|---|
| Layer Masks | Non-destructive, flexible, gradual transitions, easy to adjust | Can be time-consuming for complex selections |
| Vector Masks | High precision, scalability, sharp results | Limited to vector shapes, not suitable for complex or organic selections |
| Quick Masks | Fast, intuitive, good for quick selections | Can be less precise than other methods, not ideal for intricate details |
Mastering Layer Masks
Layer masks are a powerful tool in Photoshop for non-destructive editing. They allow you to selectively reveal or hide portions of a layer’s contents without permanently altering the original data. This approach is crucial for achieving intricate edits and complex effects, as modifications can be adjusted and reversed easily.Layer masks operate by utilizing a grayscale image to control the visibility of the underlying layer.
Darker areas of the mask hide the layer’s content, while lighter areas reveal it. This flexible approach makes them an invaluable tool for masking, blending, and refining images.
Advantages and Disadvantages of Layer Masks
Layer masks offer several benefits over traditional selection methods. They provide a non-destructive way to modify selections, allowing for easy adjustments and reversibility. Their flexibility enables precise control over image areas, leading to more nuanced edits. The ability to blend layers seamlessly is a significant advantage, creating smooth transitions and avoiding hard edges.However, layer masks also have limitations.
Complex selections may require more steps than using a selection tool, and the visual representation of the mask might not always be intuitive for intricate details. Understanding the grayscale relationship in the mask is essential to achieve the desired results.
Creating and Manipulating Layer Masks
Creating a layer mask is straightforward. Select the layer you want to mask, then click the ‘Add Layer Mask’ icon, which typically appears as a small rectangle with a superimposed white circle. This action creates a new layer mask that initially reveals the entire contents of the layer. To hide or reveal parts of the layer, you can use various tools to paint on the mask with black or white.
Black hides, white reveals. Painting with shades of gray provides partial opacity, allowing for smooth blends.
Refining Selections Using Layer Masks
To refine a selection within a layer mask, use the ‘Refine Edge’ tool. This tool allows you to adjust the selection’s boundaries, removing unwanted areas or adding areas that were previously excluded. For example, if you want to precisely select a person’s hair, the ‘Refine Edge’ tool can help remove the background and make the selection precise.
Using Layer Mask Adjustment Layers
Layer mask adjustment layers allow you to apply adjustments (like brightness, contrast, or color balance) to a specific part of an image. For example, a layer mask can be applied to a color adjustment layer to target the effect only to certain parts of the image. This is a non-destructive method for applying selective adjustments.
Creating Complex Effects with Layer Masks
Layer masks can create sophisticated effects. For instance, you can create a vignette effect by applying a gradient layer mask to a layer containing a photographic image. By using a gradient that transitions from opaque to transparent, you can soften the image’s edges, creating a focused effect in the center. Using masks with various shapes and patterns enables you to achieve unique effects and artistic styles.
Layer Mask Tools and Functionalities
| Tool | Functionality |
|---|---|
| Brush Tool | Paints black to hide, white to reveal, or gray to blend parts of the layer. |
| Gradient Tool | Applies smooth transitions to the layer mask, useful for creating fades and gradients. |
| Eraser Tool | Erases parts of the layer mask, revealing the underlying layer. |
| Mask Mode | Allows different blending modes for the layer mask, influencing the way the mask interacts with the layer’s contents. |
| Quick Selection Tool | Creates a quick selection that can be applied as a layer mask. |
Advanced Masking Techniques
Mastering masking techniques extends beyond basic layer masks. Advanced methods like clipping masks and mask blending modes unlock powerful creative possibilities. These methods allow for precise control over intricate selections and seamless image integration, leading to a more sophisticated and professional look in your projects.This section dives into advanced masking techniques, illustrating how to leverage clipping masks, blending modes, and other sophisticated methods for nuanced selections and image manipulations.
We’ll explore how to seamlessly combine images, remove unwanted elements with precision, and create intricate transitions. Furthermore, we’ll detail how to use these techniques with image adjustments for comprehensive control over your final image.
Clipping Masks
Clipping masks restrict the effects of one layer to the contents of another. This powerful technique allows for targeted edits and is particularly useful for creating complex shapes or when working with multiple layers. When a layer is clipped to another, any changes made to the clipping layer will affect only the portion of the lower layer that falls within the shape or selection of the clipping layer.
This targeted effect is crucial for creating intricate designs or manipulating specific areas of an image without affecting the surrounding areas. For example, a design for a logo could use a clipping mask to ensure the logo elements perfectly adhere to the shape of the background.
Mask Blending Modes
Blending modes for masks offer a wide range of visual effects beyond the basic on/off nature of standard masks. By applying blending modes to a mask, you can achieve a range of results, from subtle overlays to intense color changes. The effect of the blending mode on the mask is applied to the layer below, so understanding how these modes interact is essential for achieving the desired results.
Experimentation is key here to discover how different modes can impact the mask’s effect on the layer below. For example, a mask with a ‘Multiply’ blending mode will darken the underlying layer where the mask is opaque, creating a rich and sophisticated look.
Intricate Object Selections
Advanced masking techniques are essential for selecting intricate objects. Traditional selection tools may struggle with complex shapes, but masks provide a flexible solution. By combining layer masks with other selection tools and techniques like the pen tool, you can create highly accurate selections for more complex edits. Using a combination of tools, such as the lasso tool and a mask, allows for a smooth transition into the final result.
This combination provides fine-tuned control, particularly beneficial for intricate designs or detailed artwork.
Removing Unwanted Elements
Masking techniques offer unparalleled precision in removing unwanted elements from images. Using a combination of mask refinement tools, you can isolate the unwanted object and mask it out, leaving only the desired elements. By masking out unwanted elements and adjusting the mask, you can remove distractions and focus the viewer’s attention on the intended subject. This is especially useful in retouching or preparing images for publication.
Creating Seamless Transitions
Creating seamless transitions between images is a key aspect of advanced masking. By carefully applying masks and blending modes, you can merge different images, creating a natural and cohesive effect. Layer masks provide a flexible way to control the blend between the images, allowing for gradual transitions that seamlessly integrate one image into another. A common application is in photo editing, merging a portrait onto a landscape background with a smooth transition.
Using Masks with Image Adjustments
Masks can significantly enhance the impact of image adjustments. You can apply adjustments to a layer, then mask the adjustment to affect only specific areas of the image. This targeted application of adjustments is crucial for precise control over the overall look and feel of the image. For example, adjusting the contrast of a portion of an image without impacting other areas requires using a mask in conjunction with contrast adjustments.
Comparing Masking Techniques
| Technique | Precision |
|---|---|
| Basic Layer Masks | Good, but limited by shape |
| Clipping Masks | Excellent for shape-based selections |
| Mask Blending Modes | Variable, depends on the mode and the effect sought |
Masking for Specific Effects: Mastering Masking Techniques In Photoshop
Masking in Photoshop extends far beyond simple object selection. It’s a powerful tool for crafting nuanced effects, from realistic lighting to subtle corrections. This section dives into advanced masking techniques for achieving specific visual outcomes. Understanding these techniques unlocks a broader spectrum of creative possibilities within the digital image editing realm.Using masks allows for non-destructive editing. This means you can refine your results without altering the original image, retaining the option to modify or revert changes.
Realistic Lighting Effects
Masking can convincingly simulate various lighting scenarios. By creating a layer mask on a layer containing a light source, you can precisely control the intensity and distribution of the light. For example, a soft-edged mask on a layer containing a spotlight effect allows for a gradual falloff in light intensity. Using gradient masks can create a sunrise or sunset effect.
This process allows for a natural transition of light.
Object Replacement
Masking is crucial for seamless object replacement. Select the subject to be replaced and create a layer mask. Then, using a brush with a low opacity and flow, carefully paint around the edges of the selection, feathering to avoid hard edges. Import the new object and position it carefully over the masked area. Refine the mask, adjusting opacity and flow as needed, to achieve a natural blend.
This approach enables a high degree of precision in object replacement, making it ideal for photo editing and compositing.
Subtle Image Corrections
Masks allow for precise and subtle image adjustments. A layer mask on a layer containing a correction adjustment (like Brightness/Contrast or Levels) enables localized adjustments. Painting black on the mask hides the effect in that area, while painting white reveals it. This precise control avoids unwanted adjustments across the entire image, resulting in a more refined and nuanced correction.
Creating a ‘Painted’ Look
A painted look can be achieved using masking techniques in combination with brush styles. Create a layer mask on a layer containing a painting effect. Using a brush with a soft edge and low opacity, carefully paint on the mask to reveal the underlying image selectively. This approach lets you blend elements of the painted effect with the original image, achieving a custom “painted” look.
Experimenting with various brush styles, opacity settings, and colors can produce diverse painted effects.
Creating Custom Image Textures
Masking facilitates the creation of unique textures. Using a textured layer, apply a layer mask. Paint with varying shades of gray on the mask to reveal and conceal different parts of the texture. This method allows you to create unique and custom patterns, providing a way to personalize and add visual interest to your images. Using different brushes and opacity settings adds to the variability and complexity of the texture.
Masking Techniques Showcase
| Technique | Description | Example Image |
|---|---|---|
| Realistic Lighting | Creating soft shadows and highlights using layer masks. | A photograph with a soft light source, highlighting a specific object, showing the effect of diffused light. |
| Object Replacement | Replacing an object with another, ensuring a seamless transition. | A picture where a person has been replaced by another, showing a natural and blended replacement. |
| Subtle Corrections | Adjusting image tones locally with layer masks. | A picture with a darkened corner, with the mask highlighting the areas of adjustment. |
| Painted Look | Mimicking a painting effect using masks and brushes. | An image with a painterly style, with areas of the original image showing through the painted areas. |
| Custom Textures | Applying and modifying textures using masks. | A picture with a unique pattern, achieved through masking and layered textures. |
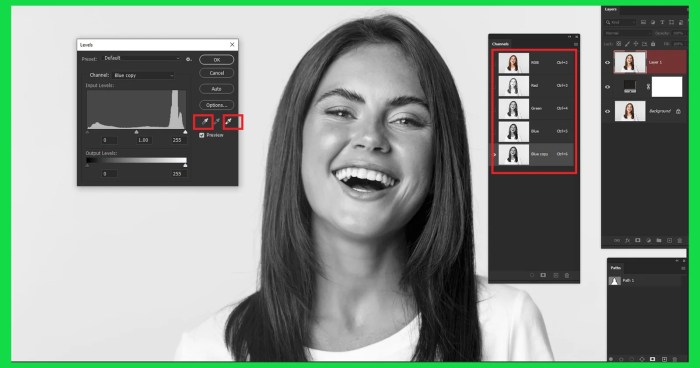
Masking and Color Correction
Masking techniques extend beyond simple object isolation, offering powerful tools for precise color adjustments. This section delves into how masking can be leveraged to fine-tune color palettes, correct imbalances, and enhance the overall visual appeal of images, particularly crucial in tasks like color grading and HDR image manipulation. Mastering these techniques empowers you to achieve nuanced and controlled color corrections.Color correction using masks allows for targeted adjustments, avoiding unwanted side effects.
Precisely isolating areas for color changes is essential for maintaining the integrity of the image’s overall aesthetics. This targeted approach is crucial for achieving professional-quality results.
Mastering masking techniques in Photoshop is crucial for achieving professional-level retouching. This skill is a cornerstone of photo editing, and understanding how to use masking effectively can significantly enhance your photo manipulation. Refer to The Ultimate Guide to Retouching Photos in Photoshop for a comprehensive overview of retouching techniques, which will ultimately give you a strong foundation for mastering masking techniques in Photoshop.
Isolating Specific Colors for Correction
Using masking to isolate specific colors for correction involves identifying and selecting the color range you want to modify. This is often accomplished using the Color Range adjustment tool or similar techniques in Photoshop. The mask, generated from this selection, acts as a precise guide for the subsequent color adjustments. The mask allows for precise modifications, avoiding unintended changes to surrounding areas.
Masking Techniques for Color Grading
Color grading, a crucial aspect of post-production, often relies on masking for nuanced control. Using masking in conjunction with curves, color balance, and other color correction tools, you can meticulously adjust the tonal values and color casts within specific areas of an image. This precision is vital for creating a cohesive and visually appealing color scheme across the entire image.
Selective Color Adjustments Using Masks
Selective color adjustments are made possible through masking. Using masks, you can target specific colors within an image for adjustments. For example, you might want to warm up the skin tones while maintaining the coolness of the background. This is achieved by creating a mask that isolates the skin tones, then applying the desired color adjustments only to that masked area.
These adjustments can be subtle or dramatic, depending on the specific needs of the project.
Correcting Color Casts Using Masks
Color casts, unwanted tints in an image, are effectively corrected using masks. A mask isolates the area with the color cast. By applying a corrective adjustment, such as a color balance adjustment, only to the masked area, you can effectively neutralize the unwanted tint without impacting the rest of the image. This approach ensures that the color correction is localized and avoids affecting the overall color balance of the image.
Masking in HDR Images
HDR images, with their dynamic range, benefit significantly from masking for color correction. Masking allows for the selective adjustment of colors in different highlights and shadows within the image. This precision is necessary to maintain the detail in various parts of the image, such as highlights and shadows. This approach helps to avoid the loss of detail that can occur when applying global color corrections.
Creating a mask for each color or tone range in an HDR image allows you to apply targeted corrections.
Table of Color Correction Scenarios and Masking Techniques
| Color Correction Scenario | Masking Technique |
|---|---|
| Warming up skin tones while maintaining cool background | Create a mask isolating skin tones. Apply a color temperature adjustment to the masked area. |
| Correcting a blue color cast in a sky | Create a mask isolating the sky. Use color balance to neutralize the blue cast. |
| Adjusting the overall color temperature of a landscape | Create a mask encompassing the entire landscape. Apply color temperature adjustment to the masked area. |
| Boosting the vibrancy of specific foliage | Create a mask isolating the foliage. Use vibrance or saturation adjustments to the masked area. |
Masking for Image Compositing
Image compositing, a crucial aspect of digital image manipulation, involves seamlessly blending multiple images to create a composite image. Masking plays a pivotal role in achieving this, allowing for precise control over which parts of different images are combined. This process enables the creation of realistic scenes, the removal of unwanted elements, and the enhancement of visual effects.
Detail Masking Techniques for Seamless Blending
Precise masking is essential for blending images. This often involves using various masking techniques like the brush tool, pen tool, and layer masks, each with unique advantages. Brush tool masking allows for controlled adjustments to the blending areas. The pen tool offers precise selections for complex shapes, leading to sharper edges in the composite image. Layer masks, acting as a transparent overlay, enable non-destructive editing, providing the flexibility to refine blending areas easily.
Object Removal and Replacement
Masking facilitates object removal and replacement in compositing. For example, removing a distracting element from a photograph involves meticulously creating a mask that isolates the unwanted object. Subsequently, the masked area can be filled with a different image or color. Conversely, introducing a new element involves masking the area where the new element will be placed. Then, the new image can be seamlessly integrated into the original composition.
Creating Composite Images with Various Effects
Masking allows for the creation of composite images with a wide range of effects. For example, creating a dramatic scene might involve masking portions of a sky, replacing it with a different image, and adjusting blending modes for an atmospheric effect. Adding special effects like light flares or particle effects can be precisely controlled using masking, ensuring the effects are targeted and visually appealing.
Masking for Image Alignment
Accurate alignment is vital for creating realistic composites. Masking can be employed for this purpose. By masking the areas to be aligned, the position of the images can be adjusted using the transform tools, ensuring the elements of the composite are perfectly aligned and integrated. This method allows for adjustments without affecting the unmasked parts.
Masking with Different Image Formats
Masking techniques remain largely consistent across various image formats. Whether working with JPEG, PNG, or other formats, the core principles of masking – selecting areas, creating masks, and refining blending – remain applicable. The software’s tools and functionalities may differ slightly between programs, but the underlying concepts of masking are similar, ensuring adaptability across various image types.
Comparison of Masking Approaches for Image Compositing
| Masking Approach | Description | Strengths | Weaknesses |
|---|---|---|---|
| Brush Tool | Using a brush to paint on a mask | Intuitive, fast for simple adjustments | Less precise for complex shapes |
| Pen Tool | Creating precise paths for masking | High precision, excellent for complex shapes | More time-consuming for simple adjustments |
| Layer Masks | Using a layer mask for non-destructive editing | Non-destructive editing, easy to adjust | Can be complex for advanced effects |
Masking for Special Effects
Masking techniques in Photoshop extend far beyond simple image adjustments. They become crucial tools for crafting unique visual effects, from subtle artistic filters to dramatic transformations. This section delves into the creative potential of masking, exploring various methods for generating striking visual effects.Masking allows for precise control over the application of special effects, enabling intricate details and nuanced results.
By combining masking with other Photoshop tools, users can achieve a wide array of artistic and photorealistic effects, ranging from stylized textures to realistic light simulations.
Creating Unique Visual Effects
Masking enables the creation of a wide range of unique visual effects by isolating specific areas of an image. By selectively applying filters or adjustments, users can achieve distinctive outcomes without affecting the entire image. This precise control allows for the generation of highly personalized effects that are both artistic and practical.
Artistic Image Filters
Applying artistic filters to specific regions of an image with masking adds a layer of creativity and personalization. The technique involves masking areas to be affected by a filter and applying the effect to the masked region. The use of various filter types (e.g., brush, blur, color adjustments) with masking provides an effective way to apply stylistic effects selectively.
Adding Special Effects to Images
Masking allows the targeted application of special effects. For example, adding a vignette to a portrait involves masking out the central portion of the image and applying a darkening effect to the masked areas. Similarly, adding a glow effect to a specific object involves masking the object and applying a light effect. These techniques are fundamental for achieving stylized images.
Simulating Light Effects
Masking is a powerful tool for simulating light effects. By masking specific areas of an image, users can control the direction and intensity of light sources. This enables the creation of highlights, shadows, and reflections with great precision. This technique allows for the manipulation of light to create realistic or artistic effects.
Photorealistic Effects with Masks
Creating photorealistic effects often requires meticulous masking techniques. The process involves masking out specific elements of an image and applying adjustments to those areas, ensuring a seamless integration of the effects. The goal is to achieve a natural-looking outcome by manipulating the lighting, shadows, and colors of selected regions. For example, creating realistic reflections in water involves masking the water surface and applying a reflection effect.
Table of Special Effects and Masking Methods
| Special Effect | Associated Masking Methods |
|---|---|
| Vignette | Mask out the center of the image and apply darkening to the masked area. |
| Glow | Mask the desired object and apply a light effect to the masked area. |
| Realistic Reflections | Mask the reflective surface and apply a reflection effect. |
| Artistic Textures | Mask the area to be textured and apply a texture filter. |
| Color Adjustments | Mask the area to be adjusted and apply color adjustments. |
Masking for Image Optimization
Masking plays a crucial role in preparing images for various media, from print to the web and mobile. Proper masking techniques can significantly reduce file size without sacrificing image quality, ensuring optimal viewing experiences across different platforms. This section delves into masking strategies for achieving this balance.
Preparing Images for Different Media
Different media platforms have varying requirements for image resolution and file size. For instance, a high-resolution image suitable for print might be unnecessarily large for display on a web page. Masking allows for targeted adjustments to optimize image files for specific media, ensuring they render correctly and load quickly.
Reducing File Size While Maintaining Quality
Masking techniques enable precise control over the areas of an image that need to be preserved. By isolating the necessary details and removing redundant data, file sizes can be significantly reduced without compromising image quality. This involves using layer masks to selectively hide or reveal parts of the image, retaining only the essential data for the desired output.
“Smart objects and layer masks enable non-destructive editing, allowing for repeated adjustments without impacting the original image.”
Optimizing Images for Print
For print applications, masking is often used to refine the image’s resolution and color profile. By masking out unnecessary detail, images can be optimized for print quality without compromising the visual appeal of the final product. High-resolution images may require extensive processing to ensure smooth output during printing, masking can help in controlling and minimizing this complexity. A good strategy is to pre-process the image in Photoshop and export at a resolution that is high enough for the print, but not excessive.
Optimizing Images for Web
Web optimization demands images that load quickly. Masking can be used to reduce image size by removing unnecessary details. Web-optimized images need to load quickly to avoid user frustration. The size and format of the image have to be adjusted for this. Masking can be used for this purpose.
Techniques such as masking out low-contrast details or applying a layer mask to compress the color palette can greatly reduce file sizes without compromising the visual impact. Using appropriate file formats like JPEG or WebP is also essential.
Optimizing Images for Mobile Devices
Mobile devices have varying screen resolutions and bandwidth constraints. Masking techniques are essential for creating images optimized for mobile devices. Images intended for mobile devices need to be optimized to maintain good display and loading time. Using masking to reduce image size and resolution is crucial to ensure that images load quickly. Masking can be used to reduce the resolution of areas of the image that are not prominent.
Summary Table of Masking Techniques for Image Optimization, Mastering Masking Techniques in Photoshop
| Platform | Masking Technique | File Format | Resolution |
|---|---|---|---|
| Mask out unnecessary details, optimize resolution for print, use appropriate color profiles | TIFF, PSD | High | |
| Web | Reduce detail in areas of low contrast, compress color palette, use appropriate file formats like JPEG or WebP | JPEG, WebP, PNG | Medium |
| Mobile | Reduce image size, mask out less prominent details, optimize for mobile screen resolution | JPEG, WebP, PNG | Low |
Practical Examples and Case Studies
Mastering masking techniques transcends theoretical understanding; it’s about applying these skills in real-world projects. This section delves into practical examples, showcasing masking’s utility across various photographic and design fields. We’ll explore complex projects, professional workflows, and specific applications in portraiture, product photography, and architectural visualization.
Complex Masking Project Example
A compelling example of a complex masking project involves creating a composite image of a city skyline at night, seamlessly blending a photo of the city with a separately captured image of the night sky. This requires meticulous masking of the buildings and sky to remove unwanted areas and ensure a natural transition. Precise masking of the edges of the buildings is crucial to avoid harsh lines and maintain a realistic look.
Similarly, masking of clouds or other elements in the night sky is essential for a cohesive composition. The end result should present a realistic and aesthetically pleasing scene.
Case Study: Masking in a Professional Workflow
In professional photo editing, masking is often used for retouching images. A photographer might use masking to remove blemishes or unwanted elements from a portrait. This approach is particularly helpful when working with high-resolution images. The photographer would likely employ a non-destructive masking method using layer masks to allow for easy adjustments and revisions later on. This technique is preferred over using a destructive method, as it allows for an iterative process of adjustments and corrections to achieve the desired result.
Masking for Retouching Portraits
Retouching portraits often involves removing blemishes, smoothing skin tones, and adjusting facial features. Masking is indispensable for these tasks. A common approach is to create a layer mask on a new layer containing the adjustments. This isolates the modifications, permitting precise control and avoiding unintended alterations to other parts of the image. A selective masking approach allows for more natural results, as it avoids over-smoothing or overly harsh changes to the subject’s features.
Precise masking is critical for subtle and effective retouching, achieving a polished final image.
Masking for Product Photography
Product photography often requires isolating the product from its background. Masking facilitates this by allowing for the creation of a clean background, either a solid color or a specific pattern. The product can then be placed on a new background, or an entirely different scene. A precise mask is essential to remove the background entirely, creating a professional and clean image of the product.
The use of masking allows for various creative background options without needing to physically rearrange the product or lighting setup.
Masking in Architectural Visualizations
Architectural visualizations utilize masking to enhance the realism and aesthetic appeal of rendered images. Masking allows for the removal of unwanted elements, such as construction scaffolding or temporary signage, to improve the overall look of the design. The process might involve masking out areas where the model needs to be presented in a clean state or for specific highlights.
Masking is crucial for accurately portraying the finished product and highlighting its key features, creating a professional and polished presentation.
Mastering masking techniques in Photoshop is crucial for achieving professional results. Knowing how to precisely control layers and selections is fundamental, and this directly impacts the creation of stunning text effects in Photoshop, like those shown in How to Create Stunning Text Effects in Photoshop. Ultimately, a solid grasp of masking is key to any Photoshop project, from subtle edits to impactful text creations.
Table: Different Project Scenarios and Masking Requirements
| Project Scenario | Masking Requirements |
|---|---|
| Portrait Retouching | Precise masking for removing blemishes, smoothing skin, and adjusting features. Subtlety is key. |
| Product Photography | Isolating the product from the background, creating clean images for presentation. Sharp edges are often required. |
| Image Compositing | Blending multiple images with seamless transitions. Carefully masked edges are crucial for realism. |
| Architectural Visualization | Removing unwanted elements like scaffolding, creating clean renderings to highlight design features. |
| Special Effects | Creating dynamic effects by combining elements and carefully masking the boundaries for realistic integration. |
Closure
In conclusion, mastering masking techniques in Photoshop equips you with a powerful toolkit for image editing. By understanding the diverse applications and nuances of various masking methods, you can refine your skills and achieve professional results. This comprehensive guide has provided a solid foundation, enabling you to confidently tackle complex projects and elevate your image manipulation capabilities. Remember, practice is key to solidifying your understanding and achieving mastery.
FAQ Overview
What are the key differences between layer masks and vector masks?
Layer masks are non-destructive, allowing for easy adjustments and reversibility. Vector masks, on the other hand, are based on vector shapes and offer precise control over selection boundaries. Layer masks are generally more versatile for complex adjustments, while vector masks are ideal for clean, sharp selections.
How can I use masking to remove unwanted elements from an image?
Masking allows for precise selection of areas to remove. You can create a mask that isolates the unwanted element and then use the mask to hide or remove that portion of the image. Different masking techniques offer varying degrees of precision, depending on the complexity of the object.
What are some common pitfalls to avoid when working with masking techniques?
Common pitfalls include over-masking, which can result in artifacts or unnatural edges. Understanding the different masking techniques and their strengths and weaknesses is essential to prevent this. Also, ensuring accurate selections is crucial for achieving desired results. Always double-check your selections and masks before making irreversible changes.
How can I optimize image file size while maintaining quality using masking?
Masking can help optimize image file size by isolating and reducing the size of specific areas. This technique, coupled with other image optimization strategies, can reduce the file size significantly without sacrificing image quality.


