Non-Destructive Editing: Best Practices in Photoshop unlocks a world of possibilities for image manipulation without permanently altering the original file. This approach, centered around layers and smart objects, empowers photographers and designers to experiment freely, making revisions easy and preserving the integrity of their work. By understanding these best practices, you can optimize your workflow, enhance your creative control, and unlock new levels of precision and efficiency in Photoshop.
This comprehensive guide explores various techniques, from mastering layers and masks to utilizing adjustment layers and filters. We’ll delve into the advantages of non-destructive editing, highlighting its impact on project management, performance, and the creative process. Discover how to leverage smart objects, organize files effectively, and optimize your workflow for optimal results.
Introduction to Non-Destructive Editing
Non-destructive editing in Photoshop is a powerful technique that allows photographers and graphic designers to manipulate images without permanently altering the original file. This approach preserves the original image data, enabling users to experiment with different effects and adjustments without risking the loss of the original file. This method is crucial for maintaining a history of changes and ensuring flexibility in the editing process.Non-destructive editing leverages a fundamental principle of digital imaging: the separation of data.
Instead of modifying the original pixel data, changes are applied to layers, masks, or adjustments that act as independent elements. This separation of elements allows users to easily revert to previous states, apply different effects, or experiment with various color palettes without compromising the original file. This makes it ideal for professional workflows, iterative design processes, and even for users who simply want to experiment without the fear of permanently damaging their work.
Non-Destructive Editing Principles
Non-destructive editing in Photoshop revolves around the concept of layers. Each adjustment or effect is applied to a separate layer, which is essentially a container for specific image elements. These layers can be individually manipulated, deleted, or adjusted without affecting other layers or the original image file. This creates a flexible, non-linear workflow where editing decisions can be revisited and refined without limitations.
The inherent flexibility of this process allows for complex edits and an extensive range of creative possibilities.
Advantages of Non-Destructive Editing
Non-destructive editing offers significant advantages over destructive methods. By keeping the original image data intact, it provides a rich history of edits, allowing for easy reversions and re-applications of changes. This ability to undo, redo, and refine edits enhances the editing process, providing a significant boost in creativity and flexibility. Furthermore, it allows for easy modifications and adjustments in the future.
Layers and Layer Styles in Non-Destructive Editing
Layers and layer styles are fundamental to achieving non-destructive results in Photoshop. Layers are containers for image elements, allowing for independent manipulation. Layer styles are pre-defined effects that can be applied to layers, offering quick access to common visual enhancements, such as drop shadows, glows, and bevels, without modifying the original pixel data. These combined features allow for powerful and flexible image manipulation, ensuring the original data remains intact.
Comparison of Destructive and Non-Destructive Editing
| Feature | Destructive Editing | Non-Destructive Editing |
|---|---|---|
| Original Image | Modified directly | Left unaltered |
| Changes | Permanently alter the original file | Applied to separate layers/adjustments |
| Reversibility | Difficult to undo/redo edits | Easy to revert to previous states |
| Flexibility | Limited options for changes | High flexibility and numerous possibilities |
| Complexity | Simpler edits | Complex and layered edits |
| History | Limited edit history | Detailed history of changes |
Mastering Layers and Masks
Layers and masks are fundamental to non-destructive editing in Photoshop. They allow for independent manipulation of image elements, enabling precise adjustments and revisions without affecting the original image data. This approach fosters flexibility and control, crucial for achieving desired outcomes in photo editing and graphic design.Understanding different layer types, their functionalities, and the power of layer masks empowers you to create complex images and intricate effects with unparalleled precision and control.
Layer styles further enhance creativity, adding various visual elements without altering the underlying image data.
Different Types of Layers
Photoshop offers various layer types, each serving specific purposes. Common types include regular image layers, adjustment layers, shape layers, and text layers. Image layers contain pixel data, adjustment layers apply effects without modifying the original layer, shape layers define vector-based shapes, and text layers accommodate text elements. Each type allows for independent manipulation, crucial for non-destructive editing.
Layer Masks: Precision in Image Manipulation
Layer masks are crucial for selective editing. They allow you to reveal or hide portions of a layer, enabling precise adjustments and selections. Layer masks work by applying a mask to the layer, where white areas reveal the layer content and black areas hide it. Gradients and patterns within the mask provide nuanced controls. A mask’s opacity determines how much of the layer is visible or hidden, and adjustments to the mask directly affect the layer’s visibility.
Creating and Modifying Layer Masks
Creating a layer mask is straightforward. You can create a mask from scratch or use the selection tool to create a selection on a layer, then convert it into a layer mask. Mask adjustments are accomplished through the mask’s brush, gradient, and other tools, with options like opacity and feathering.
Using Layer Styles for Creative Enhancements
Layer styles offer creative enhancements without modifying the underlying image. These styles add effects such as bevels, glows, inner shadows, and more, to layers. They’re applied to the layer and can be modified individually, allowing you to add visual depth and interest to your images without altering the original data. Each layer style has parameters that can be adjusted for personalized results.
Common Layer Mask Operations
- Creating a Mask from a Selection: Select the desired area in your image using a selection tool. Then, click the ‘Add Layer Mask’ icon. This hides everything outside your selection and reveals the underlying layer.
- Using the Brush Tool for Precise Masking: Using a brush tool, paint over areas of the mask with black to hide portions of the layer, and white to reveal them. Adjust the brush size and hardness for finer control.
- Using the Gradient Tool: A gradient tool can create smooth transitions in a layer mask. This is useful for blending elements smoothly.
- Using the Eraser Tool: The eraser tool in layer mask mode can erase portions of the mask to reveal the underlying layer.
- Using a Layer Mask to Mask Out a Shape: A shape layer can be used to mask parts of a layer. The shape layer’s mask hides areas outside the shape.
Working with Smart Objects
Smart Objects are a cornerstone of non-destructive editing in Photoshop. They allow you to edit raster images without altering the original file, maintaining its integrity and preserving the quality of the image. This approach is crucial for complex edits and ensures your original data is always available.Smart Objects leverage the power of layers to keep the original image data separate from the editing process.
This separation allows you to make numerous edits without compromising the source image’s quality. Edits made to Smart Objects are treated as separate adjustments, enabling you to revert to the original or refine edits without loss of detail. This approach stands in contrast to traditional raster editing, where each edit modifies the underlying pixel data.
Understanding the Concept of Smart Objects
Smart Objects act as containers for raster images. When an image is converted to a Smart Object, it’s treated as a single, editable layer. Crucially, any edits made to this layer do not directly affect the original image file. This means you can apply filters, adjustments, or other effects without losing the original image’s quality.
Preserving Original Image Quality
The key to maintaining image quality is the way Smart Objects handle edits. Photoshop stores the original image data separately from the edits applied to the Smart Object. This means that if you need to revert to the original image, you can easily do so without losing any work you’ve done on other layers or adjustments. This preservation of the original data is essential for non-destructive editing workflows.
For instance, if you make an adjustment to the Smart Object, the original image data remains untouched. This is a critical distinction from standard raster edits, which modify the underlying pixels.
Benefits of Using Smart Objects, Non-Destructive Editing: Best Practices in Photoshop
Using Smart Objects offers numerous advantages over traditional raster editing:
- Preservation of original image quality: Edits do not permanently affect the source file. This is essential for maintaining the original image’s quality and allowing for reversibility.
- Non-destructive editing: Changes are isolated to the Smart Object, allowing you to undo, redo, or modify edits without affecting the original file. This is paramount for experimentation and iterative design.
- Flexible editing: You can apply multiple effects or adjustments to the Smart Object without affecting the original data. This provides flexibility for complex edits and diverse creative approaches.
- Scalability: Smart Objects allow for editing of images at different sizes and resolutions. This flexibility is crucial for various applications, like print and web design, where images might need to be resized.
Examples of Smart Object Applications
Smart Objects excel in diverse editing scenarios:
- Photo retouching: Apply complex adjustments to images without compromising their quality. This includes color correction, sharpening, and other retouching tools.
- Graphic design: Use Smart Objects to add effects to logos, illustrations, or other graphics without affecting the underlying image data. This enables rapid prototyping and iterations.
- Web design: Resize images for various screen resolutions without quality loss. This is crucial for creating responsive websites.
- Complex compositing: Work with multiple images, layers, and effects within a non-destructive workflow.
Smart Object Types and Functionalities
| Smart Object Type | Functionality |
|---|---|
| Standard Smart Objects | Basic Smart Objects used for editing raster images. These support a wide range of filters and adjustments. |
| Smart Filters | Apply filters to Smart Objects without permanently altering the underlying image data. This allows for iterative adjustments and quick experimentation with effects. |
| Smart Objects in Vector Shapes | Enable the editing of vector shapes that are linked to raster images, providing a way to refine and modify both the vector shapes and the raster images within a non-destructive environment. |
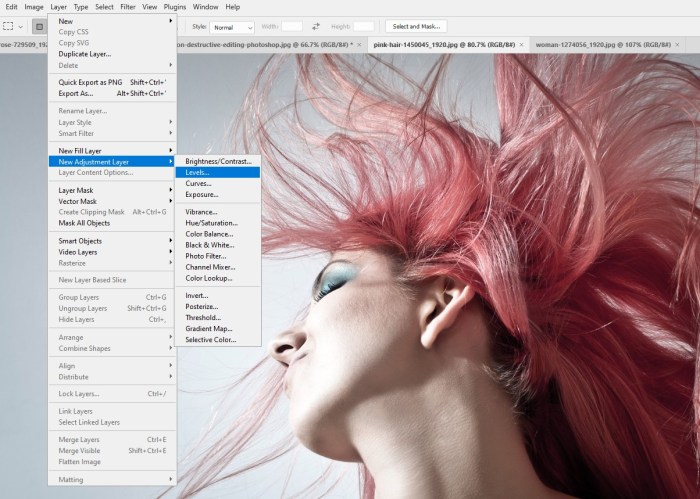
Using Adjustment Layers: Non-Destructive Editing: Best Practices In Photoshop
Adjustment layers are a cornerstone of non-destructive editing in Photoshop. They allow for precise and reversible modifications to an image’s tone, color, and other attributes without altering the original pixel data. This approach preserves the integrity of the original image, enabling iterative adjustments and experimentation without the risk of irreversible changes.Adjustment layers function by creating a separate layer above the original image.
Changes made to an adjustment layer only affect the pixels below it, effectively isolating the adjustment from the underlying image. This is crucial for non-destructive editing because it allows for easy adjustments, modifications, and even the complete removal of the adjustment layer without impacting the original image’s integrity.
Adjustment Layer Functionality
Adjustment layers are fundamentally non-destructive tools that affect only the layers beneath them, leaving the original image untouched. This is achieved by creating a separate layer containing the adjustment, thus allowing for modifications without altering the base image. A significant advantage of this methodology is the possibility of re-applying, modifying, or removing the adjustment without affecting other elements of the image.
By isolating the adjustments, the photographer can effectively manipulate different aspects of the image in an independent and controlled manner.
Using Specific Adjustment Layers
Various adjustment layers cater to different image manipulation needs. Learning to utilize these tools effectively is essential for achieving a desired aesthetic.
- Curves: The Curves adjustment layer provides precise control over the image’s tonal range. By adjusting the curve’s shape, you can brighten shadows, increase highlights, or fine-tune mid-tones. This is particularly useful for correcting exposure issues or achieving a specific contrast level. Precisely adjusting the tonal curves is a vital aspect of achieving the desired aesthetic. The curves tool is ideal for advanced editing, allowing you to sculpt the tonal range of your images.
- Levels: The Levels adjustment layer offers a more straightforward approach to tonal adjustments. It adjusts the image’s black, white, and mid-tone points. This provides a simple but effective way to correct overexposure, underexposure, or simply adjust the overall contrast.
- Color Balance: The Color Balance adjustment layer allows for targeted adjustments to the image’s color temperature. You can modify the balance of red, green, and blue tones to correct color casts or create specific color palettes. This is particularly useful for images that have an unusual color cast, such as those taken in a specific lighting environment.
Applying Multiple Adjustment Layers
Applying multiple adjustment layers allows for complex color grading and adjustments. Each adjustment layer functions independently, and can be combined to achieve nuanced and refined results. By applying multiple adjustment layers in succession, the photographer can control and modify multiple aspects of the image’s appearance. This enables a layered and controlled approach to color grading. For example, a photographer might apply a Curves adjustment to enhance contrast, followed by a Color Balance adjustment to correct a slight color cast, and then a Vibrance adjustment to increase saturation.
Adjustment Layer Table
| Adjustment Layer | Primary Function | Use Cases |
|---|---|---|
| Curves | Precise tonal adjustments | Fine-tuning exposure, contrast, and highlights |
| Levels | Adjusting black, white, and mid-tone points | Correcting exposure issues, adjusting contrast |
| Color Balance | Adjusting red, green, and blue tones | Correcting color casts, creating specific color palettes |
| Hue/Saturation | Adjusting hue, saturation, and luminance | Modifying colors, increasing or decreasing saturation |
| Selective Color | Adjusting specific colors | Fine-tuning color balance, correcting color issues in specific areas |
Utilizing Filters and Effects
Applying filters and effects in Photoshop often involves the risk of permanently altering the original image. Non-destructive editing techniques, however, safeguard the original data while allowing for flexible adjustments and iterations. This approach ensures that the initial image remains untouched, permitting various adjustments and modifications without loss of the original data.Filters, when applied non-destructively, function as a distinct layer on top of the existing image or layer.
This approach allows for adjustments and alterations without impacting the underlying pixels of the image. This modularity allows for a more versatile and dynamic editing process.
Smart Filters and Their Impact
Smart filters are a key component of non-destructive filtering in Photoshop. They operate within a layer’s adjustment parameters, creating a separate effect layer rather than directly modifying the original pixel data. This critical difference ensures the original image remains unaffected. The effect layer is linked to the original image data and can be adjusted, modified, or deleted without altering the underlying image.
Applying Filters and Effects Non-Destructively
Applying filters non-destructively involves creating a new layer or adjustment layer above the original image or layer. This layer then hosts the filter’s effect. The original image remains untouched, offering an unlimited number of iterations and edits. This workflow is crucial for achieving precise results and preserving the integrity of the original data.
Using Filter Galleries in Non-Destructive Workflows
Photoshop’s filter galleries provide a range of effects that can be applied non-destructively. These galleries allow for a streamlined workflow, offering quick access to a wide array of visual enhancements. Using these filters within a non-destructive framework allows for revisiting and fine-tuning each filter’s application without impacting the original image.
Applying Filters to Specific Layers
Filters can be applied to specific layers without affecting other layers. This is a critical aspect of non-destructive editing. By utilizing layers and masks, filters can be isolated to specific areas of an image, allowing for targeted adjustments without compromising the integrity of other parts of the image. This selective application is fundamental to maintaining the flexibility and control required in a professional workflow.
For instance, applying a vignette effect to the background layer without affecting the foreground subject. This targeted application ensures that the desired effects are precisely isolated to the intended layer or selection.
Organizing and Managing Files
A well-organized file management strategy is crucial for non-destructive editing in Photoshop. Effective organization streamlines workflow, prevents errors, and allows for efficient retrieval of assets in complex projects. This structured approach ensures your edits are easily tracked and maintained, which is essential for maintaining a robust creative process.A thoughtful system for managing files and layers is more than just a good practice; it’s a foundation for productivity and creativity.
This approach is especially vital in large-scale projects where numerous assets and edits are involved.
File Naming Conventions
Consistent naming conventions are vital for identifying and locating files quickly. Clear and descriptive names, including project details and stages, are essential for maintaining a structured project. For example, a file named “Website_Homepage_v1_final.psd” is more informative than “image1.psd.” This practice aids in locating specific versions and understanding the project’s context.
Non-destructive editing in Photoshop is crucial for preserving your original files. Understanding the key differences between Adobe Photoshop CC and Photoshop Elements, particularly regarding file handling and advanced tools, is important for optimal non-destructive workflows. For example, knowing the limitations of Photoshop Elements in advanced layer manipulation can help you choose the right software for a project, as detailed in Adobe Photoshop CC vs Photoshop Elements: Key Differences.
Ultimately, a solid grasp of non-destructive editing techniques is essential for efficient and flexible image manipulation in Photoshop.
Layer Organization
Effective layer organization is critical for non-destructive editing. It helps maintain clarity and control over your artwork, enabling you to isolate specific elements for adjustments without affecting others. Well-organized layers make future adjustments easier.
- Layer Naming: Use descriptive names for layers, specifying the element they represent (e.g., “Header_Image,” “Button_Blue”). This allows for quick identification and avoids confusion when dealing with numerous layers.
- Grouping Layers: Group related layers together to maintain visual clarity and organization. For instance, group all layers associated with the website header, and then group these layers within the larger project folder structure. This structure reduces the visual clutter and simplifies navigation.
- Layer Visibility: Utilize layer visibility options to isolate elements and focus on specific parts of the image. This allows you to concentrate on one element while hiding others, improving your focus and efficiency.
Folder Structure for Large Projects
For large-scale projects, a hierarchical folder structure is essential. This method allows for easy navigation and quick retrieval of specific assets.
- Project Folder: Create a main folder for the entire project. This acts as the central repository for all associated files.
- Subfolders for Assets: Organize assets (images, graphics, etc.) into subfolders based on their category. For instance, a “graphics” folder could contain all the project’s graphic elements, while a “photos” folder holds all the photos used. Subfolders can further be categorized into sub-subfolders for more granular organization.
- Version Control: Create subfolders for different project versions (e.g., “v1,” “v2”). This is crucial for keeping track of edits and reverting to previous versions if necessary.
- Resources: Create a folder to store all project resources (fonts, brushes, and other assets).
Example of a File Organization Structure
| Main Folder (Project Name) |
|---|
|
This structure provides a clear and organized path for locating and accessing project files. This organized approach is essential for streamlining your workflow and making it easier to manage the complexity of larger projects.
Optimizing Performance
Non-destructive editing, while offering numerous advantages, can sometimes be resource-intensive. Understanding how to optimize workflows is crucial for maintaining smooth performance, especially when dealing with large files and complex projects. Efficient strategies can dramatically reduce processing time and frustration.Effective non-destructive workflows are characterized by a conscious approach to memory management, file organization, and the utilization of Photoshop’s features.
This includes leveraging smart objects, adjustment layers, and caching mechanisms to minimize the impact on system resources. By adhering to best practices, users can avoid common pitfalls that lead to sluggish performance and ensure a consistently positive editing experience.
Strategies for Faster Workflows
Efficient workflows in non-destructive editing revolve around conscious use of Photoshop’s features. Careful consideration of the steps involved in each project is key to avoiding bottlenecks. By prioritizing actions, such as batch processing, and by understanding the limitations of certain tools, users can maintain a high level of productivity.
Mastering non-destructive editing in Photoshop is key for preserving your original files. Learning to avoid common pitfalls, like those detailed in Avoid These 10 Common Photoshop Mistakes , is crucial. This approach ensures you can easily revert changes and maintain flexibility in your workflow, making non-destructive editing the best practice for professional results.
- Batch Processing: Batch processing allows for the application of adjustments or effects to multiple images simultaneously. This can significantly reduce the time needed for repetitive tasks, particularly when dealing with a series of similar images. This approach is especially valuable when editing a large collection of photographs for a consistent look and feel.
- Preemptive Optimization: Optimizing images before importing them into Photoshop can drastically improve performance. Reducing file size through compression, without significantly impacting quality, reduces the load on system resources. This proactive step prevents performance bottlenecks later in the editing process.
- Smart Objects and Adjustment Layers: Smart objects and adjustment layers are cornerstones of non-destructive editing. They allow for adjustments to be applied without altering the original image data, preserving image integrity and ensuring consistent quality throughout the editing process. Leveraging these features minimizes memory usage and enables the handling of large, complex files.
Avoiding Common Pitfalls
Understanding the potential pitfalls that can hinder performance is crucial. Many users encounter issues related to inefficient file management and the misuse of Photoshop’s tools. Careful consideration of these potential problems can ensure that workflow remains consistent and effective.
- Unnecessary File Manipulation: Excessive layers, unnecessary filters, and repeated adjustments can lead to significant performance issues. Understanding the impact of each action and the need for each step is essential. By being mindful of what is required and using only necessary tools and layers, users can ensure a more efficient editing process.
- Inadequate System Resources: Photoshop requires a sufficient amount of RAM and processing power to handle complex edits. Ensuring your computer meets the minimum requirements, or investing in upgrades, is vital for a smooth and efficient workflow, particularly when working with high-resolution images.
- Overuse of Filters and Effects: Excessive application of filters and effects can significantly increase processing time. Carefully consider the impact each filter will have on file size and system resources. Using filters judiciously can maintain a balance between creative expression and workflow efficiency.
Managing Large Files and Complex Projects
Managing large files and complex projects requires a multi-faceted approach to ensure smooth performance. Careful planning, strategic file organization, and utilization of Photoshop’s advanced features are crucial to maintaining efficiency.
- Smart Object Grouping: Organizing large numbers of smart objects into folders or groups can improve the clarity and efficiency of the editing process. This organization also helps to avoid confusion when working with complex files and facilitates easier navigation. This organized structure is especially useful for large projects, such as photo shoots or advertising campaigns.
- External Storage: Leveraging external storage devices to store large files, and working with files on external drives when possible, can reduce the strain on system resources. This frees up system memory, preventing slowdowns and bottlenecks. The use of external drives can be particularly helpful for large projects.
- File Optimization Strategies: Implementing strategies for file optimization, such as reducing file size and using appropriate image formats, is vital for performance. These steps contribute to the smooth handling of large files. Prioritizing optimized file formats, reducing file size without compromising quality, and utilizing appropriate formats for different uses (web, print, etc.) are essential.
Real-World Applications
Non-destructive editing techniques are not just a set of Photoshop features; they are a fundamental approach to digital asset management. This method significantly streamlines workflows, reduces errors, and allows for maximum flexibility in creative endeavors. The ability to revisit and refine edits without altering the original file is invaluable in a wide range of professional fields.This section delves into how non-destructive editing is employed in diverse settings, from photography and graphic design to video production and image enhancement.
It highlights the advantages for professionals, showcasing how this approach boosts efficiency and creative control.
Photography
Non-destructive editing is a cornerstone of professional photography. Photographers frequently encounter situations where multiple adjustments are needed, such as retouching, color correction, and cropping. The ability to experiment with different edits without permanently altering the original image is crucial for achieving the desired outcome. For example, a wedding photographer might need to adjust the lighting in several images without altering the original RAW files, enabling them to explore various styles and preferences.
Graphic Design
In graphic design, non-destructive editing is essential for iterating on designs quickly. Designers often need to modify colors, fonts, and layouts to meet client feedback or create different versions of a project. Using layers and adjustment layers, designers can easily adjust elements without affecting the rest of the design. A graphic designer creating a brochure, for instance, can modify colors or text without having to recreate the entire document.
Web Design
Non-destructive editing is increasingly vital for web designers. Web design often involves creating multiple variations of a website layout, incorporating different colors and fonts, and making various adjustments to the design. By working with layers, designers can create and modify website elements without altering the original file, allowing them to efficiently produce diverse designs and maintain a comprehensive design history.
Retouching and Image Enhancement
Non-destructive editing plays a pivotal role in image retouching and enhancement. Photographers and graphic designers often need to refine images by adjusting colors, removing blemishes, or sharpening details. The non-destructive approach lets them experiment with different retouching techniques and refine edits without compromising the original image quality. A professional retoucher can, for example, use adjustment layers to enhance skin tones in a portrait without affecting the background or other elements.
Video Editing
Non-destructive editing principles extend seamlessly into video editing. Video editors can use layers and effects to adjust lighting, color, and sound without permanently altering the original footage. The ability to experiment with different editing styles and refine edits without impacting the source footage is essential for video projects requiring various iterations. A video editor might use adjustment layers to alter the color grading of a scene, enabling various edits to be explored.
Advanced Techniques

Mastering advanced techniques in Photoshop’s non-destructive editing workflow unlocks a realm of sophisticated image manipulation. These techniques allow for greater precision, flexibility, and control over the final image, enabling photographers and designers to achieve intricate results without compromising the integrity of the original data. This section delves into advanced layer styles, masking strategies, image manipulation workflows, and specific image editing tasks.
Advanced Layer Styles and Blending Modes
Layer styles offer a plethora of options for enhancing visual appeal and creating unique effects. Understanding and applying advanced layer styles, in conjunction with blending modes, is crucial for achieving nuanced results. Careful selection of blending modes can drastically alter the appearance of a layer, creating complex effects.
- Layer Styles: Advanced layer styles go beyond simple inner shadows and outer glows. These include techniques like gradient overlays, pattern overlays, and more complex color blends. Using these advanced styles with blending modes like Soft Light or Multiply creates unique and stylized effects.
- Blending Modes: Beyond the basic modes, experimenting with more complex options like Color Dodge, Color Burn, Exclusion, and Luminosity can produce dramatic effects. These modes can alter the way colors and tones interact, leading to artistic and professional outcomes. For instance, using Color Burn on a layer can darken the underlying layers while retaining the original details.
Advanced Masking Techniques
Advanced masking techniques are essential for precise selections and complex image manipulations. They go beyond basic selections, enabling the creation of intricate selections that are often impossible with standard tools.
- Mask Refinement Tools: Photoshop provides tools like the Refine Edge tool, which allows for more nuanced control over selection edges. This tool is particularly valuable for selections around intricate details or hair. The tool’s ability to smooth edges and feather selections is crucial for non-destructive editing.
- Using Masks with Adjustment Layers: Masking adjustment layers allows for localized adjustments to specific areas of an image. This is particularly useful for creating selective color corrections or tonal changes. The flexibility to adjust the mask precisely is crucial for achieving the desired effect.
- Using Channels for Masks: Utilizing channels, specifically grayscale versions of color channels, can aid in creating complex masks. This technique provides a way to select specific color ranges or tonal values, facilitating precise selections for advanced masking.
Intricate Image Manipulations
Non-destructive editing allows for the creation of intricate image manipulations without permanently altering the original data. This is achievable through various techniques.
- Using Smart Objects for Complex Edits: Smart objects preserve the original image’s resolution and allow for non-destructive editing and manipulation. Applying transformations and filters to a Smart Object is crucial for preserving the original image quality, even after numerous edits. This approach is especially useful for photo compositing and complex image manipulations.
- Compositing Multiple Images: Non-destructive compositing is key to seamlessly blending multiple images. Smart Objects and layers play a pivotal role in this process. This allows for precise control over the positioning and blending of images.
Advanced Workflows for Specific Image Editing Tasks
Specific image editing tasks benefit greatly from advanced non-destructive workflows. These workflows leverage the power of layers, masks, and adjustment layers to achieve the desired results.
- Retouching Portraits: Non-destructive workflows allow for precise adjustments to skin tones and blemishes without affecting the overall image. Smart Objects and adjustment layers allow for adjustments to be made without affecting the original image data.
- Creating Photomontages: Non-destructive photomontages leverage Smart Objects and layers to compose multiple images seamlessly. This process ensures that adjustments and modifications can be made without compromising the integrity of the original images.
Final Thoughts
In conclusion, non-destructive editing in Photoshop empowers users with a powerful approach to image manipulation. By embracing layers, masks, smart objects, and adjustment layers, you gain control over your creative process while preserving the integrity of your original files. This guide provided a practical overview of the core concepts and techniques, equipping you with the knowledge and tools to achieve professional-level results.
This approach, from foundational principles to advanced techniques, unlocks a world of creative possibilities in Photoshop.
Essential FAQs
What are the key benefits of non-destructive editing over destructive editing?
Non-destructive editing allows for reversibility, experimentation, and preservation of the original file. You can make changes without altering the source image, enabling you to easily revert to previous states and experiment with different edits without risk. This flexibility is crucial for iterative design and post-production workflows.
How do adjustment layers affect the original image?
Adjustment layers create a separate layer to apply edits. These edits affect only the layers below the adjustment layer, leaving the original image untouched. This enables you to apply complex adjustments without damaging the original data and to easily modify or remove the adjustment layer without impacting other layers.
What are some common pitfalls to avoid when working with large files in non-destructive editing?
Large files can lead to slow performance. Optimizing your workflow by using appropriate file formats, using smart objects when possible, and organizing your layers efficiently can prevent issues like slow processing or crashing.
Can non-destructive editing be used with video editing in Photoshop?
While Photoshop primarily focuses on still images, some non-destructive techniques can be adapted to certain video editing workflows, such as using layers and adjustment layers for specific effects or color grading. However, specialized video editing software is generally more suitable for video projects.


