Photoshop editing tips provide a comprehensive guide to enhancing your images. From basic adjustments like brightness and contrast to advanced techniques like layer masking and blending modes, this guide will empower you to take your image editing to the next level.
This resource covers everything from foundational principles to specialized techniques for various image types, including portraits, landscapes, and product photography. Discover how to correct colors, retouch imperfections, and master composition to create stunning visuals.
Basic Editing Techniques
Photoshop offers a wide array of tools for enhancing images, from simple adjustments to complex manipulations. Mastering these fundamental techniques empowers you to transform raw images into polished and compelling visuals. This section delves into the core tools and strategies for refining your images.
Brightness and Contrast Adjustment
Brightness and contrast are fundamental adjustments in image editing. Adjusting these parameters directly affects the overall tone and visual appeal of the image. A well-balanced brightness and contrast level can significantly improve the impact of your photographs.
The Brightness/Contrast tool in Photoshop provides a straightforward method to fine-tune these aspects. Increasing brightness makes the image lighter, while increasing contrast amplifies the difference between light and dark areas. Conversely, decreasing brightness makes the image darker, and decreasing contrast reduces the tonal variations. Experienced users often use these adjustments in conjunction with other tools to achieve a nuanced aesthetic.
Common Mistakes in Brightness and Contrast Adjustment
Beginners often encounter pitfalls when adjusting brightness and contrast. One common error is over-adjusting, resulting in an image that appears unnatural or washed out. Another is under-adjusting, which leaves the image looking flat and lacking impact. Understanding these common errors is crucial to avoiding them. A methodical approach and careful consideration of the image’s overall tone are vital.
Experimentation is key to finding the optimal balance for your specific needs.
- Over-adjusting brightness or contrast can lead to an image that looks unrealistic or overly processed.
- A lack of adjustment can result in a flat, uninspired image that lacks visual appeal.
- Insufficient understanding of the image’s original tonal range can hinder the editing process.
Avoiding Common Mistakes
To avoid these pitfalls, start with subtle adjustments and gradually refine your changes. Use the preview function to see the effect of your modifications in real-time. Remember to consider the image’s subject matter and intended use. A portrait requires different adjustments than a landscape. This careful approach minimizes the risk of creating an over-processed or under-processed image.
Referencing similar images with desired characteristics can help you create a visually appealing and effective result.
Color Balance Adjustment
Color balance refers to the overall distribution of colors in an image. This involves adjusting the relative intensities of red, green, and blue (RGB) channels. Correcting color balance ensures accurate and consistent color representation, which is essential for achieving a realistic and aesthetically pleasing outcome. A balanced color palette elevates the visual appeal and accuracy of the image.
Comparison of Image Editing Software
| Feature | Photoshop | GIMP | Pixlr |
|---|---|---|---|
| Basic Adjustments (Brightness, Contrast, Color Balance) | Excellent, with intuitive tools and sliders. | Good, with similar functionality to Photoshop. | Basic, but sufficient for simple edits. |
| Advanced Features (masking, layers) | Extensive, professional-grade tools. | Strong, though potentially more complex for beginners. | Limited, focused on quick edits. |
| Price | Paid software, with varying pricing tiers. | Free and open-source software. | Free online editor. |
This table provides a rudimentary comparison of popular image editing software, focusing on basic editing capabilities. GIMP and Pixlr are often attractive options for their affordability and ease of use, especially for novices. However, for complex editing tasks, Photoshop’s comprehensive features and professional-grade tools remain unmatched. Ultimately, the best choice depends on the specific needs and budget of the user.
Advanced Editing Techniques
Mastering advanced Photoshop techniques unlocks a world of creative possibilities, allowing you to manipulate images with precision and achieve highly stylized visual effects. Beyond basic adjustments, these methods provide intricate control over individual elements and layers, leading to sophisticated image transformations.Layer masking, blending modes, and channel mixing are powerful tools for advanced image editing. Understanding their functionalities enables you to fine-tune your images, enhancing specific areas, and creating visually compelling results.
Layer Masking
Layer masks are a non-destructive way to selectively reveal or hide portions of a layer. This technique allows for precise control over which parts of a layer interact with other layers, enabling intricate detail manipulation. By painting on a layer mask with black, white, or various shades of gray, you can precisely define areas of visibility and opacity. This is crucial for masking out unwanted elements or creating subtle fades.
Blending Modes
Blending modes significantly alter how layers interact, allowing you to create a wide array of visual effects. They dictate how the colors and tones of one layer are blended with those of another. This is essential for achieving unique and striking image effects. Understanding the nuances of blending modes is vital for achieving specific visual results. By experimenting with different blending modes, you can transform an image from a basic snapshot to a striking artistic creation.
Channel Mixing
Channel mixing allows for a deeper level of image manipulation, providing a method to extract and alter specific color components. By manipulating individual color channels, you can extract and modify aspects of the image’s color palette. For example, isolating a specific color, such as blue, allows you to adjust its saturation or hue independently. This technique is powerful for achieving unique color effects and correcting color imbalances.
Blending Mode Comparison
Different blending modes produce distinct effects on an image. Understanding their characteristics allows you to select the most appropriate mode for a specific task. A clear understanding of how each mode affects the image is crucial for achieving the desired visual outcomes.
| Blending Mode | Typical Use | Effect |
|---|---|---|
| Normal | Default blending; no change | No alteration in the image |
| Multiply | Creating darker tones, darkening shadows | Darkens the colors of the layer below |
| Screen | Creating lighter tones, highlighting highlights | Lightens the colors of the layer below |
| Overlay | Creating a combination of dark and light effects | Combines the effects of Multiply and Screen |
| Soft Light | Subtle lightening or darkening effects | A softer version of Overlay |
| Hard Light | Stronger lightening or darkening effects | A more intense version of Overlay |
Color Correction and Grading
Color correction and grading are crucial steps in post-production, significantly impacting the overall aesthetic and impact of an image. These techniques allow photographers and designers to adjust the color balance, intensity, and overall mood of an image, transforming it from a raw capture to a polished, compelling piece. Proper color correction and grading can enhance the visual appeal and communicate a specific message.Color correction aims to fix unwanted color casts and inconsistencies within an image.
Color grading, on the other hand, focuses on enhancing the overall color palette and mood, often used to create a specific look or style. Both are essential in creating visually appealing and impactful images.
Color Cast Correction
Color casts, often caused by variations in light sources, can dramatically affect the overall impression of an image. Identifying and correcting these casts is vital for achieving accurate and visually pleasing results. Various tools in Photoshop are designed to address color casts, offering a range of options for precise adjustments. Using the White Balance tool allows for quick adjustments based on the lighting conditions present during the image capture.
Color Consistency Correction
Maintaining color consistency across different parts of an image is essential for a harmonious visual experience. Slight variations in color saturation or hue between elements can detract from the overall aesthetic appeal. Techniques such as using the Levels or Curves tools can ensure that colors within the image are uniformly balanced. Careful adjustments to highlights and shadows can help to ensure that colors are consistent across different tones within the image.
Color Palette and Mood Creation
Color palettes play a vital role in communicating specific moods and messages. The careful selection of colors can evoke a sense of joy, nostalgia, or even danger. Understanding the psychological impact of color is paramount in achieving the desired effect. Color grading in Photoshop provides powerful tools to achieve a wide array of visual styles. Adjusting the color temperature and intensity can dramatically alter the overall mood of an image.
Proficient Photoshop editing hinges on understanding a few key techniques. Knowing how to effectively utilize layers and masks is crucial, and mastering adjustment layers can significantly elevate your image editing. This often leads to a crucial consideration: is Photoshop the best tool for the job? Consider this comparison of Photoshop versus Canva: Photoshop vs Canva: Which Is Better for Design?
. Ultimately, understanding the nuanced differences between these powerful tools empowers informed choices in your editing workflow.
Color Palette Examples
| Image Type | Color Palette | Mood |
|---|---|---|
| Portrait Photography (Formal) | Muted tones, cool colors (blues, grays, pastels) | Sophistication, elegance |
| Landscape Photography (Sunrise) | Warm tones (reds, oranges, yellows) | Energy, vibrancy, excitement |
| Product Photography (High-end Fashion) | Bold colors, high saturation | Luxury, style, modernity |
| Editorial Photography (News) | Neutral tones, muted colors, often with a slight emphasis on contrast | Objectivity, seriousness |
The table above provides a basic framework. The specific colors and intensity adjustments should be tailored to the unique characteristics of each image.
Image Retouching and Manipulation
Image retouching and manipulation are crucial aspects of digital photography and graphic design. These techniques allow professionals and enthusiasts to enhance images, removing imperfections and refining aesthetics. From subtle adjustments to dramatic transformations, retouching empowers creators to achieve desired visual outcomes.
Removing Imperfections
Retouching often involves the removal of blemishes, scars, and other imperfections from images. Careful selection and application of tools are vital to achieve natural-looking results without disrupting the overall image integrity. The process typically involves isolating the imperfection and applying a blending or smoothing technique to seamlessly integrate the surrounding pixels. This delicate approach prevents unnatural or jarring transitions in the final image.
Enhancing Facial Features and Skin Tones
Enhancing facial features or altering skin tones can dramatically affect the perception of an image. Techniques like adjusting the intensity of highlights and shadows, fine-tuning contrast, and selectively altering color saturation can refine facial structure and skin complexion. However, over-enhancement can produce an artificial or unrealistic appearance. Careful consideration of the original image’s characteristics and the desired outcome is paramount for creating a natural-looking enhancement.
Cloning and Healing Tools
Cloning tools and healing brushes are indispensable for image retouching. Cloning tools copy pixels from one area of an image to another, effectively masking imperfections. The healing brush, a more sophisticated tool, blends pixels from the source area with the destination, creating a more seamless and natural repair. Both tools demand precision and careful application to avoid noticeable artifacts or distortions.
Retouching Tool Applications
| Tool | Specific Application |
|---|---|
| Clone Stamp Tool | Duplicating pixels from one area to another to cover blemishes or scars. Excellent for large, consistent areas. |
| Healing Brush Tool | Blending pixels from a source area to the destination, creating a smoother transition and a more natural look. Suitable for smaller imperfections and areas with intricate details. |
| Spot Healing Brush Tool | Removing blemishes or imperfections with a single click. Quick and effective for minor blemishes or imperfections. |
| Patch Tool | Replacing a larger area with a selected area. Useful for removing significant portions of blemishes, replacing damaged areas, or seamlessly removing unwanted elements. |
| Red Eye Tool | Correcting red-eye effect, a common issue in portraits, caused by flash reflections in the eyes. |
Composition and Layout
Mastering image composition is crucial for creating visually engaging and impactful photographs. Effective composition transcends mere technical skills; it’s about understanding how elements within an image interact to create a compelling narrative and evoke a desired emotional response. A well-composed image draws the viewer’s eye in a meaningful way, guiding them through the scene and leaving a lasting impression.A strong compositional structure is achieved by strategically arranging elements within the frame.
This arrangement not only improves the visual appeal but also enhances the overall message conveyed by the image. By thoughtfully considering the principles of composition, image editors can elevate their work from merely functional to truly artistic.
Principles of Visual Composition
Understanding the fundamental principles of visual composition is essential for creating visually appealing images. These principles act as guidelines, offering a framework for arranging elements within the frame. A harmonious balance between these principles enhances the overall impact of the image.
- Rule of Thirds: This fundamental principle divides the image into nine equal segments using two equally spaced horizontal and vertical lines. Placing key elements along these lines or at their intersections creates a more dynamic and engaging composition, avoiding the center as a default placement. For example, positioning a subject at the intersection of these lines draws the viewer’s attention and creates a more visually interesting image than placing the subject directly in the center.
This technique enhances the overall visual appeal and fosters a sense of balance in the image.
- Leading Lines: Lines within an image can guide the viewer’s eye towards a focal point. These lines can be straight, curved, or diagonal. By strategically using leading lines, the editor can direct the viewer’s gaze through the image, emphasizing specific elements or creating a sense of depth. For instance, a winding road in a landscape photograph can lead the viewer’s eye towards a distant landmark, creating a strong visual connection between the foreground and background.
- Symmetry and Patterns: Symmetrical compositions create a sense of balance and harmony. Patterns, whether natural or man-made, can also add visual interest and create a sense of order. A perfectly symmetrical reflection in a still pond or repeating patterns in a fabric design are examples of this technique. They provide a visual anchor and create a sense of order in the image.
- Negative Space: Negative space, the area surrounding the main subject, is crucial for creating balance and emphasis. By thoughtfully utilizing negative space, the editor can create a sense of spaciousness, isolate the subject, and prevent the image from feeling cluttered. An example is a minimalist portrait where the subject occupies a small portion of the frame, allowing the surrounding negative space to highlight the subject’s features and emotions.
Creating Balanced Compositions
A well-balanced composition is essential for a visually compelling image. Achieving balance involves more than just symmetrical arrangements. It encompasses a harmonious distribution of elements within the frame. Careful consideration of the visual weight of different elements is crucial for a well-balanced image.
- Visual Weight: Different elements in an image have varying visual weights. Large, bold objects or intense colors tend to have greater visual weight than smaller, subtle details. Balancing the visual weights of different elements is essential for achieving a harmonious composition. For instance, a large, imposing mountain in a landscape photo requires a counterbalance, such as a smaller but equally important element like a winding path or a small cottage, to achieve visual harmony.
- Focal Point: A focal point is the central element of the image that draws the viewer’s attention. It’s crucial to strategically place the focal point within the frame, considering the other elements to ensure it doesn’t overpower or overwhelm the overall composition. This can be achieved by utilizing leading lines, contrasting colors, or by strategically placing the focal point within the rule of thirds framework.
Working with Layers: Photoshop Editing Tips
Layers are the cornerstone of effective image editing in Photoshop. They allow you to organize and manipulate different elements of an image as independent entities, enabling non-destructive editing and providing a robust framework for complex projects. This modular approach significantly simplifies editing and allows for easy adjustments, revisions, and even the addition of new elements without affecting the original image data.
Understanding Layers, Photoshop editing tips
Layers in Photoshop are essentially transparent sheets overlaid on one another. Each layer contains a specific element of the image, such as a background, a foreground object, or a text element. This layered structure facilitates complex manipulations without permanently altering the original image data. It’s a key principle behind Photoshop’s non-destructive editing capabilities.
Using Layers to Organize Image Elements
The ability to organize image elements into separate layers is a crucial advantage. Imagine you’re working on a portrait. You can create a separate layer for the background, another for the subject’s skin tones, and yet another for clothing. This allows for independent adjustments to each element without affecting the others. You can adjust the opacity, blending modes, and other properties of each layer independently, leading to a higher level of control and precision.
Creating and Editing Layers
Creating layers is straightforward. Photoshop provides various options for creating new layers, including a dedicated button in the layers panel. Commonly used methods include creating a new layer for a specific element, such as text, a graphic, or a selection. Once a layer is created, you can manipulate it by adjusting its properties in the Layers panel, including opacity, blending modes, and other settings.
You can also duplicate layers to quickly create variations of an element.
Layer Styles
Layer styles are pre-programmed effects that can be applied to layers. These enhance visual appeal and add complexity to your images without significant manual effort. Understanding and using these styles is crucial for producing professional-quality images.
Knowing some Photoshop editing tips can seriously boost your image manipulation skills. Understanding the key differences between Adobe Photoshop CC and Photoshop Elements, like the range of tools and features, is important for choosing the right software. For example, exploring Adobe Photoshop CC vs Photoshop Elements: Key Differences can help you decide if you need more advanced options for intricate edits.
Ultimately, mastering these nuances will undoubtedly improve your Photoshop editing workflow.
| Layer Style | Effect | Description |
|---|---|---|
| Bevel and Emboss | Creates a three-dimensional effect | This style adds highlights and shadows to the layer, mimicking the look of light reflecting off a sculpted surface. |
| Gradient Overlay | Adds a gradient effect to the layer | A gradient overlay applies a smooth transition between two or more colors to the layer. It’s effective for creating subtle transitions or adding visual interest. |
| Inner Shadow | Creates a shadow inside the layer | This style produces a soft shadow effect inside the layer, creating depth and dimension. |
| Outer Glow | Creates a glow effect around the layer | An outer glow adds a soft, glowing effect around the edges of the layer, often used to highlight elements or add visual emphasis. |
| Drop Shadow | Creates a shadow effect outside the layer | This style casts a shadow behind the layer, providing a sense of depth and separation from the background. |
Selection and Masking Techniques
Mastering selection and masking tools is crucial for precise editing and manipulation in Photoshop. These techniques allow you to isolate and modify specific areas of an image without affecting the surrounding pixels, opening a world of creative possibilities. From subtle adjustments to dramatic transformations, these tools are fundamental for achieving polished results.
Selection Tools Overview
Different selection tools in Photoshop cater to various needs. Understanding their strengths and weaknesses is key to effective image manipulation. These tools are essential for achieving clean selections, a prerequisite for accurate masking and editing.
- The Rectangular Marquee Tool: This tool allows for creating rectangular selections. Its simplicity makes it ideal for selecting uniform areas like a block of text or a solid color. It’s also a great starting point for more complex selections.
- The Elliptical Marquee Tool: This tool creates elliptical selections, perfect for selecting objects with rounded or circular shapes. It’s useful for selecting portions of a subject that are not perfectly rectangular, like a person’s head or a flower.
- The Lasso Tool: This tool allows for freehand selections, providing greater flexibility and control. It’s particularly useful for selecting irregular shapes, like a complex plant or a flowing piece of clothing. Variations exist within the Lasso Tool (Polygonal Lasso, Magnetic Lasso) providing different levels of precision and automation.
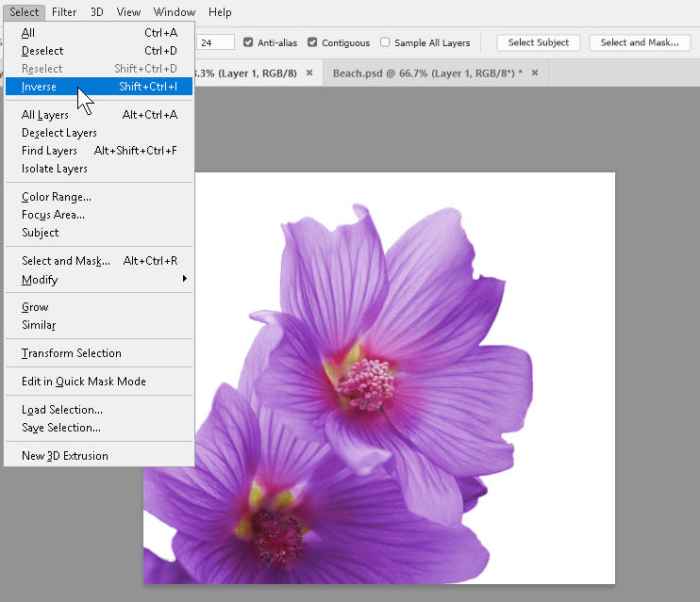
- The Magic Wand Tool: This tool selects similar colors, allowing for quick selections of large areas of uniform color. It is excellent for isolating backgrounds from subjects with clear color differences. However, it can struggle with complex color gradients and require adjustments.
- The Quick Selection Tool: This tool offers a balance between the precision of the lasso and the speed of the magic wand. It allows for refining selections with ease, and works best when the subject and background have clear color or tone differences.
Precise Editing and Masking
Once a selection is made, precise editing and masking become possible. This process involves isolating and manipulating specific image areas without altering surrounding pixels. By using masks, you can achieve a high level of control over the editing process.
Masking Techniques
Masking techniques are essential for isolating and manipulating specific image areas. These methods provide non-destructive editing, allowing for adjustments and corrections without permanently altering the original image data. Masking allows you to selectively apply edits or effects to specific parts of the image.
- Using Layer Masks: Layer masks are a powerful tool for non-destructive editing. They allow you to control the visibility of pixels within a layer, effectively isolating and manipulating specific parts of an image. They are very useful for adding or removing effects without affecting the original.
- Using Vector Masks: Vector masks offer precise control over selections, allowing for sharp, clean edges. They are ideal for intricate designs and complex shapes. They are best suited for shapes that need perfect precision and are generally used in vector editing rather than raster editing.
- Using Alpha Channels: Alpha channels provide a grayscale representation of a selection. They allow for precise control over selections, especially useful for complex selections, as well as complex edits and effects.
Selection Tools Summary
| Tool | Description | Use Cases |
|---|---|---|
| Rectangular Marquee | Creates rectangular selections | Selecting blocks of text, uniform areas |
| Elliptical Marquee | Creates elliptical selections | Selecting objects with rounded shapes |
| Lasso Tool | Freehand selections | Selecting irregular shapes, complex Artikels |
| Magic Wand | Selects similar colors | Isolating objects from backgrounds with clear color differences |
| Quick Selection | Refining selections | Balance between precision and speed |
Image Resizing and Cropping
Image resizing and cropping are fundamental Photoshop techniques for adapting images to various uses and presentations. Proper resizing and cropping not only adjusts the dimensions of an image but also significantly impacts its visual impact and overall quality. Understanding these techniques is crucial for achieving desired results without compromising image quality.
Resizing Techniques
Different resizing methods affect the quality of the final image in varying degrees. Choosing the appropriate method depends on the intended use and the desired level of detail. Understanding these methods helps maintain the best possible quality.
- Resampling Methods: Resampling methods alter the pixel density of an image. Methods such as Nearest Neighbor, Bilinear, Bicubic, and Lanczos resampling produce varying degrees of smoothing and detail. Nearest Neighbor maintains sharp edges but can introduce pixelation. Bilinear offers better smoothing but may blur finer details. Bicubic, a more advanced method, provides a good balance between smoothing and detail preservation.
Lanczos, the most sophisticated, offers high-quality resizing but can be computationally intensive. Selecting the right method is essential for optimal image quality.
Importance of Resolution
Image resolution, measured in pixels per inch (PPI), directly impacts the image’s clarity and detail. Higher resolution images provide more detail and are suitable for larger outputs, such as high-quality prints or displays. Lower resolution images are sufficient for smaller displays, like web graphics. Maintaining the appropriate resolution throughout the editing process is critical.
Aspect Ratio
Maintaining the original aspect ratio is important when resizing to avoid distorting the image’s proportions. The aspect ratio defines the proportional relationship between the width and height of an image. Preserving the aspect ratio ensures the image’s original shape and proportions are maintained.
Cropping Techniques
Cropping involves removing unwanted portions of an image. This technique allows focusing on the essential elements while improving the composition and visual impact of the image. Using the cropping tool with precision and understanding of the subject is vital for creating effective compositions.
Example: Resizing a Portrait
Imagine resizing a high-resolution portrait for a social media post. For optimal quality, use a bicubic resampling method and maintain the aspect ratio. If the output is a smaller display, a bilinear method might be sufficient, but a loss of detail might occur.
Comparison of Resizing Methods
| Resampling Method | Effect on Quality | Suitability |
|---|---|---|
| Nearest Neighbor | Sharp edges, but potential pixelation | Quick resizing, simple outputs |
| Bilinear | Smoother transitions, some detail loss | Web graphics, smaller outputs |
| Bicubic | Good balance between sharpness and smoothing | General resizing, prints |
| Lanczos | High-quality output, complex computations | High-resolution prints, detailed images |
Working with Specific Image Types
Mastering Photoshop extends beyond generic techniques. Understanding how to tailor your approach to different image genres, like portraits, landscapes, and product photography, is crucial for achieving optimal results. This section delves into the specific nuances and challenges of each image type, providing you with targeted editing strategies.
Portrait Photography Editing
Portrait editing focuses on enhancing the subject’s features and creating a captivating mood. Skin retouching is paramount, aiming for a natural and polished appearance, avoiding overly smooth or artificial results. Adjusting lighting and color tones can dramatically influence the overall mood, whether creating a warm and inviting atmosphere or a cool and sophisticated look. Careful attention to eye detail and expressions is essential to portray the subject’s personality and emotions effectively.
Landscape Photography Editing
Landscape editing often involves enhancing the grandeur and depth of the scene. Color grading plays a vital role in recreating the atmosphere of the moment, whether a vibrant sunrise or a serene evening. Careful attention to details like shadows and highlights helps convey the texture and three-dimensionality of the scene. Noise reduction is frequently necessary to maintain clarity and sharpness, particularly in high-contrast or low-light conditions.
Product Photography Editing
Product photography editing aims to showcase the product in the best possible light. Accurate color representation is critical, ensuring that the colors match the real-world product. Careful attention to lighting and shadows is needed to highlight the product’s features and textures, minimizing imperfections and highlighting desirable aspects. Background removal and retouching are standard procedures for a clean and professional presentation.
Table: Best Practices for Editing Different Image Types
| Image Type | Key Focus Areas | Specific Challenges | Solutions |
|---|---|---|---|
| Portrait | Skin retouching, lighting, eye detail, mood | Maintaining natural look, avoiding over-editing, capturing emotion | Use non-destructive editing methods, selectively adjust tones, focus on natural expressions |
| Landscape | Color grading, depth, texture, clarity | Balancing highlights and shadows, reducing noise, preserving atmosphere | Use graduated filters, tonal adjustments, careful noise reduction |
| Product | Accurate color, lighting, texture, clean presentation | Highlighting features, minimizing imperfections, removing backgrounds | Precise color matching, strategic lighting, selective retouching, effective background removal techniques |
Specific Effects and Filters
Photoshop offers a diverse array of filters and effects, allowing users to transform images in compelling ways. These tools can enhance visual appeal, evoke specific moods, and create unique artistic styles. Mastering these tools is crucial for creating professional-quality images.
Filter Categories and Applications
Photoshop’s filter categories are categorized for ease of use. Each category contains a range of effects designed to address various needs. Understanding the specific purpose of each filter is essential to making informed choices for desired outcomes.
Specific Filter Examples
Several filters cater to unique visual transformations. For example, the “Artistic” filter category provides options like “Chalk & Charcoal,” “Film Grain,” and “Watercolor,” which can mimic the look of traditional artistic mediums.
Customizing Filter Effects
Filter customization options often include controls for intensity, size, and other parameters. Adjusting these settings enables users to refine the effect and tailor it to the specific needs of the image. For instance, the “Blur” filter’s parameters might involve radius and method selection.
Creating Unique Visual Effects
Combining different filters and adjustments allows for unique effects. For instance, applying a “Distort” filter followed by a “Stylize” filter can produce surprising results, potentially creating a surreal or abstract image.
Filter Comparison Table
| Filter Category | Common Filters | Typical Effects | Customization Options |
|---|---|---|---|
| Blur | Gaussian Blur, Motion Blur, Radial Blur | Reduces image sharpness, creates smooth transitions, simulates motion | Radius, Method, Angle, Number of Iterations |
| Distort | Pinch, Twirl, Spherize | Deforms image elements, creates unusual shapes, alters perspective | Strength, Center Point, Radius |
| Pixelate | Color Halftone, Mosaic | Replaces areas with blocks of pixels, creates a patterned effect | Cell Size, Color Mode, Smoothness |
| Artistic | Chalk & Charcoal, Film Grain, Watercolor | Mimics artistic techniques, adds texture and grain to images | Texture Type, Detail, Grain Amount, Color Adjustments |
| Stylize | Find Edges, Emboss, Smooth | Enhances image details, creates 3D-like effects, alters texture | Strength, Angle, Height, Depth |
Final Thoughts
In conclusion, mastering Photoshop editing tips equips you with the tools and knowledge to transform ordinary images into extraordinary works of art. From basic adjustments to advanced techniques, understanding these principles will unlock your creative potential. Remember to practice and experiment to fully realize your image editing ambitions.
Questions Often Asked
What are some common mistakes beginners make when adjusting brightness and contrast?
Over-adjusting brightness and contrast can lead to unnatural-looking images. Beginners often overdo it, resulting in washed-out or overly dark images. Gradually adjust these settings, paying close attention to the overall effect on the image.
What are the best practices for working with layers in Photoshop?
Using layers effectively allows for non-destructive editing. Create separate layers for different elements of your image, enabling you to easily modify or remove parts of the image without affecting the rest. This organization also makes editing and future adjustments much simpler.
How can I resize images without losing quality?
Image resizing can affect quality. Consider the resolution and aspect ratio of the image when resizing. Use appropriate resizing techniques to minimize loss of quality. For example, using “resample” options or specific techniques can help to maintain image detail.
What are some specific editing techniques for product photography?
Product photography often involves highlighting the product’s features. Techniques include adjusting lighting, removing backgrounds, and enhancing colors to showcase the product’s attributes.


