Photoshop for beginners provides a comprehensive introduction to this powerful image editing software. This guide will take you from novice to confident user, covering essential tools, image editing techniques, and creative applications. You’ll learn the basics of the interface, essential tools like layers and selections, and how to manipulate images with ease.
Mastering Photoshop opens up a world of creative possibilities, from enhancing photographs to designing graphics and more. This guide will equip you with the knowledge and skills to begin your Photoshop journey with confidence.
Introduction to Photoshop for Beginners
Photoshop is a powerful image editing software used by professionals and hobbyists alike. It offers a wide range of tools for enhancing, manipulating, and creating digital images. Understanding its core functionalities is crucial for anyone wanting to explore digital art, graphic design, or even simple image enhancements. This guide will provide a basic overview of Photoshop’s capabilities and highlight its importance in various creative fields.Photoshop is a versatile tool that goes beyond basic image editing.
It’s used to create stunning graphics, logos, and web designs, as well as retouching photographs and composite images. Learning Photoshop empowers users to express their creativity and transform ordinary images into extraordinary works.
Core Functionalities of Photoshop
Photoshop’s core strength lies in its ability to manipulate images in numerous ways. It provides tools for adjusting colors, sharpening details, removing imperfections, and creating special effects. Understanding these core functionalities is essential for achieving desired outcomes.
Importance of Learning Photoshop
Learning Photoshop opens doors to various creative avenues. Whether you’re a photographer looking to enhance your images, a graphic designer aiming to create compelling visuals, or an aspiring artist seeking to bring your concepts to life, Photoshop offers a versatile platform.
Key Photoshop Tools and Their Uses
This table Artikels some fundamental Photoshop tools and their basic functions:
| Tool | Basic Use |
|---|---|
| Selection Tools (e.g., Marquee, Lasso) | Selecting specific areas of an image for editing, copying, or moving. |
| Move Tool | Moving selected elements within the image. |
| Crop Tool | Resizing or trimming an image. |
| Layers Panel | Organizing and manipulating different elements of an image in separate layers. |
| Brush Tool | Applying paint-like effects and textures to images. |
| Eraser Tool | Removing parts of an image. |
| Adjustment Layers | Non-destructively altering image properties like brightness, contrast, and color. |
Types of Images Commonly Edited with Photoshop
Photoshop is a powerful tool that is suitable for a broad range of image types.
- Photographs: Enhancing photo quality, removing blemishes, adjusting lighting and color.
- Digital Artwork: Enhancing details, blending colors, adding textures, and creating special effects.
- Graphics: Designing logos, illustrations, and other visual elements for print or web use.
- Web Graphics: Creating banners, icons, and other elements for websites.
- Composited Images: Combining multiple images to create a new visual.
Essential Tools and Interface: Photoshop For Beginners
Photoshop’s interface, while seemingly complex at first, is actually quite intuitive once you understand its structure and the functions of its various components. Mastering these tools and panels is key to efficiently navigating and manipulating images. Understanding the fundamental tools and their roles will significantly improve your workflow and overall experience with the software.The Photoshop interface is designed with a structured layout to streamline the image editing process.
Key panels, like the Layers panel and the Tools panel, provide quick access to essential functions, allowing for precise control over image elements. Understanding how these panels interact will help you achieve desired effects.
Selection Tools
Selection tools are crucial for isolating and manipulating specific areas of an image. These tools enable you to precisely select portions of an image, allowing for operations like copying, moving, resizing, and editing individual components without affecting the rest of the image.
- The Rectangular Marquee Tool (M): Used for selecting rectangular areas. It’s excellent for cropping, moving, or applying effects to specific sections of an image.
- The Elliptical Marquee Tool (M): Enables selection of elliptical or circular areas. Ideal for selecting objects with curved edges or creating specific shapes within an image.
- The Lasso Tool (L): Provides flexibility in selecting free-form shapes. Precise selection is possible, especially useful for intricate shapes and complex selections.
- The Magic Wand Tool (W): Selects similar colors in an image. It’s efficient for selecting large areas with consistent colors, but it may not be precise for nuanced color gradations.
Layers Panel
The Layers panel is central to Photoshop’s non-destructive editing approach. It allows you to organize and manage multiple image elements (layers) independently. This feature enables you to edit one element without affecting others, making adjustments reversible and providing flexibility in image composition.
- Each layer represents a distinct image element. You can add, delete, or modify layers to create intricate compositions.
- Opacity and blending modes are essential controls within the Layers panel. They enable adjustments to the visibility and interaction of layers, resulting in diverse visual effects.
- Masking tools are often employed with layers to isolate specific portions for editing. This helps refine the selection and control the impact of adjustments.
Brush Tools
The Brush tools are essential for painting and adding details to an image. These tools allow for a wide range of textures, strokes, and effects to enhance image quality.
- Different brush tip shapes and sizes are available, enabling diverse artistic effects.
- Brush hardness and opacity settings control the precision and intensity of the strokes.
- A variety of blending modes can be used with brushes to create intricate visual effects, enabling unique and compelling enhancements to the image.
Photoshop Interface Overview
The Photoshop interface is structured to facilitate efficient image editing. Understanding the various panels and their roles will significantly improve your workflow.
| Tool | Icon | Description |
|---|---|---|
| Move Tool | [Image of the Move Tool] | Used for moving and transforming selected elements within an image. |
| Crop Tool | [Image of the Crop Tool] | Used to crop or resize an image to a desired shape or size. |
| Brush Tool | [Image of the Brush Tool] | Used for painting or applying textures to an image. |
| Eraser Tool | [Image of the Eraser Tool] | Used for removing parts of an image. |
Navigating the Interface
Effective navigation is crucial for efficient image manipulation. Understanding the interface’s structure allows you to quickly access the tools and panels you need.
- Using the navigation tools, like the zoom and pan tools, allows for precise examination of specific image details.
- The menus and toolbars provide quick access to frequently used functions.
- Keyboard shortcuts can significantly accelerate the image editing process.
Image Editing Basics
Image editing in Photoshop goes beyond simply opening and saving files. Mastering resizing, cropping, and color correction is crucial for enhancing your images and achieving the desired aesthetic. These fundamental techniques provide a solid foundation for more complex editing tasks.
Opening and Saving Images
Photoshop supports a wide variety of image formats. Understanding these formats and their respective uses is vital for efficient workflow. Common formats include JPEG, PNG, TIFF, and PSD. JPEGs are great for web use due to their small file size, while PNGs preserve transparency. TIFFs offer high quality, but larger file sizes, making them suitable for professional print work.
PSD files retain all layers and adjustments, allowing for non-destructive editing. Saving in the appropriate format ensures the best results for your specific needs.
Resizing and Cropping Images
Resizing and cropping are fundamental image manipulation tools. Resizing alters the dimensions of an image, while cropping removes unwanted portions. Proper resizing is important to maintain aspect ratio and avoid distortion. Cropping is used to focus attention on the most crucial elements of an image.
- Resizing: Photoshop offers various resizing options, including changing the width and height directly, or maintaining the aspect ratio. Maintaining the aspect ratio prevents distortion by proportionally adjusting both dimensions when one is changed. Using the image’s original proportions often produces better results.
- Cropping: Photoshop’s cropping tool allows you to precisely select the area you want to keep, removing unwanted parts of the image. Cropping is useful for framing subjects, removing blemishes, or adjusting the composition.
Color Correction and Adjustments
Color correction and adjustments are essential for achieving the desired visual impact in an image. They encompass a range of tools and techniques to enhance or modify colors, contrast, and other visual elements.
- Brightness/Contrast: Adjusting brightness and contrast can significantly alter the overall tone of an image. Increasing brightness makes the image lighter, while increasing contrast enhances the difference between light and dark areas. An example of this is making a slightly underexposed photo look more vibrant.
- Levels: Levels adjust the tonal range of an image, allowing for precise control over the highlights, mid-tones, and shadows. This is particularly useful for correcting images with uneven lighting or color casts.
- Curves: Curves provide a more granular way to adjust tonal values compared to Levels. They offer a visual representation of the tonal changes and can be used for more sophisticated color grading.
- Hue/Saturation: These adjustments control the color hues and intensities in the image. Hue changes the color family, while saturation alters the intensity. Adjustments can be used to correct or enhance the colors in an image.
Common Image Editing Adjustments
| Adjustment | Before | After | Description |
|---|---|---|---|
| Brightness/Contrast |  |  | Adjusted the overall lightness and darkness of the image. |
| Levels |  |  | Precisely adjusted the tonal range, correcting highlights and shadows. |
| Curves |  |  | Fine-tuned tonal values using a graphical representation. |
| Hue/Saturation |  |  | Adjusted the colors’ intensity and tones, enhancing color vibrancy. |
Working with Layers
Layers are the cornerstone of Photoshop’s image manipulation capabilities. They act as individual, editable elements within a single document, allowing for non-destructive editing. This modular approach enables flexibility and control over various aspects of an image, from adjustments to complex composites. This structure significantly simplifies the editing process, especially when working with multiple images or intricate design elements.Understanding and effectively utilizing layers is crucial for efficient and professional image editing.
From basic adjustments to complex compositing, layers empower you to achieve a wide range of effects without permanently altering the original image data. This method facilitates easy revisions and iterations, ensuring a smooth and versatile workflow.
Creating and Editing Layers
Layers in Photoshop are like transparent sheets superimposed on each other. You can add, modify, or delete layers to build up an image. This enables an iterative design process, where edits can be readily reversed or altered. This allows for a non-destructive approach to image editing.
- To create a new layer, select the “Create a new layer” icon in the Layers panel, or use the keyboard shortcut (Ctrl+Shift+Alt+N in Windows, Command+Shift+Alt+N in Mac). This will open a new layer dialog box where you can adjust settings, like opacity, blending modes, and layer names.
- Editing layers involves modifying the content of the layer itself, using tools like the Move tool, selection tools, or adjustment layers. The editing process can include changing colors, shapes, and sizes, and adding effects.
- To edit layer properties, double-click the layer name in the Layers panel. This brings up the Layer Style dialog box, where you can adjust layer properties, such as blending modes, opacity, and fill.
Manipulating Layers
Layers can be reordered, moved, or grouped to manage complex designs efficiently. This hierarchical structure makes it easy to organize multiple elements. Effective layer management streamlines the workflow and improves the visual hierarchy.
- To reorder layers, drag and drop them in the Layers panel. The order in which layers are stacked directly affects how they interact with each other.
- Layers can be moved to a different image or merged into a single layer for better organization.
- Grouping layers allows you to treat multiple layers as a single unit, streamlining complex compositions.
Layer Masks
Layer masks are a powerful tool for selectively revealing or hiding portions of a layer. They work like stencils, enabling precise control over which parts of a layer are visible. This feature allows for intricate adjustments and subtle changes.
- To create a layer mask, click the “Add Layer Mask” icon in the Layers panel. This creates a new layer mask that’s associated with the layer. This mask can be edited with various tools.
- Layer masks are edited using a brush tool, allowing you to paint areas of the layer to reveal or hide them. This non-destructive editing method is a cornerstone of professional image manipulation.
Layer Styles
Layer styles add effects to a layer without altering the underlying pixel data. They enable you to apply effects like shadows, glows, and bevels to individual layers. This technique provides a variety of visual effects without affecting the original image.
- To add layer styles, click the “Layer Styles” icon in the Layers panel. This opens a dialog box that contains numerous style options.
- Adjusting settings for different layer styles allows for fine-tuning and customization of effects. This gives considerable creative freedom in design.
Managing Complex Layers
Effective layer management is critical for handling large or intricate images. Organizing layers logically, using layers masks, and layer styles can help simplify the process.
- Using folders to group related layers is an efficient way to organize complex projects. This hierarchical structure is essential for large projects.
- Employing layer styles and masks judiciously helps maintain a clean and organized workflow.
- Backing up layers or creating duplicates of layers before making significant edits is a vital part of maintaining a non-destructive workflow. This approach ensures that mistakes can be easily rectified.
Basic Image Adjustments
Image adjustments are fundamental to enhancing and refining photographs in Photoshop. These adjustments allow you to modify aspects like brightness, contrast, and color saturation to achieve a desired aesthetic or correct imperfections. Understanding these techniques empowers you to significantly improve the visual appeal and impact of your images.
Brightness and Contrast Adjustments
Brightness and contrast are crucial for image readability and visual impact. Adjusting brightness controls the overall lightness or darkness of the image, while contrast emphasizes the differences between light and dark areas, thereby increasing or decreasing the visual separation. These adjustments often work in tandem, complementing each other to create a balanced and visually appealing image.
Saturation Adjustments
Saturation controls the intensity of colors within an image. Increasing saturation makes colors more vibrant, while decreasing it makes them less intense. This adjustment is particularly valuable for enhancing the overall mood or style of an image, depending on the specific desired effect.
Levels and Curves Adjustments
Levels and curves offer more advanced control over image tone and color. Levels adjust the tonal distribution within an image, allowing you to shift the highlights, mid-tones, and shadows. Curves provide a more precise method for manipulating tonal values and color balance, offering a degree of customization unmatched by simpler adjustments. By manipulating the curves, photographers and editors can achieve very precise control over the tonal range.
Removing Blemishes and Unwanted Elements
Photoshop offers several tools for removing blemishes and unwanted elements from an image. The Spot Healing Brush tool is excellent for quickly removing small imperfections, while the Clone Stamp tool allows for more precise removal of unwanted objects or details. These tools can be used to restore images to a higher standard, fixing damage or unwanted elements, while preserving the image’s overall integrity.
Image Sharpening Techniques
Sharpening techniques enhance the detail and clarity of an image. These techniques often involve adjusting the image’s edge detection, which can lead to more refined results. The Unsharp Mask filter is a popular tool for sharpening images. Using the Unsharp Mask filter, users can control the amount of sharpening and the radius to be applied to the image.
Understanding these techniques will allow you to increase the image’s visual appeal and clarity.
Step-by-Step Sharpening Guide (Unsharp Mask)
- Select the “Filter” menu and choose “Sharpen” then “Unsharp Mask”.
- Adjust the “Amount” slider to control the intensity of the sharpening effect. Start with a low value and increase gradually until you achieve the desired level of sharpness. A low amount of sharpening is usually preferred for a more natural look.
- Adjust the “Radius” slider to control the area affected by the sharpening effect. A larger radius will sharpen a larger area, potentially resulting in a more noticeable, but sometimes artificial, look. A smaller radius will sharpen a smaller area, which is preferred for finer details and a more subtle effect.
- Adjust the “Threshold” slider to control the detection of edges. A higher threshold will sharpen only noticeable edges, while a lower threshold may sharpen less noticeable edges and details, leading to a more noticeable effect.
- Experiment with different combinations of Amount, Radius, and Threshold to achieve the optimal sharpening effect for your image.
Creating and Editing Text
Adding text is a fundamental aspect of image editing, allowing you to convey information, add captions, or create artistic elements. Photoshop provides a robust set of tools for manipulating text, from simple formatting to complex effects. Learning these tools will enhance your ability to customize images and communicate effectively through visual media.Photoshop’s text tools enable precise control over font, size, color, and placement.
You can easily integrate text into existing images, making it an indispensable skill for designers, photographers, and anyone working with visual content.
Text Tools
Photoshop offers a variety of tools for adding and editing text. The Type Tool is the primary tool for creating and manipulating text. Its different modes enable different functionalities. The Horizontal Type Tool creates text aligned horizontally, while the Vertical Type Tool creates text aligned vertically. Other tools like the Horizontal Type Mask and Vertical Type Mask allow more nuanced control over text placement and effects.
Text Formatting Options
Various formatting options are available to customize the appearance of text. These options include adjusting font, size, color, style, and kerning (adjusting spacing between characters). Font families offer a wide range of styles, from classic serif fonts to modern sans-serif fonts, and decorative fonts for unique effects. Font size dictates the text’s physical size, and color adds visual appeal.
Text styles encompass bold, italic, and underline options, further enhancing the visual impact. Kerning controls the spacing between characters, ensuring readability and visual harmony.
Text Effects
Photoshop’s text effects allow you to transform text into artistic creations. Drop shadows, inner shadows, and Artikels provide depth and dimension. These effects can be applied individually or combined to create unique visual styles. Bevel and Emboss effects add a three-dimensional look, while strokes add a border to the text. These techniques allow you to make text stand out or integrate it seamlessly into the image.
Adding gradients to text can add another layer of visual interest.
Integrating Text into Images
Integrating text into images is a versatile technique. Placing text over existing images allows for captioning, highlighting specific details, or adding artistic flair. Using layers allows for independent manipulation of text and images, ensuring precise placement and editing. By utilizing layer masks, you can precisely control the visibility of text within the image. Text can be integrated into a variety of designs, from simple image captions to complex graphic designs.
The positioning of text on an image often depends on the overall aesthetic and message intended to be conveyed.
Image Manipulation Techniques
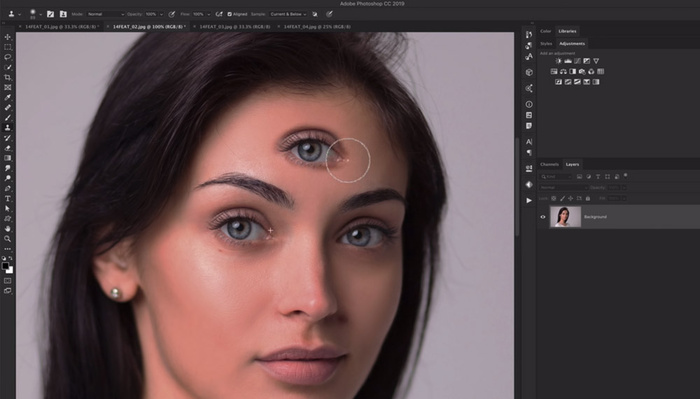
Image manipulation in Photoshop allows for a wide range of creative possibilities, from subtle enhancements to dramatic transformations. Understanding these techniques empowers you to refine your images, express your vision, and create compelling visuals. Mastering these core methods is crucial for effectively using Photoshop to achieve your desired outcomes.Learning how to rotate, flip, and transform images, along with basic retouching and enhancements, is fundamental.
This will equip you to create unique collages and apply various filters and effects for artistic impact. The techniques discussed in this section offer a solid foundation for further exploration and development of your Photoshop skills.
Rotating, Flipping, and Transforming Images
Image rotation, flipping, and transformation are fundamental adjustments for modifying the orientation and position of elements within an image. These techniques are essential for correcting perspectives, arranging compositions, and enhancing the overall aesthetic appeal of your work. Understanding these manipulations enables you to create dynamic and compelling visuals.
- Rotation: This technique allows you to turn an image by a specified angle. It’s crucial for rectifying skewed images or altering the perspective to achieve desired compositional effects. Photoshop provides tools to rotate images clockwise or counter-clockwise, enabling adjustments in specific increments or by dragging the rotation handle. This flexibility is key for fine-tuning the image’s orientation.
- Flipping: This process mirrors the image horizontally or vertically, reversing the elements’ positions. Horizontal flipping is useful for mirroring objects or scenes, while vertical flipping can be used for various effects, such as creating a reversed text effect. Flipping is an essential tool for achieving unique visual results.
- Scaling and Resizing: These techniques alter the dimensions of an image. Scaling adjusts the image’s size proportionally, while resizing allows for independent adjustments to the width and height. This enables you to fit images into specific spaces, adapt them for different applications, or create scaled-up/down versions for various purposes.
Basic Image Retouching and Enhancements
Retouching and enhancement techniques are employed to improve the overall quality and appearance of an image. These techniques can address imperfections, correct flaws, or refine details to create a polished and appealing result.
- Removing blemishes and imperfections: Photoshop offers tools to eliminate blemishes, scars, and other imperfections from an image. These tools, including the Healing Brush and Spot Healing Brush, allow for targeted adjustments, maintaining the image’s natural look.
- Adjusting colors and tones: Techniques like adjusting brightness, contrast, saturation, and levels are crucial for refining the color palette and tonal range. These adjustments can enhance the visual appeal of the image and ensure a balanced color scheme.
- Sharpening and blurring: Sharpening can improve image details and clarity, while blurring can soften or smooth out areas, creating a sense of depth or artistic effect. These techniques are vital for manipulating the image’s sharpness or softness.
Using Filters and Effects Creatively
Filters and effects in Photoshop offer a vast array of creative options for transforming images. These tools can enhance or alter the image’s aesthetic appeal, creating unique visual styles. Applying these filters effectively adds creative flair and distinguishes your image.
- Applying Artistic Filters: Photoshop offers a wide variety of artistic filters that can be used to transform images. These filters can create unique visual styles, ranging from painterly effects to stylized textures. The selection of filters depends on the desired aesthetic.
- Creating Special Effects: Photoshop’s effects can create striking visual transformations, ranging from dramatic lighting effects to surreal or abstract looks. These special effects can add a touch of uniqueness and excitement to your images.
- Adjusting the intensity of effects: Adjusting the intensity of filters and effects allows for precise control over the visual outcome. Adjusting the opacity or blending mode of filters can fine-tune the visual impact of the effects.
Creating Collages
Collage creation involves combining multiple images to create a composite image. This technique allows for a unique and artistic approach to storytelling and visual representation. Mastering the technique will add creative flair to your projects.
- Assembling images: Using various tools to align, arrange, and blend images is crucial for creating cohesive and visually appealing collages. Precise placement and careful blending are key elements for creating an engaging composition.
- Adding textures and overlays: Adding textures and overlays can further enhance the visual appeal of collages. Textures add depth and interest, while overlays provide an additional layer of visual impact.
- Blending images: The selection of appropriate blending modes can significantly enhance the overall impact of the collage. This includes understanding how different modes impact the colors and textures of the images in the collage.
Understanding File Formats
Image file formats significantly impact the quality and usability of your images in Photoshop. Different formats cater to various needs, from web displays to high-resolution prints. Understanding these differences is crucial for effective image management and delivery.Choosing the right format directly influences the image’s size, quality, and compatibility with different applications. Knowing the advantages and disadvantages of each format empowers you to make informed decisions about how to best prepare your images for their intended purpose.
Common Image File Formats in Photoshop
Various image file formats are supported by Photoshop, each with its own set of characteristics. Familiarizing yourself with these formats is essential for achieving optimal results.
- JPEG (Joint Photographic Experts Group): JPEG is a widely used format for photographs and images requiring a good balance between file size and image quality. Its compression algorithm effectively reduces file size, making it ideal for web use and sharing. However, this compression can lead to a slight loss of image detail. The format is suitable for photographs with smooth color transitions.
- PNG (Portable Network Graphics): PNG is a lossless format, preserving all image details without any quality degradation. It is an excellent choice for graphics, logos, and images with sharp edges or text. PNG supports transparency, making it useful for creating images with transparent backgrounds. PNG files generally have larger file sizes compared to JPEG for similar images.
- TIFF (Tagged Image File Format): TIFF is a versatile format that offers a high level of image quality. It’s a lossless format, meaning no image data is lost during compression. TIFF is often favored for professional-grade images, especially in print design. Its large file size is a drawback, making it less suitable for web use.
Optimizing Images for Web and Print
The ideal format and settings vary depending on the intended use. Proper optimization is crucial for both web and print applications.
- Web Optimization: For web use, JPEG is often the preferred choice due to its smaller file size. Ensure you select the appropriate quality setting in Photoshop to balance file size and image quality. For images with text or sharp edges, PNG is the more suitable option.
- Print Optimization: For print applications, TIFF is often the best choice, offering the highest quality and preserving all image details. Choose a high resolution for the intended output size.
File Format Summary Table
This table provides a concise overview of the characteristics of different image formats.
| Format | Compression | Quality | File Size | Use Cases |
|---|---|---|---|---|
| JPEG | Lossy | Good balance | Small | Web images, photographs |
| PNG | Lossless | High | Medium | Graphics, logos, images with transparency |
| TIFF | Lossless | Highest | Large | High-resolution prints, professional images |
Resources for Beginners
Leveling up your Photoshop skills doesn’t require a degree in graphic design. Numerous readily available resources can guide you through the learning process, from introductory tutorials to advanced techniques. This section will highlight valuable online platforms, books, and courses to enhance your Photoshop journey.Effective learning hinges on consistent practice and seeking guidance from trusted sources. By utilizing these resources, you can progressively master Photoshop’s capabilities and unlock your creative potential.
Reliable Online Tutorials and Learning Resources, Photoshop for beginners
A wealth of online tutorials and learning platforms are dedicated to Photoshop. These resources offer structured lessons, practical exercises, and community support.
- YouTube channels like Adobe Photoshop Tutorials and DesignCourse provide numerous free videos covering various aspects of Photoshop, from basic editing to advanced techniques. Many channels also feature step-by-step instructions, making it easier for beginners to grasp the concepts.
- Websites like Adobe’s official website and various online design communities host a vast collection of tutorials, articles, and guides. These resources often offer diverse perspectives and approaches to mastering specific Photoshop skills.
- Platforms like Skillshare and Udemy provide paid courses covering Photoshop at various skill levels. These courses often include structured lessons, practice exercises, and downloadable resources.
Books for Learning Photoshop
Books provide a comprehensive and structured approach to learning Photoshop. They offer in-depth explanations, practical examples, and real-world applications.
- Numerous books cater to different skill levels. Beginners’ guides often focus on the fundamental tools and techniques, while advanced books delve into more complex aspects like image manipulation and design.
- Consider books featuring a step-by-step approach with clear instructions and visual aids. Look for books that offer real-world examples and exercises for practical application.
- Some books provide in-depth information on specific techniques, like color correction, retouching, or creating special effects. These can be helpful for those interested in developing specialized Photoshop skills.
Photoshop Courses for Beginners
Structured learning through courses can significantly accelerate your progress. Courses often provide comprehensive instruction and ongoing support.
- Many online platforms offer courses that teach Photoshop from the ground up, guiding you through fundamental tools and techniques to more advanced concepts.
- Consider courses offering practical exercises and projects to apply your newly acquired knowledge. Hands-on experience is crucial for solidifying your understanding.
- Look for courses that provide access to online forums or communities where you can interact with other students and instructors for support and feedback.
Tips for Practicing and Improving Photoshop Skills
Consistent practice and focused effort are vital for mastering Photoshop. Developing a structured approach can maximize your learning.
- Create a personalized practice schedule. Dedicate specific time slots to practice Photoshop techniques and experiment with different tools.
- Choose relevant projects and tasks. Start with basic exercises and gradually increase the complexity of your projects as you gain proficiency.
- Seek feedback from peers or experienced designers. Critique and self-evaluation are essential for identifying areas for improvement.
- Explore different Photoshop resources to enhance your learning. Refer to tutorials, articles, and communities for inspiration and new ideas.
Frequently Asked Questions (FAQs)
These common questions provide answers to typical beginner queries regarding Photoshop.
| Question | Answer |
|---|---|
| How do I get started with Photoshop? | Begin by understanding the interface and fundamental tools. Explore tutorials and practice exercises to grasp basic techniques. |
| What are the essential tools in Photoshop? | Essential tools include the selection tools, adjustment layers, and image editing tools. Mastering these will allow you to perform various tasks efficiently. |
| How can I improve my Photoshop skills? | Consistent practice, utilizing available resources, and seeking feedback from others are crucial for skill enhancement. Experiment with different techniques and projects. |
| Where can I find free Photoshop resources? | Numerous free tutorials, online courses, and articles are available on platforms like YouTube, websites, and online communities. |
Practical Examples and Case Studies
Photoshop’s versatility extends far beyond simple image editing. It’s a powerful tool used across diverse fields, from enhancing professional portraits to crafting stunning visual effects in film and advertising. Understanding its practical applications allows you to leverage its capabilities effectively.Real-world applications of Photoshop are plentiful. Photographers use it to polish their images, designers use it to bring their visions to life, and marketers use it to create engaging advertisements.
Learning how to apply Photoshop to real-world scenarios is essential to understanding its true potential.
Portrait Enhancement Techniques
Portrait enhancement involves refining a photo to highlight the subject’s best features. This often includes adjusting lighting, color, and skin tones. A key aspect is achieving a natural, polished look, avoiding overly processed or artificial results.
- Lighting Adjustments: Identifying and correcting uneven lighting is crucial. This may involve adjusting brightness, contrast, and shadows to create a more balanced and flattering look. Tools like the “Curves” adjustment layer can be used for precise tonal adjustments, or the “Levels” tool for more general adjustments.
- Color Correction: Color correction is important for achieving accurate skin tones. Tools such as “Selective Color” and “Color Balance” can be used to fine-tune the color palette, ensuring the skin tone is realistic and appealing. This can involve adjusting the saturation and vibrancy of specific colors to achieve a harmonious aesthetic.
- Skin Tone Refinement: Photoshop offers tools to smooth and refine skin tones, removing blemishes and imperfections. These tools include the “Healing Brush,” “Spot Healing Brush,” and “Patch Tool,” enabling precise adjustments. These tools should be used judiciously to maintain a natural appearance.
- Adding Subtle Enhancements: Enhancements like sharpening and noise reduction can improve the overall image quality. Using the “Sharpen” tool and “Noise Reduction” filters effectively, while avoiding over-sharpening, will result in a crisp and detailed portrait.
Creative Image Transformations
Photoshop enables the transformation of images into various artistic styles. This involves manipulating existing images to replicate a different visual aesthetic.
- Transforming to a Black and White Image: Converting a color image to black and white involves removing color information. This can be done using various techniques like desaturating the image or using dedicated black and white conversion filters.
- Creating a Vintage or Retro Look: Adding a vintage or retro effect involves simulating the look of old photographs. This can be accomplished through adjusting colors, adding grain, or applying specific filters. Adjusting the color saturation and adding texture are crucial elements to achieving this effect.
- Applying Artistic Styles: Photoshop allows for the application of artistic styles like watercolor, oil painting, or charcoal sketches. This is achieved using filters and brushes, or by using specific actions designed for these purposes. These effects should be applied in a way that complements the subject and doesn’t detract from its quality.
Case Study: Enhancing a Product Photo
A crucial application of Photoshop is enhancing product photos for online stores or marketing materials. A well-edited product photo can significantly improve the appeal and sales of a product.
Getting started with Photoshop can seem daunting, but it’s actually quite accessible for beginners. One crucial skill to master early on is skin smoothing, a technique that can significantly enhance images. Learning how to achieve this effect effectively can be found in this helpful guide on skin smoothing Photoshop. Once you’ve grasped the fundamentals of skin smoothing, you’ll be well on your way to confidently using Photoshop for a wide range of image editing tasks.
- Background Removal: Removing the background of a product image is a common task. Tools like the “Magic Wand Tool” or the “Pen Tool” can help isolate the product from its original background.
- Color Correction and Adjustments: Color correction ensures accurate representation of the product’s color. Adjustments to lighting, contrast, and vibrancy will enhance the product’s appeal.
- Adding a Background: A new background can be added to create a more visually appealing composition for the product. This can involve selecting and pasting a different background or creating a custom one.
- Adding Text and Graphics: Adding text or graphics like logos can improve the image’s information and visual appeal.
Tips for Staying Motivated
Mastering Photoshop takes dedication and consistent effort. Staying motivated throughout the learning process is crucial for achieving your goals. This section provides strategies to keep you engaged and inspired as you explore the world of digital imaging.Effective learning involves more than just acquiring knowledge; it requires a sustained commitment to practice and improvement. This section details actionable steps to cultivate a positive learning environment and overcome common obstacles, ensuring a rewarding and enjoyable learning journey.
Importance of Consistent Practice
Regular practice is fundamental to skill development in Photoshop. Consistent engagement with the software allows for the internalization of concepts and the refinement of techniques. This process builds muscle memory, allowing for quicker and more efficient workflows. Without consistent practice, skills will stagnate, and progress will be limited. This reinforcement of learned concepts through consistent application is crucial for mastering Photoshop.
Overcoming Challenges and Maintaining Motivation
Maintaining motivation can be challenging, especially when encountering obstacles. Learning Photoshop can be complex, requiring patience and persistence. Breaking down complex tasks into smaller, more manageable steps can significantly reduce the feeling of overwhelm. Setting realistic goals and celebrating small victories along the way helps maintain a positive attitude and reinforces progress. A structured approach to learning helps maintain motivation by ensuring gradual progress and consistent accomplishment.
Finding Inspiration and New Ideas
Finding inspiration is crucial for maintaining motivation and preventing stagnation. Exploring diverse resources, such as online tutorials, professional portfolios, and creative communities, provides a constant influx of fresh ideas and techniques. Analyzing the work of other photographers and designers, observing trends in visual design, and keeping up with the latest developments in the field can inspire innovative approaches to image editing.
Getting started with Photoshop can feel daunting, but it’s actually quite accessible for beginners. To truly grasp the basics, understanding the core functionality of Adobe Photoshop is crucial. For a comprehensive overview, check out this helpful guide: What Is Adobe Photoshop? A Beginner’s Guide. This resource will equip you with the foundational knowledge necessary to navigate the software effectively, paving the way for your Photoshop journey.
Exposure to different styles and approaches will cultivate a creative spark, fostering a love for the medium.
Building a Personal Photoshop Workflow
Developing a personalized workflow in Photoshop is essential for optimizing efficiency and productivity. This involves identifying your most frequently used tools and customizing shortcuts to streamline your process. Creating a consistent system for organizing files, layers, and adjustments allows for easy navigation and recall. Experimenting with different layouts and arrangements until you find a setup that works best for your style and project needs is an important part of this process.
A streamlined workflow will improve efficiency and reduce frustration, ultimately enhancing the creative process.
Conclusion
In conclusion, this comprehensive guide to Photoshop for beginners provides a solid foundation for anyone looking to delve into the world of digital image editing. By understanding the core functionalities, essential tools, and image manipulation techniques, you’ll be well-equipped to embark on your creative journey. Remember to practice consistently and explore the numerous resources available to further enhance your skills.
Essential FAQs
What are the system requirements for Photoshop?
System requirements vary depending on the Photoshop version. Check Adobe’s website for the most up-to-date specifications.
Can I use Photoshop for free?
No, Photoshop is a paid software. However, Adobe offers a trial period for testing the software.
How do I fix a blurry image in Photoshop?
Photoshop offers various sharpening tools and filters to improve image clarity. Experiment with different options to achieve the best results.
What file formats does Photoshop support?
Photoshop supports a wide range of image file formats, including JPEG, PNG, TIFF, and more. Each format has its own characteristics and usage scenarios.


