Photoshop Liquify tool tips guide you through the fascinating world of image manipulation. This comprehensive resource explores the tool’s core functions, from basic warping to advanced artistic distortions. Learn fundamental techniques, troubleshoot common issues, and discover how to leverage the tool for specific subjects and image types. Dive deep into realistic and artistic effects, and unlock the power of layer masks for precise control.
Mastering the Photoshop Liquify tool opens up a realm of creative possibilities. This in-depth guide empowers users to transform images in ways previously unimaginable. Understanding the nuances of this tool unlocks a whole new dimension of visual artistry, enabling you to craft stunning results.
Introduction to Liquify Tool
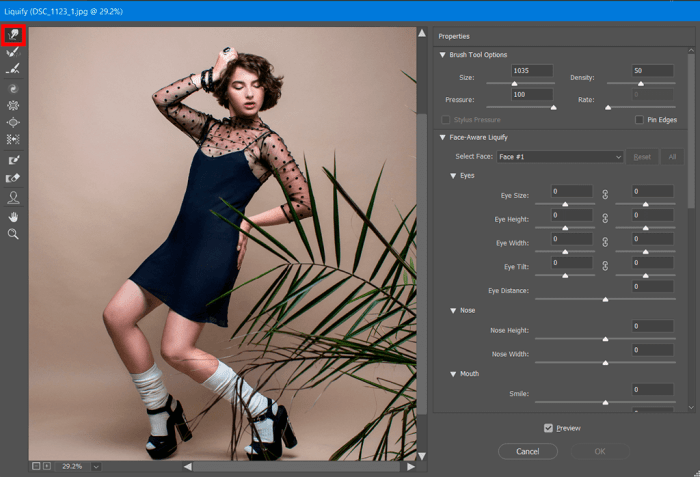
The Photoshop Liquify tool is a powerful tool for non-destructive image manipulation. It allows users to deform and reshape images in a precise and controlled manner, offering a wide range of creative possibilities. This tool is invaluable for tasks ranging from subtle adjustments to dramatic transformations.The Liquify tool’s core function is to modify the pixel structure of an image.
This manipulation can involve stretching, shrinking, twisting, bending, and more, effectively changing the shape and form of objects within the image. This flexibility is why it’s a go-to tool for artists seeking to create unique and personalized imagery.
Types of Transformations
The Liquify tool provides a diverse array of transformations. Users can employ a range of techniques, including stretching, shrinking, and warping portions of an image to achieve a desired outcome. These transformations are adaptable, allowing for both subtle adjustments and bold modifications. Specific options include pulling, pushing, rotating, and twisting, each providing unique opportunities to manipulate the image.
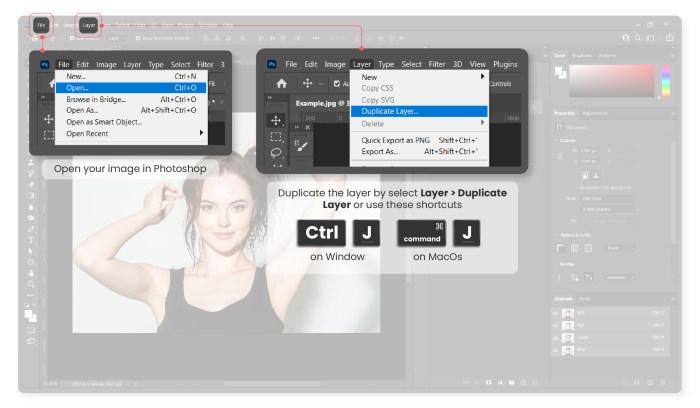
Basic Workflow
The fundamental workflow for using the Liquify tool involves selecting a brush, adjusting its parameters, and applying the selected deformation to the image. This process is iterative, as adjustments can be made and refined until the desired result is achieved. The process generally involves selecting a specific area of the image, applying the chosen transformation with the selected brush, and then repeating the process to refine the details and achieve the final result.
Understanding Brush Types
The selection of the appropriate brush type is crucial for precise and effective image manipulation. The Liquify tool offers a variety of brush options, each with unique characteristics and purposes. Understanding these nuances is essential for achieving the desired result. The brush type determines the size and shape of the deformation applied to the image. Various brush types provide different levels of precision and control, which allows users to target specific areas and tailor the transformations to the desired aesthetic.
| Brush Type | Description | Use Case |
|---|---|---|
| Forward Warp | Stretches or shrinks pixels in a specific direction. | Creating subtle adjustments or elongating elements. |
| Backward Warp | Stretches or shrinks pixels in the opposite direction. | Adjusting areas that need to be shrunk. |
| Pucker | Shrinks pixels in the center of the brush. | Creating a puckered or indented effect. |
| Bloat | Expands pixels in the center of the brush. | Creating a bulging or inflated effect. |
| Push | Moves pixels in the direction of the brush stroke. | Shifting or moving elements in the image. |
| Pull | Moves pixels in the opposite direction of the brush stroke. | Adjusting or pulling elements into the image. |
Fundamental Techniques: Photoshop Liquify Tool Tips
Mastering the Liquify tool involves understanding its fundamental techniques. These techniques, once grasped, allow for precise and creative manipulation of images, enabling a wide array of enhancements and transformations. From subtle adjustments to dramatic alterations, the core principles remain consistent.
Forward Warp Tool
The Forward Warp tool is a key component for moving and shaping image pixels in a desired direction. It essentially pushes or pulls pixels in the selected direction. By applying pressure, the tool dynamically changes the shape of the area under the brush. This allows for a wide range of warping effects, from subtle stretching to significant reshaping.
It’s ideal for creating the illusion of movement, altering facial features, or distorting objects.
Backward Warp Tool
The Backward Warp tool, conversely, works by moving pixels in the opposite direction of the brush. It’s effectively the inverse of the Forward Warp tool, pulling or shrinking pixels toward the center of the brush. This technique is useful for removing unwanted bulges, refining details, and achieving a smoother, more polished look. Understanding its interaction with the brush size and shape is crucial for precise results.
Brush Size and Shape
The Liquify tool’s effectiveness is significantly influenced by the brush size and shape. Larger brushes create broader, more dramatic effects, while smaller brushes offer precise control over smaller details. Experimentation with various brush shapes (e.g., circle, ellipse, or custom shapes) is essential. Each shape provides a different manipulation approach, enabling a wide range of warping possibilities. Using a variety of shapes and sizes is crucial for a nuanced approach to image manipulation.
Basic Warping Effects
Creating basic warping effects involves understanding the interaction between the brush, the tool’s settings, and the image’s content. A simple example is stretching a face’s width or narrowing the jawline. Using the Forward Warp tool with a small, soft-edged brush, and applying subtle pressure, you can achieve this. Another example is widening an object. Using a larger brush with the Forward Warp tool will allow for a wider distortion effect.
Facial Feature Adjustments
The Liquify tool is exceptionally useful for fine-tuning facial features. Imagine adjusting the shape of a nose, making it slightly straighter or more pronounced. Using the Backward Warp tool and a small brush, you can achieve this, removing excess pixels and refining the structure. Similarly, you can modify the eye shape or alter the jawline, pushing or pulling pixels in specific directions.
The tool provides a flexible method for achieving aesthetic changes.
Forward Warp vs. Backward Warp
| Feature | Forward Warp | Backward Warp |
|---|---|---|
| Direction | Pushes pixels in the direction of the brush. | Pulls pixels toward the center of the brush. |
| Effect | Stretching, expanding, elongation. | Contracting, narrowing, smoothing. |
| Use Case | Creating exaggerated features, elongating objects, adding dynamism. | Refining features, removing bulges, creating smoother shapes. |
| Brush Interaction | Pushing pixels outwards | Pulling pixels inwards |
Advanced Liquify Techniques
The Liquify tool in Photoshop transcends basic adjustments, enabling sophisticated manipulations for intricate warping and artistic distortions. Mastering these advanced techniques unlocks a world of creative possibilities, transforming ordinary images into extraordinary works of art. This section delves into the intricacies of complex warping effects, realistic distortions, and unique artistic outcomes achievable with this powerful tool.
Complex Warping Effects
Employing multiple brush strokes and warp tools, such as the Forward Warp and Backwards Warp, can create complex and intricate shapes. This allows for highly controlled manipulation, enabling you to achieve a variety of deformations. For example, you can warp a subject’s limbs in a natural and believable manner, or contort objects to achieve a surreal effect.
Realistic and Artistic Distortions
The Liquify tool can be used to achieve incredibly realistic and artistic distortions. By using the Forward Warp and Backwards Warp tools, you can manipulate images in a way that mimics natural phenomena like wind or water movement. Careful brushstrokes and blending modes allow for subtle variations and seamless transitions. For instance, you can simulate the effects of flowing fabric or a windswept landscape.
Body and Limb Deformation
Deforming body parts and limbs requires precision and a keen eye for anatomical accuracy. Start by selecting a brush size appropriate for the area you’re targeting. Using the Forward Warp tool, gently push and pull the desired area. Gradually adjust the brush pressure and intensity to create a smooth and natural deformation. This allows for believable alterations in posture, shape, and overall form.
Smooth Transitions and Avoiding Harsh Distortions, Photoshop liquify tool tips
Achieving smooth transitions between warped areas is crucial for creating believable distortions. Employ smaller brush sizes and gradual adjustments to avoid harsh edges or noticeable seams. Using the “Pucker” and “Bloat” tools in conjunction with the “Forward Warp” and “Backwards Warp” tools enables smooth transformations and avoids a jerky or distorted appearance. Layer masks and adjustment layers can help further refine the outcome and maintain natural transitions.
Creating Unique Artistic Effects
The Liquify tool is exceptionally adaptable for generating unique artistic effects. Experiment with various brush sizes, pressure settings, and warping techniques to generate novel results. Combining the Liquify tool with other Photoshop tools, such as the cloning stamp tool, can further enhance your creative potential and yield distinctive visual outcomes. For example, you can morph a portrait into an abstract piece or create surreal imagery by combining different shapes and textures.
Troubleshooting and Common Issues
The Liquify tool, while powerful, can sometimes lead to unwanted results. Understanding common problems and their solutions is crucial for achieving the desired transformations without frustration. This section delves into troubleshooting techniques for correcting warping artifacts and distortion issues.
Identifying Unwanted Distortions
Recognizing the source of unwanted distortions is the first step in fixing them. Distortions can arise from overzealous use of the tool, inappropriate brush sizes, or misapplication of the tool’s features. Inconsistent or excessive use of the “Forward” and “Backward” warping tools can result in uneven or unrealistic deformations.
Correcting Warping Artifacts
Warping artifacts, often manifesting as stretched or distorted areas, can be rectified by applying corrective actions. A crucial step involves carefully analyzing the problematic areas and using the “Brush” tool with appropriate settings. The “Pucker” and “Bloat” tools, when used in conjunction with the “Brush” tool, can help refine the transformation, returning the image to a more natural appearance.
For example, if a face appears stretched horizontally, applying “Shrink” and “Push” tools with a small brush size in the affected region can yield a better outcome.
Fixing Distortion Issues
Issues related to distortion, such as unnatural or exaggerated shapes, typically stem from improper tool application or excessive use of the tool’s features. Using a smaller brush size allows for more precise control, preventing unwanted effects. Conversely, a larger brush size can create more significant transformations, but care must be taken to avoid drastic or unnatural changes.
Techniques for Resolving Tool-Related Distortion
Correcting distortions often necessitates a multifaceted approach. For instance, if the Liquify tool introduces “bloated” or “puckered” areas, the “Push” or “Pull” tool, respectively, with a suitable brush size and settings, can be used to restore the intended shape.
Table of Troubleshooting Solutions
| Problem | Description | Solution |
|---|---|---|
| Over-stretching or squeezing | Excessive distortion in certain areas, resulting in unnatural shapes. | Reduce the brush size and adjust the “Forward” and “Backward” tool settings. Use “Push” and “Pull” tools to gently correct the areas. |
| Uneven or inconsistent warping | Distortions are not uniform across the image, leading to an unbalanced transformation. | Use smaller brush sizes and gradually apply the Liquify tool. Pay close attention to the brush’s impact on the area. |
| Unintentional “bloating” or “puckering” | The image appears inflated or compressed in certain sections. | Use the “Push” tool (to correct bloating) or the “Pull” tool (to correct pucker) with a suitable brush size and adjust the tool’s intensity carefully. |
| Warping artifacts | Distorted areas within the image, often appearing stretched or compressed. | Employ the “Brush” tool with a precise brush size and use the “Pucker” and “Bloat” tools to refine the warping effects. |
Liquify Tool and Specific Subjects
The Liquify tool in Photoshop transcends basic image editing; it empowers users to manipulate subjects with a level of precision and creativity previously unimaginable. This section delves into the practical applications of the tool across various subject types, highlighting its effectiveness in enhancing portraits, refining features, and even altering body proportions.The Liquify tool, while powerful, demands understanding of its capabilities.
Using the tool effectively requires a nuanced approach tailored to the specific subject. This section will provide practical examples and guidance to help users achieve desired results.
Portrait Enhancement with Liquify
The Liquify tool is particularly useful for enhancing portraits. It allows for subtle adjustments to facial features and expressions, creating a more refined and engaging image. This capability extends to altering the subtle curves of the lips or the delicate structure of the eyes, thereby impacting the overall aesthetic appeal.
Improving Facial Expressions and Features
By manipulating individual pixels, the tool can precisely adjust the shape and size of facial features. This enables the creation of subtle, almost imperceptible changes that enhance the expressiveness of a portrait. For example, a slight elongation of the eyes can create an intense gaze, while reshaping the lips can convey different emotions. The tool allows the user to refine the shape of the nose or the jawline, all while maintaining a natural aesthetic.
Enhancing Specific Features (Eyes and Lips)
The Liquify tool offers precise control over the manipulation of specific facial features. For instance, users can subtly enlarge or reshape eyes, potentially making them more expressive or alluring. Similarly, altering the shape and fullness of lips is achievable, allowing for the creation of a more captivating pout or a more subtle curve. These changes can be as subtle or dramatic as the user desires.
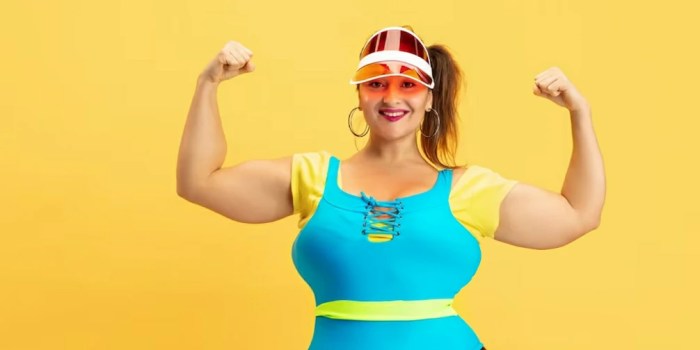
Improving Body Proportions
The Liquify tool’s capability extends beyond facial features; it’s also capable of refining body proportions. This is especially useful for creating a more aesthetically pleasing composition. The tool can subtly adjust the shape and size of limbs or the torso to achieve a more harmonious figure. This is crucial in creating a realistic and balanced portrayal of the subject.
This includes correcting minor imperfections and fine-tuning the overall silhouette.
Application Examples Across Subject Types
The Liquify tool is not limited to portraiture. Its versatility allows for manipulation across a wide array of subjects. For instance, modifying the shape of a flower’s petals can create a more dramatic or intricate design. The tool can even be applied to animals, enhancing their features or creating unique stylistic effects. Modifying the curves of a flowing garment, or subtly changing the posture of a figure, are also within its capability.
Ideal Applications Table
| Subject Type | Ideal Application |
|---|---|
| Portraits | Adjusting facial expressions, refining features (eyes, lips, nose), improving body proportions |
| Fashion/Beauty | Altering clothing details, adjusting body proportions, enhancing features of models |
| Animals | Enhancing animal features, creating unique stylistic effects, subtle adjustments to body posture |
| Flowers/Nature | Modifying the shape and size of petals, altering the flow of leaves, creating intricate designs |
| Illustrations | Improving the realism of figures, enhancing expressions, refining details |
Realistic vs. Artistic Effects
The Liquify tool in Photoshop offers a spectrum of possibilities, ranging from subtle, almost imperceptible adjustments to dramatic, eye-catching transformations. Understanding the difference between creating realistic deformations and exaggerated artistic distortions is key to harnessing the tool’s full potential. This section delves into the techniques for each approach, providing examples and comparisons to illustrate the nuances.The Liquify tool’s power lies in its ability to manipulate pixels, allowing for both natural and stylized results.
Realism often prioritizes subtle shifts, mimicking organic processes, while artistic effects embrace exaggeration and distortion for visual impact.
Realistic Deformations
Realistic deformations in Photoshop utilize the Liquify tool to mimic natural processes like wrinkles, creases, or subtle facial expressions. Precision and attention to detail are crucial.
- Mimicking Organic Processes: To achieve realistic wrinkles, for example, use the Forward Warp tool to gently push and pull skin in the direction of the wrinkle’s path. Adjust brush size and pressure to achieve gradual transitions. This approach often involves multiple, small brush strokes to avoid harsh edges.
- Blending and Subtlety: Maintain a smooth flow between the deformed areas and the surrounding image. Using the Warp tool with a smaller brush size and lower pressure is essential for creating smooth transitions, preventing any visible seams.
- Contextual Understanding: Consider the direction of light and shadow when manipulating wrinkles or other realistic details. The deformations should be plausible and consistent with the overall image context.
Artistic Distortions
Artistic distortions leverage the Liquify tool’s flexibility to create highly stylized and imaginative results.
- Exaggeration and Distortion: Artistic distortions involve significant, sometimes unrealistic, manipulations. This approach frequently uses larger brush sizes and more aggressive pressure to achieve the desired visual effect. This can lead to highly noticeable transformations, often employing multiple iterations to refine the outcome.
- Abstract Effects: The tool can create unique textures, surreal figures, and artistic interpretations of existing images by employing unusual distortions. This is an opportunity to be creative and explore new visual possibilities.
- Experimentation and Iteration: Artistic distortions often involve experimenting with various deformation techniques and iterations to refine the outcome. This can involve multiple passes and adjustments to achieve the desired degree of distortion.
Examples and Comparison
A realistic application might involve subtly altering a portrait to simulate the aging process. This would involve creating subtle wrinkles and adjustments to the facial features without significantly altering the overall likeness of the subject. Conversely, an artistic application could involve transforming a landscape into a surreal dreamlike scene, distorting the shapes and colors in a manner that departs significantly from reality.
| Feature | Realistic Effects | Artistic Effects |
|---|---|---|
| Goal | Mimic natural forms and processes | Create unique, stylized, and often exaggerated visuals |
| Brush Size/Pressure | Small, gentle | Large, aggressive |
| Deformation | Subtle, gradual | Significant, dramatic |
| Context | Maintains overall likeness and plausibility | Embraces abstraction and departure from reality |
| Iterations | Often involves several passes for refinement | Often involves experimentation and iteration to achieve the desired result |
Liquify Tool and Layer Masks
The Liquify tool in Photoshop offers powerful, yet sometimes unpredictable, ways to manipulate images. Layer masks provide a crucial layer of control, allowing for precise and non-destructive edits. This approach helps to avoid irreversible alterations and enables flexibility for refining results.Using layer masks with the Liquify tool effectively separates the modification from the original image data, making adjustments easier to undo or modify later.
This significantly enhances the overall workflow, especially when dealing with complex or intricate edits.
Precise Edits with Layer Masks
Layer masks, when applied to a Liquify tool adjustment layer, act as a stencil. Pixels within the masked area are unaffected by the Liquify tool, while pixels outside the mask are subject to the tool’s transformation. This allows for very targeted and precise modifications, avoiding unwanted distortions. By using a layer mask, you can apply Liquify to specific areas of an image without impacting the rest.
Non-Destructive Editing
Using a layer mask allows for non-destructive editing. If you’re not satisfied with a Liquify effect, you can simply adjust the mask to reveal or hide the altered areas. This characteristic is crucial, as it lets you iterate and refine your adjustments without permanently altering the original image data.
Applying Liquify to Specific Areas
To apply Liquify to specific areas, create a layer mask on the Liquify adjustment layer. A white layer mask will reveal the adjustment, and a black layer mask will hide it. You can use a variety of tools to paint on the mask, like the Brush tool, Gradient tool, or even a selection. For example, you could create a selection around a specific object using the lasso tool and then invert it to mask out the background.
You can then use the Liquify tool on the selected object without affecting other areas. Adjusting the brush opacity and flow on the layer mask allows for precise control.
Examples of Complex Edits
Imagine wanting to smooth a model’s face but not alter the background. You would apply the Liquify tool to a layer mask covering just the face area. Or, if you want to give a character exaggerated eyes without changing the hair, you can mask out the hair and work solely on the eyes. Another example would be enhancing the shape of a building without altering the surrounding landscape.
Avoiding Issues with Layer Masks
When working with layer masks and the Liquify tool, watch for blending issues. If the edges of your mask aren’t crisp, it might lead to unexpected results. Ensure that the layer mask is set to the correct adjustment layer, as an incorrectly linked mask won’t produce the desired effect. Always check the layer visibility before applying changes.
Using the Liquify Tool with Layer Masks: A Practical Example
Let’s say you want to lengthen a character’s legs. First, create a new layer for the Liquify effect. Apply the Liquify tool to this layer. Then, create a layer mask on the Liquify layer. Using a soft-edged brush with white paint, mask out the areas you don’t want to affect.
Paint black on the mask to hide the effect in those areas. You can then refine the effect, and if needed, apply the tool again to the masked areas, achieving a more refined and precise adjustment. This iterative process is critical to getting a believable and natural result.
Liquify Tool and Specific Software Versions
The Liquify tool, a powerful Photoshop feature for manipulating images, has evolved significantly across different software versions. Understanding these variations is crucial for achieving desired results and optimizing workflow. Different versions offer subtle but impactful improvements, from enhanced control to streamlined usability.The Liquify tool’s functionality, while fundamentally the same, has been refined and expanded with each Photoshop update.
This includes adjustments to brush sizes, pressure sensitivity, and the introduction of new features that affect the tool’s performance and output.
Functionality Variations Across Versions
Early Photoshop versions introduced the Liquify tool with basic functionality, enabling users to warp and distort images. Subsequent updates progressively added features like improved brush control, allowing for finer details in image manipulation. The evolution included the integration of pressure sensitivity, enabling more natural-feeling distortions, and the addition of new filters and tools, creating diverse manipulation possibilities.
Knowing Photoshop’s Liquify tool tips can be super helpful, especially when you’re trying to fine-tune details. For instance, if you need to enhance an image’s sharpness, techniques like using the Photoshop Liquify tool to subtly manipulate details, followed by methods outlined in how to sharpen images in Photoshop , can be a powerful combo. Ultimately, understanding these combined approaches will make your photo editing workflow much more efficient, giving you more control over the Liquify tool’s results.
Usability Differences
The user interface and control schemes for the Liquify tool have varied slightly across different Photoshop versions. This has led to slight variations in the overall usability experience. The user interface has evolved to become more intuitive, making the tool accessible to a broader user base. New controls and settings have improved workflow, making complex manipulations more manageable.
Performance Comparison Across Versions
The Liquify tool’s performance has been improved through the various Photoshop iterations. Earlier versions might have experienced some lag or slowdown during extensive use. More recent versions address these performance issues by utilizing enhanced processing power, resulting in smoother operations and faster response times.
Evolution of the Liquify Tool Through Iterations
The Liquify tool’s evolution showcases Adobe’s commitment to refining user experience and expanding creative possibilities. The introduction of new tools and filters has allowed for more complex manipulations. This evolution can be seen in the increasing sophistication of the tool’s capabilities.
Summary Table of Liquify Tool Features
| Photoshop Version | Key Features | Limitations | Performance |
|---|---|---|---|
| Photoshop CS6 | Basic Liquify tool, limited brush control, no pressure sensitivity | Limited control over distortions, potential performance issues | Moderate performance |
| Photoshop CC 2015 | Improved brush control, pressure sensitivity, initial introduction of Smart Filters | Limited filter combinations | Improved performance compared to CS6 |
| Photoshop CC 2023 | Advanced brush controls, expanded Smart Filters, enhanced performance | None mentioned | High performance |
Liquify Tool and Image Types
The Liquify tool, while versatile, interacts differently with various image types. Understanding these interactions allows for more effective and predictable results. The tool’s impact is heavily influenced by the image’s resolution, content, and intended use.The Liquify tool, despite its power, can sometimes produce unexpected or undesirable results if not used judiciously. Careful consideration of the image type and desired outcome is crucial for successful manipulation.
Mastering Photoshop’s Liquify tool is crucial for image manipulation, but exploring supplementary resources can elevate your skills further. For instance, checking out Top Photoshop Plugins and Extensions to Boost Creativity could uncover helpful tools that augment the Liquify tool’s capabilities. Ultimately, these external resources can provide a broader perspective on image editing techniques, and ultimately enhance your proficiency with the Liquify tool.
Effects on Different Image Types
The Liquify tool’s effectiveness varies depending on the complexity and detail of the image. For instance, its impact on portraits is often subtle, focusing on fine-tuning facial features. In contrast, its application to landscapes might be more dramatic, emphasizing terrain or creating abstract effects. Illustrations, with their defined shapes and Artikels, can be significantly transformed by the tool, allowing for intricate alterations.
Potential Challenges and Advantages
Using the Liquify tool on portraits presents challenges in maintaining natural proportions and avoiding overly distorted features. However, it offers significant advantages in refining facial details and enhancing expressions. Landscapes can benefit from the tool’s ability to manipulate textures and create a sense of depth or movement. For illustrations, the tool allows for dynamic alterations to shapes and Artikels, opening doors for creative modifications.
Ideal Use Cases for Different Image Formats
Portrait images are ideal for subtle adjustments like refining features or adding subtle expressions. Landscapes benefit from the tool’s ability to emphasize certain aspects or create unique visual effects, such as exaggerating natural forms or adding dramatic lighting. Illustrations, with their predefined forms, are excellent candidates for detailed alterations, allowing artists to modify designs and enhance their aesthetics.
Comparison on High-Resolution and Low-Resolution Images
High-resolution images allow for more intricate manipulations with the Liquify tool. The higher pixel count results in smoother transformations and more detailed results. Low-resolution images, conversely, may produce more noticeable artifacts and distortions due to the limited detail. This is a crucial factor to consider when deciding if the Liquify tool is suitable for a given image.
Table: Image Types and Liquify Tool Uses
| Image Type | Appropriate Liquify Tool Uses | Potential Challenges |
|---|---|---|
| Portraits | Refining facial features, enhancing expressions, subtle adjustments | Maintaining natural proportions, avoiding over-distortion |
| Landscapes | Manipulating textures, creating depth or movement, enhancing lighting | Maintaining natural forms, avoiding excessive alteration |
| Illustrations | Altering shapes and Artikels, creating dynamic effects, modifying designs | Maintaining structural integrity, achieving desired aesthetics |
| High-Resolution Images | Complex manipulations, smoother transformations, detailed results | Time consumption |
| Low-Resolution Images | Limited transformations, potential artifacts and distortions | Quality loss, noticeable alterations |
Liquify Tool and Other Editing Tools
The Liquify tool in Photoshop offers unique possibilities for manipulating image details, but it’s not an isolated entity. Its effectiveness often hinges on its integration with other tools for a more comprehensive editing workflow. Understanding how the Liquify tool interacts with other tools can lead to significantly enhanced results and greater control over the final image.The Liquify tool’s strength lies in its ability to subtly reshape and deform areas of an image.
However, for more complex tasks or achieving specific effects, combining it with other tools provides greater flexibility and control. This integration allows for refining adjustments, adding further details, or ensuring the final output aligns with specific aesthetic goals.
Comparison with Other Editing Tools
The Liquify tool excels at localized, non-destructive transformations. Contrast this with tools like the Pen tool, which allows for precise selection and masking, enabling intricate edits but not the same degree of fluid shape manipulation. The Liquify tool is complementary to tools like the Clone Stamp or Patch tool, which excel at repairing imperfections or seamlessly blending elements without the same level of transformative power.
The difference in approach and purpose dictates when each tool is most suitable.
Complementarity with Other Tools
The Liquify tool often works best in conjunction with other tools to achieve a cohesive and polished edit. For instance, using a layer mask with Liquify allows you to precisely target specific areas for manipulation, preventing unwanted distortion in other parts of the image. The precise selection tools can refine and limit the scope of the Liquify effect, ensuring it is applied only to desired sections.
Combined Use Cases
Combining the Liquify tool with other tools can achieve a variety of effects. For instance, liquifying a character’s face and then using the Dodge and Burn tools can add subtle highlights and shadows, further enhancing the realism of the character. Alternatively, after liquifying a portrait to achieve a unique expression, the Color Balance tool can adjust the overall tone to match the new aesthetic.
Table: Comparison of Liquify Tool and Other Tools
| Tool | Primary Function | Interaction with Liquify |
|---|---|---|
| Liquify | Localized image manipulation | Excellent for subtle shape changes, but can be enhanced by other tools |
| Pen Tool | Precise selection | Can be used to precisely mask areas for liquify effect or to create areas that aren’t subject to the liquify effects |
| Clone Stamp | Repairing or blending elements | Useful for repairing areas that have been distorted or adjusting the blend after the Liquify tool is applied. |
| Patch Tool | Removing or replacing imperfections | Helpful for seamlessly blending and removing unwanted effects or artifacts caused by the Liquify tool. |
Demonstration: Combining Liquify with Other Tools
This demonstration will illustrate how to combine the Liquify tool with the Adjustment Layers to create a stylized portrait. First, open your image in Photoshop. Select the Liquify tool and make adjustments to the facial features, achieving a desired look. Create a new layer and fill it with a solid color. Then, use the layer mask to mask out the liquefied areas, leaving the background intact.
Next, add a Curves adjustment layer to adjust the overall tone and contrast. Finally, use the Levels adjustment layer to fine-tune the brightness and contrast of the image. The combination of these tools allows for a polished, artistic result.
Final Thoughts
In conclusion, the Photoshop Liquify tool is a versatile and powerful instrument for image manipulation. This guide has explored its multifaceted capabilities, from basic techniques to advanced applications. By understanding its intricacies, you can unlock its potential to create stunning visual effects. Remember to practice and experiment to fully grasp the tool’s nuances and discover your unique creative expressions.
Commonly Asked Questions
What are the common issues when using the Liquify tool?
Unwanted distortions, warping artifacts, and difficulty achieving smooth transitions are common issues. This guide provides solutions for fixing these problems.
How can I create realistic deformations using the Liquify tool?
Utilizing subtle adjustments and precise brush control can achieve realistic deformations. The guide details the techniques for creating realistic transformations.
What are the differences between Forward Warp and Backward Warp tools?
Forward Warp moves pixels forward while Backward Warp moves them backward. A detailed comparison table is included to illustrate the distinctions.
Can I use the Liquify tool on different image types?
Yes, the Liquify tool can be used on various image types, including portraits, landscapes, and illustrations. The guide details the ideal use cases for different image formats.


