Photoshop Tips That Will Instantly Improve Your Edits offers a comprehensive guide to mastering various editing techniques. From basic enhancements like cropping and color correction to advanced masking and retouching, this resource equips you with actionable strategies to significantly elevate your image quality. Learn how to refine portraits, landscapes, and product shots, while understanding the nuances of different image formats and editing styles.
This guide will walk you through essential Photoshop techniques, providing practical examples and actionable steps to transform your images. Discover how to effectively use layers, color grading, and sharpening to achieve professional-looking results. We’ll also delve into advanced concepts like Smart Objects and actions, empowering you to streamline your workflow and achieve maximum efficiency.
Basic Editing Enhancements
Mastering basic Photoshop adjustments is crucial for elevating image quality and achieving professional results. These foundational techniques empower you to refine details, correct flaws, and optimize images for various purposes. From subtle enhancements to substantial corrections, these adjustments are essential for any aspiring image editor.
Fundamental Photoshop Adjustments
A strong foundation in basic adjustments is essential for image enhancement. These adjustments are the cornerstones of any effective editing workflow. Knowing how to use them efficiently and effectively will dramatically improve your images.
- Brightness/Contrast: Adjusting brightness and contrast allows you to control the overall tone of your image. Increasing brightness lightens the image, while increasing contrast intensifies the differences between light and dark areas. This is a foundational adjustment for creating a balanced and visually appealing image.
- Levels: The Levels adjustment provides granular control over the tonal range of your image. You can manipulate the highlights, midtones, and shadows to fine-tune the overall color balance and contrast.
- Curves: Curves offers even more precise control over the tonal range compared to Levels. It allows for non-linear adjustments, which are crucial for achieving a wide range of tonal effects. Curves is especially valuable for fine-tuning highlights, midtones, and shadows.
- Sharpness: Sharpness adjustments enhance the detail and clarity of an image, improving the overall visual appeal. This adjustment is crucial for bringing out textures and details in an image.
- Color Balance: Color balance allows you to adjust the overall color temperature of your image. This adjustment is valuable for correcting color casts or creating a specific mood or aesthetic.
Correcting Photo Flaws
Addressing common flaws like red-eye and blemishes is essential for producing polished images. These techniques are crucial for ensuring your photos are presentable and professional.
- Red-eye Removal: Use the “Red Eye Reduction” tool in Photoshop to easily correct red-eye in a photo. It works by automatically detecting and reducing the red-eye effect in the affected areas. This tool can be particularly effective in preventing any further red-eye from appearing in future edits. This process is efficient and reduces the time spent on post-processing.
- Spot Healing Brush: The Spot Healing Brush tool allows for targeted correction of blemishes and imperfections. Select the tool and gently brush over the affected area. The tool will analyze the surrounding pixels and blend the chosen area to the surrounding pixels, effectively removing or concealing the blemish.
- Clone Stamp Tool: The Clone Stamp tool is an excellent choice for removing or masking imperfections that are more complex or extensive. Select the tool, sample a clean area, and then paint over the imperfection. The tool replicates the sampled area onto the affected area, effectively concealing the flaw. This method requires careful selection and blending for optimal results.
Cropping and Resizing Images
Proper cropping and resizing are essential for optimizing images for various purposes. These techniques are vital for maximizing visual impact and ensuring your images are suitable for their intended use.
- Select the Crop Tool: Choose the Crop Tool in Photoshop. Drag the handles to define the desired cropping area.
- Refine the Crop: Fine-tune the crop using the handles and the crop guides. Align the crop to important elements in the image for optimal composition.
- Resize the Image: Use the Image > Image Size menu to change the dimensions of the image. Specify the desired width and height, and select the appropriate resolution for your project. Consider the output medium and its resolution requirements.
- Maintain Aspect Ratio: Ensure that the aspect ratio of the image is maintained during the resizing process, maintaining the original proportions. This is especially crucial for maintaining the original visual balance.
Using Layers Effectively
Layers are the foundation of non-destructive editing in Photoshop. This technique allows you to work on multiple parts of an image simultaneously without permanently altering the original. Using layers effectively is a key aspect of working efficiently in Photoshop.
Layers allow for independent editing and non-destructive manipulation. Each layer can be edited, masked, or deleted without affecting other layers. This feature provides a robust system for managing and organizing complex edits.
Image Formats Comparison
Choosing the right image format is crucial for maintaining quality and optimizing file size. Understanding the characteristics of each format is essential for achieving the best possible results.
| Format | Characteristics | Suitability |
|---|---|---|
| JPEG | Lossy compression, good for web images, smaller file sizes. | Web graphics, social media, general use |
| PNG | Lossless compression, supports transparency, suitable for graphics with text or intricate details. | Logos, icons, images with text, transparency is required |
| TIFF | Lossless compression, supports layers and channels, ideal for high-quality images needing extensive editing. | High-resolution images, print work, detailed illustrations |
Color Correction and Enhancement
Color correction and enhancement in Photoshop are crucial steps in achieving professional-looking images. They involve adjusting the overall color palette, correcting inaccuracies, and enhancing visual appeal. This process goes beyond simple brightness and contrast adjustments, delving into the intricacies of color balance, white balance, and color grading to create specific moods and styles. By understanding these techniques, you can elevate your image editing to a new level.Color balance and white balance are fundamental adjustments that influence the overall tonal quality of an image.
Incorrect color balance can make images appear overly warm, cool, or desaturated, while inaccurate white balance can introduce undesirable color casts. These adjustments are essential for ensuring that colors appear natural and accurate to the eye. Proper calibration and understanding of light sources are paramount in achieving accurate color reproduction.
Adjusting Color Balance and White Balance
Color balance adjustments involve shifting the overall color temperature of an image. Photoshop offers tools to fine-tune the balance between red, green, and blue channels. White balance adjustments, on the other hand, are critical for correcting color casts introduced by different light sources. Understanding the color temperature of the light source (e.g., tungsten, fluorescent, daylight) is key to accurate white balance settings.
Photoshop provides presets and manual adjustments for achieving the desired white balance. Using a grey card or a neutral color patch in the image is a recommended practice to precisely calibrate the white balance settings.
Color Grading Techniques
Color grading is a powerful technique for creating specific moods and styles in images. It involves manipulating colors to enhance the visual impact and evoke particular emotions. This can involve adjusting the hue, saturation, and luminance of colors in different parts of the image to create a cohesive visual style. By selectively adjusting colors in the highlights, mid-tones, and shadows, photographers can shape the overall atmosphere of the image.
Experimenting with different color palettes and color combinations is crucial in mastering color grading.
Comparison of Color Correction Tools
Photoshop offers a suite of tools for color correction, each with its own strengths and weaknesses. The basic adjustments, like Hue/Saturation and Color Balance, provide quick and intuitive ways to adjust overall color tones. More advanced tools, like Curves and Selective Color, allow for precise and granular control over color adjustments. The choice of tool depends on the specific needs of the image and the desired outcome.
Selective Color Adjustments
Selective color adjustments allow for precise control over specific colors within an image. This technique is useful for fine-tuning colors like skin tones, foliage, or specific objects. It allows for targeted adjustments to specific colors, enhancing their vibrancy or reducing their intensity. Selective color adjustments are often used in conjunction with other color correction tools for achieving the desired aesthetic.
By isolating specific colors, photographers can improve their accuracy and precision in the color correction process.
Color Palettes and Psychological Impact
Different color palettes evoke distinct psychological responses in viewers. The use of color palettes can subtly influence emotions and create specific moods. A warm color palette (reds, oranges, yellows) can evoke feelings of warmth, energy, and excitement. Cool color palettes (blues, greens, purples) often create a sense of calmness, serenity, and peace. Understanding the psychological impact of color palettes is essential for choosing colors that enhance the intended message or emotion in the image.
| Color Palette | Psychological Impact |
|---|---|
| Warm (Reds, Oranges, Yellows) | Warmth, Energy, Excitement |
| Cool (Blues, Greens, Purples) | Calmness, Serenity, Peace |
| Neutral (Grays, Whites, Blacks) | Sophistication, Elegance, Neutrality |
Image Sharpening and Detail Enhancement
Image sharpening is a crucial step in post-processing, enhancing the perceived detail and sharpness of an image. Effective sharpening techniques are essential for both print and web applications, ensuring that images maintain their clarity and visual appeal across different mediums. This section delves into various methods for sharpening images without introducing unwanted artifacts, optimizing noise reduction, and understanding the impact of image resolution.
Sharpening Techniques
Sharpening techniques are vital for boosting the visual impact of images, especially when dealing with details. Several methods exist to achieve this without introducing undesirable artifacts.
- High-Pass Filtering: This method enhances edges by creating a high-frequency filter. It effectively isolates and amplifies the high-frequency information present in the image, thereby boosting the sharpness of details. High-pass filtering works by subtracting a blurred version of the image from the original, highlighting the details.
- Unsharp Masking: This technique is a popular and widely used sharpening method. It creates a blurred version of the image, subtracts it from the original, and then adds the result back to the original. This method amplifies the high-frequency components, increasing the image’s sharpness without overdoing it. The amount of sharpening can be controlled by adjusting the strength of the masking effect.
- Sharpening Filters: Photoshop offers various sharpening filters. These filters usually involve blurring the image and then subtracting the blurred version from the original to accentuate the edges. The strength and radius of the blur affect the outcome, and different filters may have different approaches, such as applying a Gaussian blur.
Noise Reduction
Noise reduction is important for maintaining image clarity and sharpness. It’s critical to strike a balance between removing noise and preserving image details.
- Noise Reduction Tools: Photoshop and other image editing software provide tools for reducing noise, such as the “Reduce Noise” filter. These tools analyze the image to identify and reduce noise pixels, while maintaining image details. The effectiveness of noise reduction depends on the type of noise present and the settings used. Too much reduction can lead to a loss of detail, whereas insufficient reduction leaves the noise prominent.
Looking for Photoshop tips to instantly elevate your edits? One crucial technique is mastering background removal, which significantly impacts image quality. Learning how to remove backgrounds effectively in Photoshop, like a pro, How to Remove Backgrounds in Photoshop Like a Pro , is a game-changer for enhancing your photos. This, in turn, will ultimately streamline your editing process and yield more impressive results in your Photoshop projects.
Comparison of Sharpening Filters
Different sharpening filters offer varying degrees of control and results.
| Filter | Description | Advantages | Disadvantages |
|---|---|---|---|
| Unsharp Mask | Subtracts a blurred version of the image from the original, amplifying edges. | Widely used, easy to control, and often provides good results. | Can introduce halos or artifacts if the settings are not carefully adjusted. |
| High-Pass Filter | Highlights high-frequency components, accentuating edges. | Often produces a more subtle and natural-looking sharpening effect. | Can be less intuitive to control than Unsharp Mask. |
| Smart Sharpen | A more sophisticated filter that attempts to minimize artifacts while sharpening. | Generally produces a good balance between sharpening and artifact reduction. | Might require some experimentation to find the optimal settings. |
Impact of Resolution
Image resolution plays a crucial role in sharpening effectiveness.
- High Resolution: Higher resolution images generally allow for more aggressive sharpening without introducing noticeable artifacts. This is because there is more data to work with, allowing for the amplification of fine details. This is especially important for high-resolution prints.
- Low Resolution: Lower resolution images have fewer pixels. Sharpening these images can lead to the amplification of noise, making artifacts more prominent. Care must be taken to avoid over-sharpening low-resolution images.
Workflow for Print and Web Optimization
Optimizing image detail for print and web requires a tailored approach.
- Print Optimization: For print, focus on maximizing detail and sharpness. Use high-resolution images and aggressive sharpening techniques, but carefully evaluate the results to prevent artifacts. Consider the specific print method, as this can influence the optimal level of sharpening.
- Web Optimization: For web use, prioritize image file size. Use appropriate compression techniques and consider downsampling the image. Apply less aggressive sharpening techniques to prevent the amplification of noise and maintain a balance between sharpness and file size.
Retouching and Manipulation
Mastering retouching and manipulation techniques in Photoshop elevates your editing to a professional level. These methods allow you to refine images, remove unwanted elements, and enhance the overall aesthetic. Learning these techniques will open doors to more creative possibilities and the ability to transform images into compelling visual narratives.
Cloning Tools for Imperfection Removal
Cloning tools in Photoshop are invaluable for seamlessly removing imperfections like blemishes, scars, or stray hairs. These tools essentially duplicate a portion of an image to cover the unwanted elements. The key to effective use lies in precise selection and blending to maintain the natural texture of the surrounding area. Careful attention to detail ensures the retouched area blends seamlessly, avoiding a noticeable “cloning” effect.
Healing Brush Tools for Realistic Retouching
Healing brush tools offer a more nuanced approach to retouching, allowing for a more natural result compared to cloning tools. These tools analyze the surrounding pixels and blend the selected area seamlessly. This subtle blending produces a realistic and undetectable retouch, maintaining the natural texture and tone of the image. They are particularly effective for correcting small imperfections, such as minor blemishes or scratches.
Removing Unwanted Objects
Removing unwanted objects from an image is a common editing task. The process involves selecting the object to be removed and then replacing it with the surrounding pixels. Precise selection tools are crucial for minimizing any distortion or artifacts. The “Content-Aware Fill” feature in Photoshop provides an automated solution to fill in areas, often with excellent results.
The manual approach, while potentially more time-consuming, gives you greater control over the final result.
Looking for Photoshop tips to quickly elevate your edits? Mastering layers is key. Check out Understanding Layers in Photoshop: A Simple Explanation for a straightforward guide. Once you grasp the fundamentals of layers, you’ll unlock a world of possibilities for enhancing your images, leading to truly impressive results.
Step-by-Step Guide for Removing Unwanted Objects
- Select the unwanted object using tools like the lasso, pen tool, or magic wand. Ensure the selection is accurate.
- Using the “Quick Selection” tool, refine the selection if necessary.
- Choose “Edit” > “Fill” to replace the selection. Consider “Content-Aware Fill” for automatic replacement.
- Adjust the fill if needed to achieve a natural blend.
- Assess the results and make further adjustments to ensure the object has been removed effectively.
Masking Techniques for Precise Selections
Masking provides a powerful tool for precise selections in Photoshop. It allows for non-destructive editing and is particularly useful for complex selections that would be difficult or time-consuming to achieve with other selection tools. Using masks enables editing layers without directly affecting the original image, ensuring a safe workflow.
| Masking Technique | Description |
|---|---|
| Layer Masks | Non-destructive masking, allowing edits to be reversed or adjusted. |
| Quick Mask Mode | Real-time masking preview for precise selection refinement. |
| Channel Masks | Utilizing color channels for unique selection criteria, particularly useful for intricate shapes. |
Ethical Considerations of Image Manipulation
Image manipulation, while powerful, raises ethical concerns. The potential for deception and misrepresentation requires careful consideration. Modifying images to alter reality necessitates careful consideration of the impact on viewers. Ethical practices dictate that alterations should be disclosed when appropriate. Maintaining transparency and honesty is paramount in professional image editing.
Composition and Layout Enhancements

Mastering composition is key to creating visually engaging images. A well-composed image draws the viewer’s eye naturally and holds their attention longer, enhancing the overall impact. Understanding and applying composition rules and techniques significantly elevates the aesthetic appeal and storytelling potential of your photographs.Applying these techniques can instantly transform a good image into a truly captivating one, improving visual appeal and communication.
Clever arrangement of elements within an image not only enhances aesthetics but also guides the viewer’s interpretation, making the message more effective.
Composition Rules for Improved Image Appeal
Composition rules are fundamental principles that guide the arrangement of elements within an image to create visual harmony and impact. These rules, while not rigid guidelines, provide a framework for creating compelling and aesthetically pleasing images.
- The Rule of Thirds: Dividing the image into a grid of nine equal parts, placing key elements along these lines or at their intersections creates a more dynamic and engaging composition than simply centering the subject.
- Leading Lines: Using lines within the scene to draw the viewer’s eye towards a specific point of interest enhances the visual narrative and creates a sense of depth.
- Symmetry and Patterns: Employing symmetrical compositions or repeating patterns can create a sense of order, balance, and visual interest.
- Negative Space: Strategically using empty space around the subject can help highlight the subject and prevent visual clutter.
- Framing: Using natural elements like arches, doorways, or branches to frame the subject draws attention to it and adds depth to the image.
Techniques for Using Leading Lines
Leading lines are powerful tools in photography, guiding the viewer’s gaze through the image and towards a focal point. Using them effectively can create a sense of depth and direction, enhancing the overall visual impact.
- Directional Lines: Straight lines, whether roads, fences, or architectural elements, naturally guide the eye along their path. This technique works best when the line extends into the image and leads to the main subject.
- Converging Lines: Parallel lines that converge in the distance create a sense of depth and perspective. Examples include railroad tracks or a road disappearing into the horizon.
- Diagonal Lines: Diagonal lines add dynamism and energy to an image. They can lead the viewer’s eye across the scene and towards a focal point, adding a sense of motion or drama.
Arranging Elements for Visual Harmony
A well-arranged image is more than just a collection of elements; it’s a carefully orchestrated composition that creates a sense of visual harmony.
| Element | Placement | Effect |
|---|---|---|
| Subject | Off-center, along the rule of thirds lines or intersections | Creates visual interest and prevents monotony |
| Background | Supporting the subject, not overwhelming it | Provides context and depth |
| Foreground | Adding layers of interest | Enhances depth and draws the eye into the image |
Using Framing Techniques
Framing techniques are powerful tools for enhancing focus and directing the viewer’s attention to the main subject. Employing natural or man-made frames around the subject adds depth and context to the image.
- Natural Framing: Using natural elements like trees, arches, doorways, or branches to frame the subject adds depth and draws attention to the focal point.
- Man-made Framing: Employing architectural elements, such as doorways or windows, to frame the subject adds a sense of structure and control.
- Layered Framing: Combining multiple framing elements creates a more complex and layered composition, adding depth and visual interest.
Importance of Negative Space
Negative space, or the empty space around the subject, is often underestimated but plays a crucial role in creating visually appealing compositions. Effective use of negative space can help highlight the subject and prevent visual clutter, creating a more balanced and aesthetically pleasing image.
Working with Smart Objects
Smart Objects are a powerful feature in Photoshop that allows for non-destructive editing of images. This means that any changes made to a Smart Object are applied to a linked file, not to the original image itself. This preserves the original image’s quality and allows for easy adjustments and revisions without the risk of losing the original file’s integrity.
This is particularly useful when working with complex edits or when you anticipate needing to make further adjustments later.
Using Smart Objects for Non-Destructive Editing
Smart Objects enable non-destructive editing by creating a linked copy of the image. Any adjustments made to the Smart Object affect only the linked copy, leaving the original file unchanged. This is crucial for preserving the original image’s quality and allowing for revisions without compromising the original. This approach is significantly more flexible than traditional layers, as changes can be reverted or adjusted without affecting the source file.
Creating and Editing Smart Objects
Creating a Smart Object involves placing an image into a smart object layer. This can be done by dragging an image file into Photoshop, or by converting an existing layer to a Smart Object. The process is straightforward. First, select the layer you want to convert. Then, right-click on the layer and select “Convert to Smart Object.” This action creates a linked copy of the image, ensuring that any edits are applied to the linked copy rather than the original.
Editing a Smart Object is similar to editing a regular layer. You can apply adjustments, filters, and other effects. The critical difference is that these edits are applied to the linked copy, not the original file.
Using Smart Filters
Smart Filters are filters applied to Smart Objects. They function similarly to standard filters, but they are applied to a linked copy, not directly to the pixel data of the original image. This allows for more flexibility in editing. When adjusting Smart Filters, you can see the effect on the linked copy immediately, allowing you to make precise adjustments without losing the original quality.
Furthermore, Smart Filters can be easily adjusted, deleted, or reapplied without affecting the original image or other linked layers.
Benefits of Smart Objects over Standard Layers
Smart Objects offer several advantages over standard layers. Firstly, they maintain the original image quality by preserving the original file. This is particularly important when working with high-resolution images or complex editing. Secondly, Smart Objects allow for non-destructive editing, enabling easy adjustments and revisions without compromising the original image. This is particularly beneficial when making multiple edits or when the final outcome isn’t yet clear.
Finally, Smart Objects allow for the application of Smart Filters, providing greater flexibility in editing and enhancing image quality.
Common Uses of Smart Objects
| Use Case | Description |
|---|---|
| Image Adjustments | Smart Objects allow for easy adjustments to image brightness, contrast, and color without affecting the original image. |
| Complex Edits | Complex edits, such as retouching, color correction, or image manipulation, can be performed on Smart Objects without compromising the original file. |
| Filter Applications | Smart Filters can be applied and adjusted to Smart Objects, offering greater flexibility and non-destructive control over the image’s appearance. |
| High-Resolution Images | Working with high-resolution images is significantly easier with Smart Objects, as edits do not affect the original image’s quality. |
| Multiple Revisions | Smart Objects are ideal for projects requiring multiple revisions, as changes can be easily applied and reverted without affecting the original image. |
Using Actions and Presets
Mastering Photoshop’s actions and presets significantly streamlines your workflow. These tools automate repetitive tasks, saving valuable time and ensuring consistency in your edits. They allow for the quick application of styles and effects, enhancing your overall productivity.Creating custom actions allows you to record a series of steps and then replay them with a single click. This is particularly useful for batch processing, applying consistent adjustments, and maintaining a uniform aesthetic across multiple images.
Presets are pre-configured settings that instantly apply specific styles or effects. Both actions and presets empower you to significantly improve your editing efficiency and creative freedom.
Creating Custom Photoshop Actions
Creating custom actions in Photoshop is a powerful way to automate repetitive tasks. Recording a sequence of steps allows you to reproduce them easily and consistently across numerous images. This involves recording each step in your editing process, from adjustments to filters, and then saving this sequence as an action. Once saved, you can run the action on any image by selecting it from the Actions panel.
Using Presets for Quick Effects
Presets offer pre-configured settings that quickly apply styles or effects to your images. They are essentially saved combinations of adjustments, filters, and other effects that can be applied to your image with a single click. Presets are often organized into categories, making it easier to find the desired style. Using presets significantly speeds up your editing process and allows you to experiment with different styles without extensive manual adjustments.
Common Photoshop Actions and Their Applications
This list details five common Photoshop actions and their respective uses:
- Batch resizing: This action automatically resizes a group of images to specific dimensions. Useful for web design, where images need to conform to particular size requirements. This action saves time compared to resizing each image manually.
- Basic adjustments: An action that applies a series of adjustments, like contrast, brightness, and saturation, to enhance the overall look of an image. This is ideal for maintaining a consistent look across multiple photos.
- Photo sharpening: This action sharpens images, enhancing details and clarity. Useful for print projects or for improving the appearance of images that have lost some sharpness. This action is very useful for maintaining image quality during different editing processes.
- Adding artistic effects: An action that applies artistic effects like embossing, texture, or other visual enhancements. This is a valuable tool for adding creative flair and unique styles to your images.
- Background removal: An action that automatically removes a background from an image, isolating the subject. This is essential for graphic design, logos, or when you need to change the background of an image.
Organizing Actions and Presets
Organizing your actions and presets is crucial for easy access and efficiency. Using folders and subfolders within the Actions panel is a convenient method. This logical organization helps locate specific actions or presets quickly, avoiding unnecessary searching. Descriptive names for actions and presets also enhance their organization and searchability.
Recommended Actions and Presets for Various Editing Styles
The table below presents recommended actions and presets for different editing styles.
| Editing Style | Recommended Actions | Recommended Presets |
|---|---|---|
| Portrait Retouching | Skin smoothing, blemish removal, eye enhancement | Soft focus, natural glow, vibrant skin |
| Landscape Enhancement | Color grading, clarity enhancement, detail sharpening | Dramatic skies, vivid landscapes, cool tones |
| Product Photography | Background removal, color correction, product enhancement | Professional product, studio lighting, neutral tones |
Advanced Techniques (Advanced Masking)
Mastering advanced masking techniques unlocks a new level of precision and control in Photoshop, enabling you to create intricate selections and manipulate images with unparalleled finesse. These techniques are crucial for complex edits, particularly when dealing with intricate shapes, fine details, and realistic composites. Understanding different masking modes and refining mask edges are paramount to achieving professional-quality results.Advanced masking techniques provide unparalleled control over complex selections, allowing for precise isolation and manipulation of image elements.
By utilizing advanced masking techniques, you can create highly realistic composites, enhancing your image editing capabilities significantly. Understanding and applying these techniques will greatly improve your image manipulation skills, enabling you to achieve a level of detail and precision previously unattainable.
Different Masking Modes, Photoshop Tips That Will Instantly Improve Your Edits
Understanding the nuances of different masking modes is essential for achieving the desired outcome in advanced masking. Each mode offers a unique approach to controlling the mask’s impact on the underlying layer.
- Normal Mode: This is the default mode, blending the mask’s effect directly with the layer’s pixels. It’s suitable for most masking scenarios, providing a straightforward approach to defining the selection.
- Multiply Mode: This mode darkens the layer’s pixels based on the mask’s opacity. It’s effective for creating subtle tonal adjustments and darkening areas within the selection.
- Screen Mode: This mode lightens the layer’s pixels based on the mask’s opacity. It’s beneficial for highlighting areas and adding highlights to a selection.
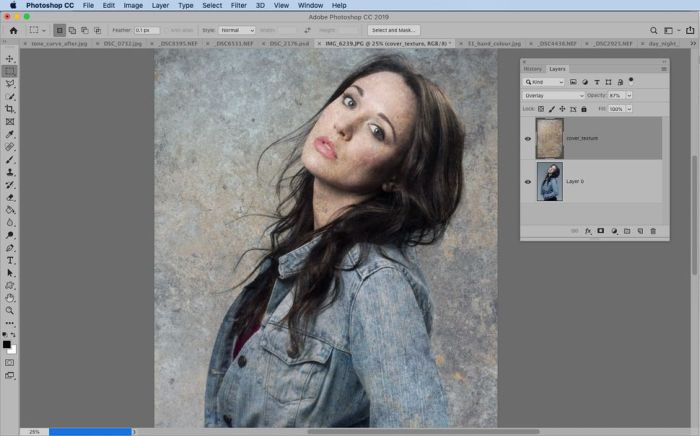
- Overlay Mode: This mode combines the effects of both Multiply and Screen modes, resulting in a more complex interaction with the layer’s pixels. It’s valuable for achieving a variety of tonal adjustments, from darkening to lightening.
Creating Realistic Composites
Using masking techniques to create realistic composites involves a multifaceted approach. The key is to carefully blend and integrate the selected elements seamlessly into the background image.
- Background Preparation: The background image should be well-lit and have a texture that aligns with the composite elements. This will enhance the believability of the composite.
- Precise Selection: Advanced masking techniques, such as using the pen tool, refine the selection’s edge to ensure a smooth integration.
- Blending Options: Adjusting the blending modes of the masked layers can further enhance the realistic effect. This will help integrate the elements seamlessly.
Layer Masks for Non-Destructive Edits
Layer masks provide a non-destructive method for editing images. This approach is invaluable for preserving the original image data while making adjustments.
- Flexibility: Layer masks enable adjustments to be easily reversed or modified without affecting the original image. This is a major advantage in the editing process.
- Non-destructive Editing: This method allows for multiple iterations of edits, ensuring you don’t lose your original image data.
- Precision Control: Layer masks provide precise control over the areas of the image that are affected by adjustments.
Refining Mask Edges
Refining mask edges is a critical step in creating smooth and natural transitions between the selected and non-selected areas. Using advanced techniques enhances the overall quality of the composite.
- Feathering: Feathering softens the mask’s edge, reducing the harshness of the transition. This is crucial for creating a smooth blend between selected and non-selected areas.
- Using the Refine Edge Tool: This tool allows for precise adjustments to mask edges, offering control over the mask’s sharpness and feathering. This is vital for achieving a professional result.
- Using the Mask Refinement Options: The Refine Edge Tool provides advanced options for refining the mask edge, including options for smoothing, feathering, and controlling the sharpness of the mask. This is essential for creating complex selections.
Specific Photo Types
Mastering the nuances of different photo types is crucial for producing professional-quality results. Understanding the specific needs of portraits, landscapes, product shots, and architecture allows you to tailor your editing approach for optimal visual impact. This section dives into specific techniques for achieving stunning results in various genres.
Portrait Editing for Professional Results
Effective portrait editing focuses on capturing the subject’s best features while maintaining a natural and flattering aesthetic. Key techniques include precise skin retouching to smooth imperfections without sacrificing realism, careful adjustment of eye color and brightness for a captivating gaze, and subtle enhancement of facial structure to complement the subject’s features. Lighting adjustments are critical for recreating the ambiance of the original shot and creating a harmonious image.
Landscape Enhancement for a Stunning Effect
Enhancing landscapes involves bringing out the depth, vibrancy, and textures inherent in the scene. Highlighting the details of the foreground and background, while preserving the overall harmony of the image, is essential. Techniques include selective adjustments to contrast and saturation, creating a greater sense of atmosphere with atmospheric perspective, and fine-tuning color palettes to evoke specific moods. Careful use of sharpening tools can bring out the subtle textures of the scene without overdoing it.
Product Image Editing for Online Sales
Product image editing is crucial for online sales as it directly influences consumer perception and purchase decisions. Key aspects include ensuring the product is clearly visible, maintaining consistency in color and lighting across all images, and removing distractions or imperfections. Using selective editing tools to highlight key features and presenting the product in a visually appealing way are essential.
Adding subtle details, like soft shadows or reflections, can further enhance the visual appeal.
Architectural Photography Edits
Editing architectural photography emphasizes capturing the intricate details and structural elements of the building or scene. Highlighting lines, textures, and perspectives is crucial to effectively convey the architectural style. Techniques involve precise color correction to maintain the authenticity of the building’s materials, careful use of contrast to enhance the visual impact, and adjustments to create depth and dimension.
Removing unwanted elements like power lines or distracting objects is essential for a clean, professional image.
Comparison of Editing Techniques for Diverse Photo Types
| Photo Type | Key Editing Techniques | Specific Considerations |
|---|---|---|
| Portraits | Skin retouching, eye enhancement, facial structure adjustments, lighting adjustments | Natural look, flattering aesthetic, capturing subject’s best features |
| Landscapes | Selective adjustments to contrast and saturation, atmospheric perspective, color palette adjustment, sharpening | Depth, vibrancy, textures, overall harmony |
| Product Images | Highlighting key features, consistent color and lighting, removing distractions, visual appeal | Clear visibility, online sales impact, product presentation |
| Architectural | Color correction, contrast adjustments, depth and dimension enhancement, removing unwanted elements | Authenticity, structural elements, lines, textures |
Troubleshooting Common Issues: Photoshop Tips That Will Instantly Improve Your Edits

Mastering Photoshop involves not only knowing its features but also understanding how to address common problems. Knowing how to troubleshoot errors, recover lost data, and optimize performance significantly improves workflow efficiency. This section details effective strategies for handling various Photoshop challenges.
Common Photoshop Errors and Solutions
Troubleshooting Photoshop errors often involves systematically identifying the source of the problem. A methodical approach, focusing on error messages, recent actions, and system configurations, is key to finding effective solutions.
- File Not Found Errors: Verify the file path and ensure the file hasn’t been moved or renamed. Double-check file permissions if necessary.
- Plugin Errors: Incompatible plugins can cause unexpected behavior. Uninstall or update problematic plugins. Check the plugin’s documentation for compatibility issues.
- Memory Issues: Photoshop requires ample RAM. Close unnecessary applications, and consider increasing the RAM allocation to Photoshop if possible.
- Brush Problems: If brushes aren’t applying correctly, check for inconsistencies in brush settings, ensure the brush is selected, and that the brush pressure settings match the expected outcome.
Recovering Deleted or Corrupted Images
Accidents happen, and deleted or corrupted images can be devastating. Fortunately, recovery options often exist.
- Deleted Images: If images are deleted from the hard drive, consider using recovery software. These tools can often retrieve files that have been deleted, but recovery success depends on the circumstances. Note that recovery may not be 100% successful, and the older the file, the more difficult it is to recover.
- Corrupted Images: Photoshop’s auto-save features can help prevent loss. Corrupted images can often be repaired using image editing software or online tools designed for image repair. The effectiveness of these methods depends on the severity of the corruption. Avoid further manipulation of a corrupted file if possible, as this can exacerbate the damage.
Troubleshooting Photoshop Performance Issues
Photoshop’s performance can be affected by several factors. Understanding these factors can lead to optimized workflow.
- Slow Loading Times: Check if Photoshop is using excessive system resources. Close unnecessary programs and applications. Consider updating your graphics card drivers or installing appropriate system updates. Over time, Photoshop’s cache can become bloated. Deleting the cache folder can improve performance, but always back up important settings first.
- Lagging Actions: If specific tools or actions are slow, check for conflicts with plugins or extensions. Consider deactivating plugins to isolate the issue.
Fixing Image Distortions
Distorted images can be a result of various factors. Correcting distortions depends on the type of distortion.
- Perspective Issues: Perspective distortion often arises from improper camera angles. Photoshop’s perspective correction tools can often address this. If using a scan, carefully adjust the scan settings to minimize perspective issues during the initial capture.
- Geometric Distortions: Geometric distortions often occur during the capture process, and are often seen in photographs. Photoshop offers tools to correct geometric distortions such as barrel distortion or pincushion distortion.
Table of Common Issues and Solutions
| Issue | Solution |
|---|---|
| File Not Found | Verify file path, check for renaming or moving. |
| Plugin Errors | Uninstall or update problematic plugins. |
| Memory Issues | Close unnecessary applications, increase RAM allocation. |
| Deleted Images | Use image recovery software. |
| Corrupted Images | Use image repair tools, avoid further manipulation. |
| Slow Loading Times | Close unnecessary programs, update drivers, clear cache. |
| Lagging Actions | Deactivate plugins, check for conflicts. |
| Perspective Issues | Use Photoshop’s perspective correction tools. |
| Geometric Distortions | Use Photoshop’s geometric correction tools. |
Tips for Speed and Efficiency
Mastering Photoshop’s tools and features is key to efficient editing. Learning shortcuts, optimizing your workspace, and leveraging Photoshop’s built-in tools significantly reduce editing time and improve productivity. This section details these techniques, providing practical tips for enhancing your workflow.
Keyboard Shortcuts
Efficient use of keyboard shortcuts is fundamental to rapid editing. They allow for precise actions without constantly switching between the mouse and keyboard. Remembering key combinations for frequently used functions significantly streamlines the editing process.
- Using the keyboard for navigation and selection tools, such as the arrow keys for moving the selection or Ctrl+T (or Cmd+T on Mac) for free transform, drastically reduces mouse usage. This minimizes wasted time and increases speed.
- Command-line tools such as the move tool, the crop tool, and the lasso tool can be easily accessed with keyboard shortcuts. These shortcuts allow for precise and quick selection and manipulation of images.
- Utilizing shortcuts for frequently used actions, such as copying and pasting, or saving, saves considerable time and effort.
Panel and Tool Management
Optimizing your panel layout and tool arrangement is crucial for streamlining your workflow. A well-organized workspace reduces the time spent searching for specific tools or panels.
- Customizing the arrangement of panels to match your personal workflow is essential. Consider arranging frequently used panels within easy reach. This reduces the need to constantly hunt for the desired panel.
- Tool palettes can be customized by dragging and dropping tools to create a personalized tool bar. By having your most used tools readily available, your workflow becomes more efficient.
- The use of panels and tools can be optimized by creating a workspace tailored to individual preferences. This ensures that the most commonly used panels and tools are always within easy reach.
Workspace Optimization
A well-organized workspace minimizes distractions and maximizes productivity.
- Arranging panels in a logical and intuitive manner, keeping frequently used tools within easy reach, helps minimize wasted time searching through the interface.
- Utilizing the workspace’s different views, such as the “Arrange” command, can be helpful in achieving a desired layout, thus increasing workflow efficiency.
- Ensuring your workspace is uncluttered with unnecessary panels and windows is essential. This prevents distractions and facilitates a more focused workflow.
History Panel
The History panel is a valuable tool for undoing and redoing actions. Understanding its functionality can help avoid losing valuable work.
- Using the History panel allows users to easily revert to previous states of an image, minimizing the risk of irreversible mistakes. It provides a complete record of editing actions.
- The History panel’s undo and redo functions are useful for correcting errors, saving time and effort, especially when multiple edits are made in succession.
- Employing the History panel as a backup mechanism for your work allows you to easily retrieve previous versions of your image if needed.
Essential Keyboard Shortcuts
The following table Artikels essential keyboard shortcuts for Photoshop, categorized for ease of reference.
| Category | Shortcut | Action |
|---|---|---|
| Navigation | Arrow Keys | Move selection |
| Selection | Ctrl+A (Cmd+A on Mac) | Select All |
| Transform | Ctrl+T (Cmd+T on Mac) | Free Transform |
| Editing | Ctrl+Z (Cmd+Z on Mac) | Undo |
| Editing | Ctrl+Shift+Z (Cmd+Shift+Z on Mac) | Redo |
| File | Ctrl+S (Cmd+S on Mac) | Save |
End of Discussion
In conclusion, this comprehensive guide provides a practical roadmap for optimizing your Photoshop workflow. By mastering the techniques discussed, you’ll gain a significant advantage in enhancing your images. Whether you’re a beginner or an experienced editor, this guide offers invaluable insights for achieving professional-quality results and boosting your overall productivity.
Quick FAQs
What are some common Photoshop errors?
Common Photoshop errors include file corruption, accidental deletion of layers, and compatibility issues with plugins. Knowing how to recover from these mistakes can save you significant time and frustration.
How can I troubleshoot performance issues in Photoshop?
Performance issues can stem from several factors, including insufficient RAM, a slow hard drive, or too many open files. Closing unnecessary applications and ensuring adequate system resources can often resolve these problems.
What are some essential keyboard shortcuts for faster editing?
Mastering keyboard shortcuts is crucial for boosting efficiency. Knowing shortcuts for common actions like cropping, resizing, and selecting tools will significantly speed up your workflow.
How do I choose the right image format for my needs?
Selecting the correct image format (JPEG, PNG, TIFF) depends on your specific needs. JPEG is suitable for web use, PNG for graphics with transparency, and TIFF for high-quality prints. Understanding these differences is essential for optimizing your image files.


